Welcome to the second–and final–part of our analysis of Famitsu’s third article on Three Houses. Just in case, be sure to check out the first part, as it contains a lot of new story and gameplay details.
If you’re wondering why the analysis is split into two parts, well, there’s simply so much information that it takes several hours for me to digest everything and format it on a page for your viewing pleasure. This way, you don’t have to wait as long to get some of the information.
Anyway, continuing from where we left off..
Weekend Activities to Boost Your Power
Here, we’ll talk about the various activities you can participate in during weekends. It’s your choice if you want to spend your time leisurely, train yourself rigidly, etc.
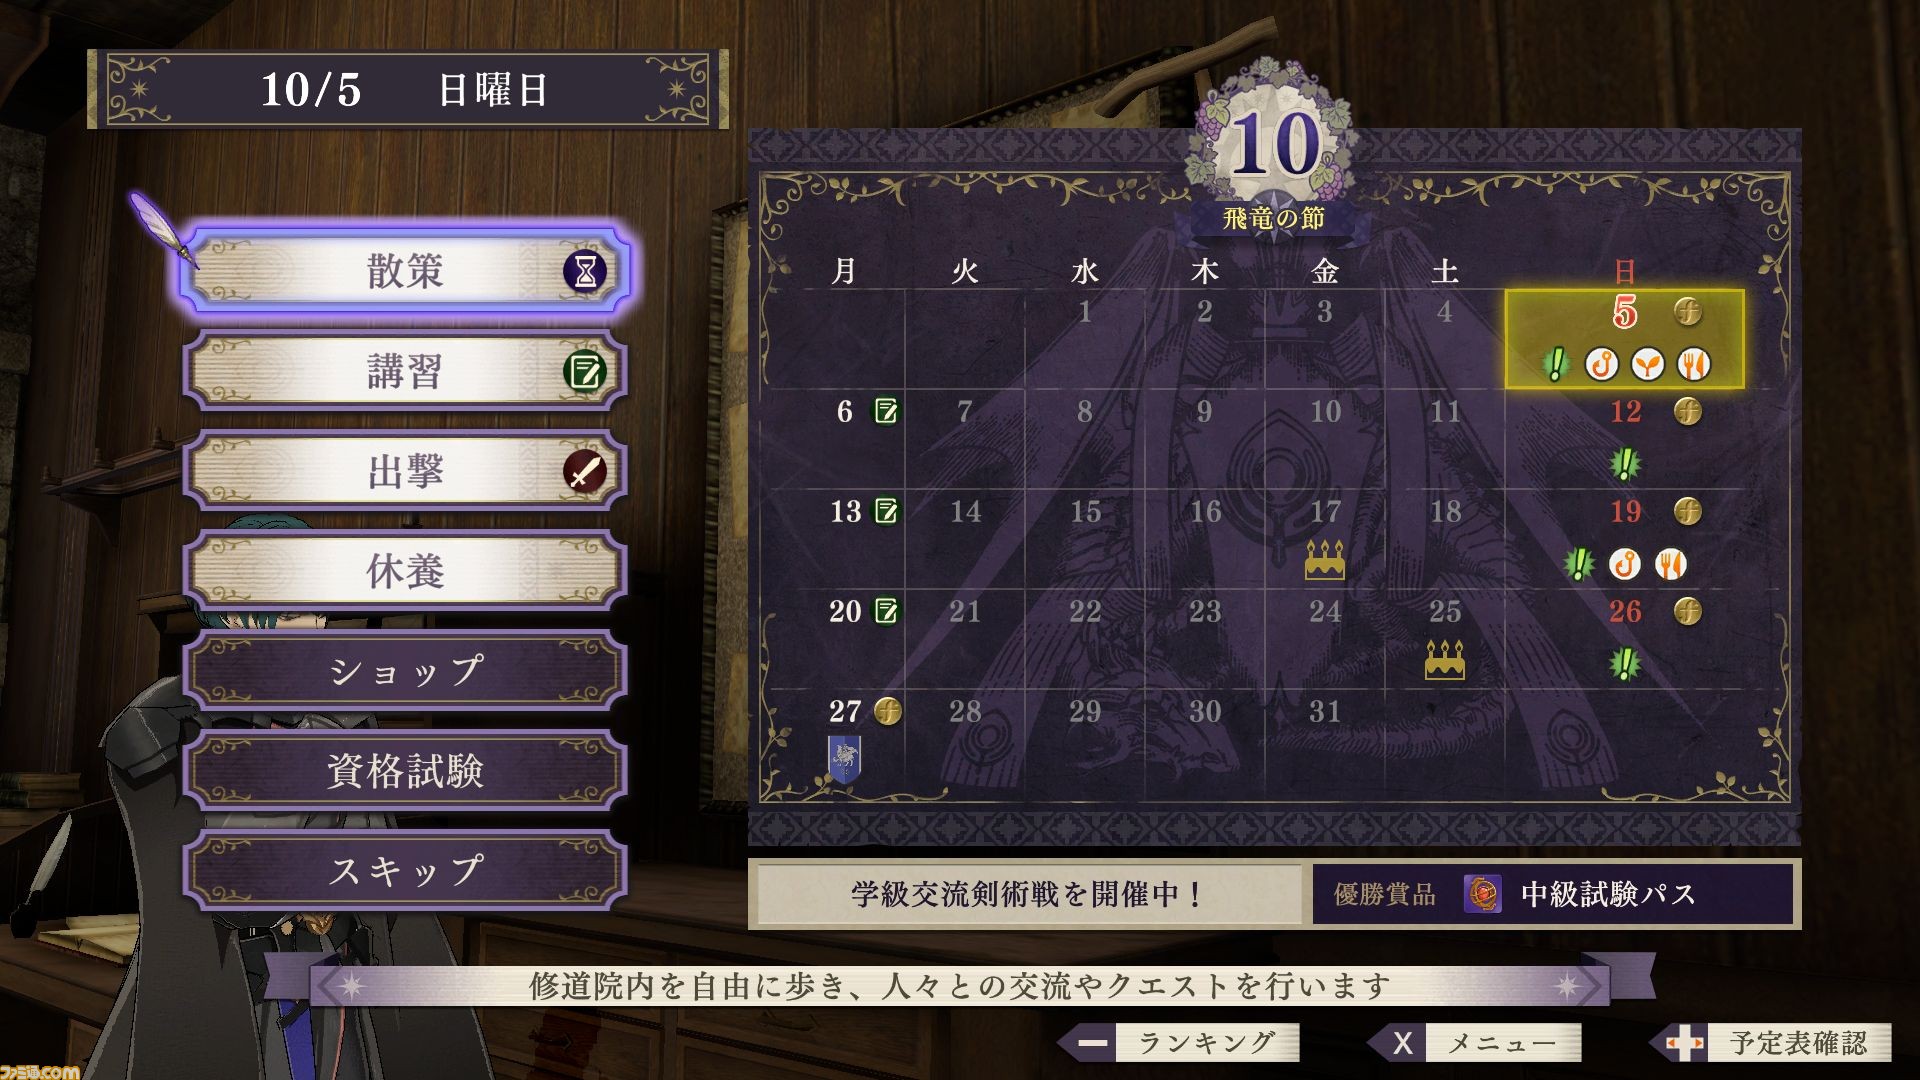
The above screenshot shows the calendar for the 10th month, the Wyvern Season. Other seasons include the Great Tree Season during the 4th month (which appears to be the month you enter the academy), the Flower Crown Season in the 6th month and the Falling Rain Season (literally “rain falling on leaves”) for the 8th month.
We already saw the calendar in the 2nd Famitsu article. Like before, there are icons for birthdays (two this month, but it seems birthdays during weekends aren’t marked), sub-activities (the fishing hook, plant, dining icons etc.) and a house icon (this time, Blue Lions) at the end of the calendar.
For those unaware or to refresh your memory, players will progress through the calendar, teaching during the weekdays and spending free time in the weekend. For more info about teaching, please check the 2nd Famitsu article. At the end of each month, there’s a Field Study task that you must complete to finish the month. Then the next chapter/act starts.
New for this month are a series of blue exclamation marks during all four weekend. I believe these indicate sidequests or paralogues. More on those later. Also, for those wondering, I don’t think you go through every single day in the calendar, but only the ones where there are important icons.
Here are four of the options available from the calendar screen:
Shop: Access the market where you can stock up on weapons and supplies or sell things. We saw the shop menu before, in the first Famitsu article (search for “shop”).
Skip: Skip to any day of your liking, as well as any activity during that particular day.

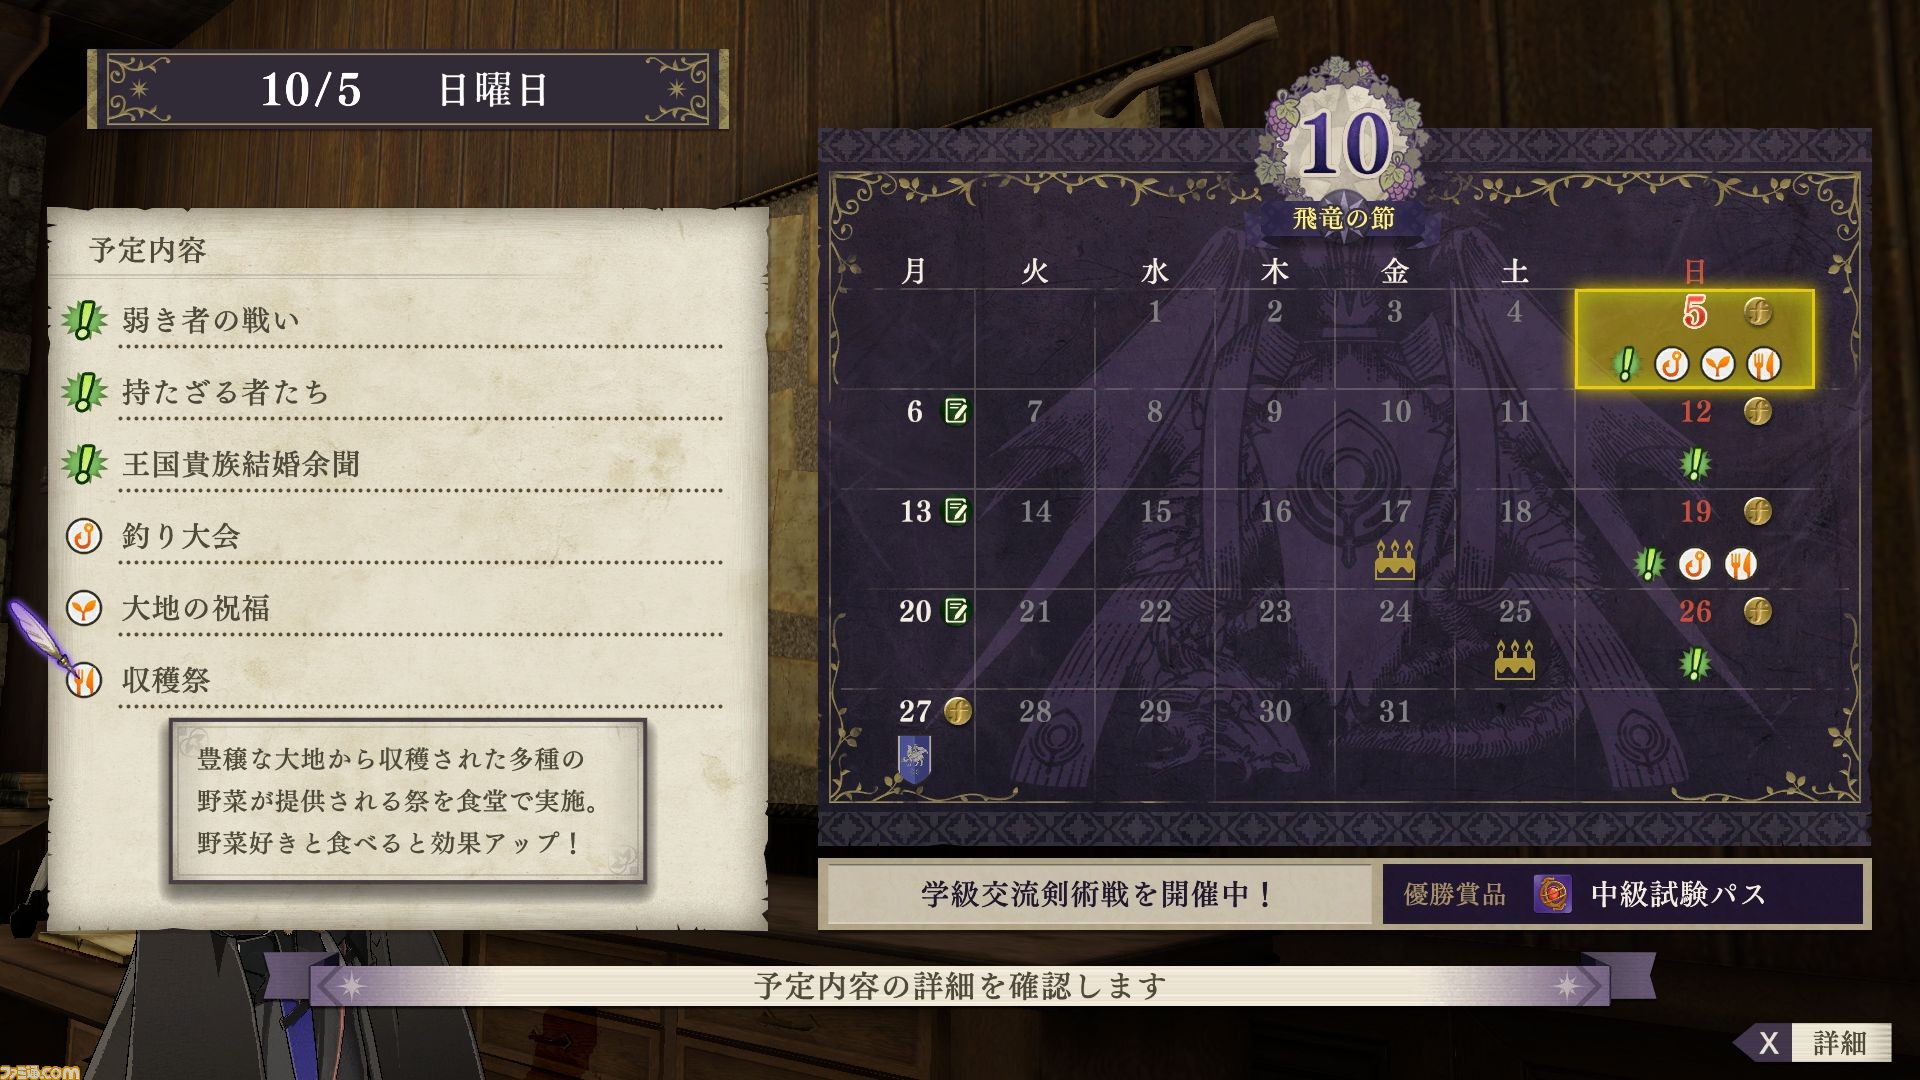
The above screenshots show the Skip function. Here, the player chooses Sunday the 5th and the Harvest Festival sub-activity. The other activities in order are: Battle of the Weak, Have-Nots, Kingdom Nobles’ Marriage (all sidequests/paralogues), Fishing Contest and Earth’s Blessing.
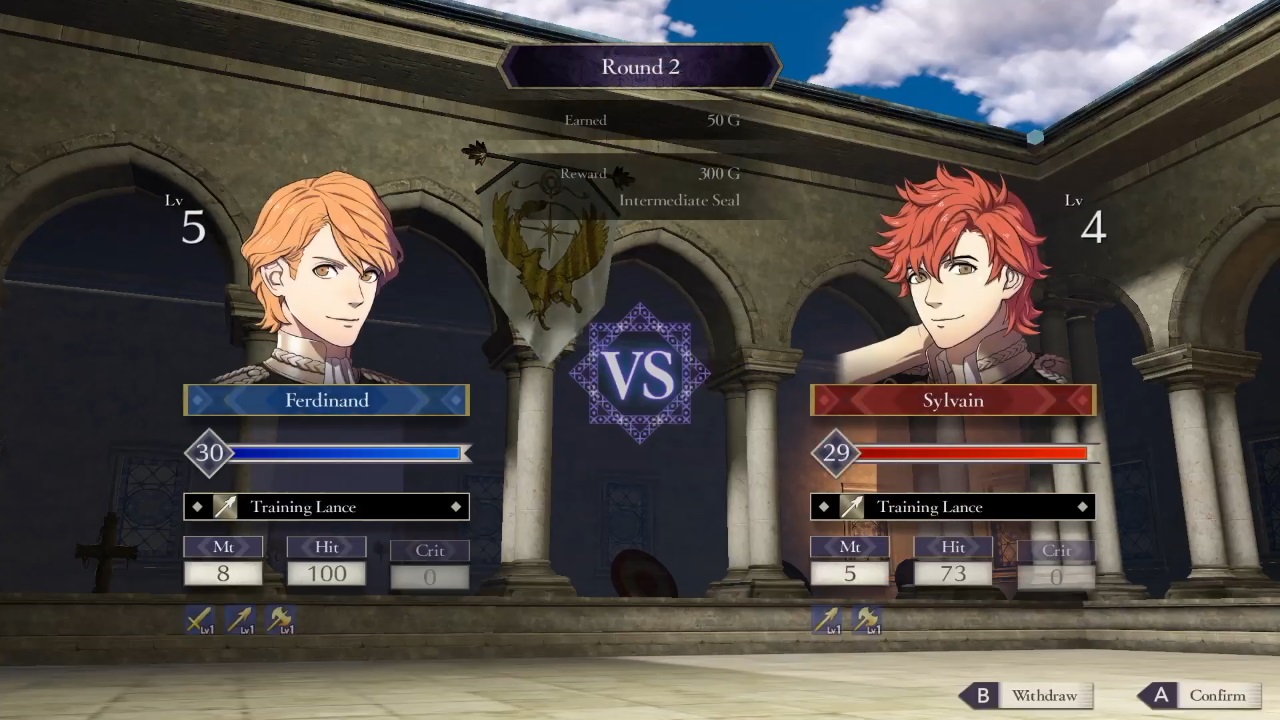
Near the bottom of the calendar, there’s a comment about a swordfighting competition being held at the academy. The reward is an Intermediate Pass, used to take an exam to Class-Change to an intermediate class. This may be what this screenshot from the February trailer was about.
Anyway, this feature seems useful for people who want to blast ahead or focus on certain activities only. I’m assuming you can only skip forward in time, but hey, you kind of have time-travel powers, so it might not be impossible for you to skip backwards. But it would probably cause a paradox or two…
Stroll
You can freely walk around the Garreg-Mach Monastery where the Officer’s Academy is. There are facilities that can be used by spending the protagonist’s Stroll Gauge. As the story progresses, more places will open up. Here, you can socialise with students and other people from the monastery, to build up strength for upcoming battles.
Converse
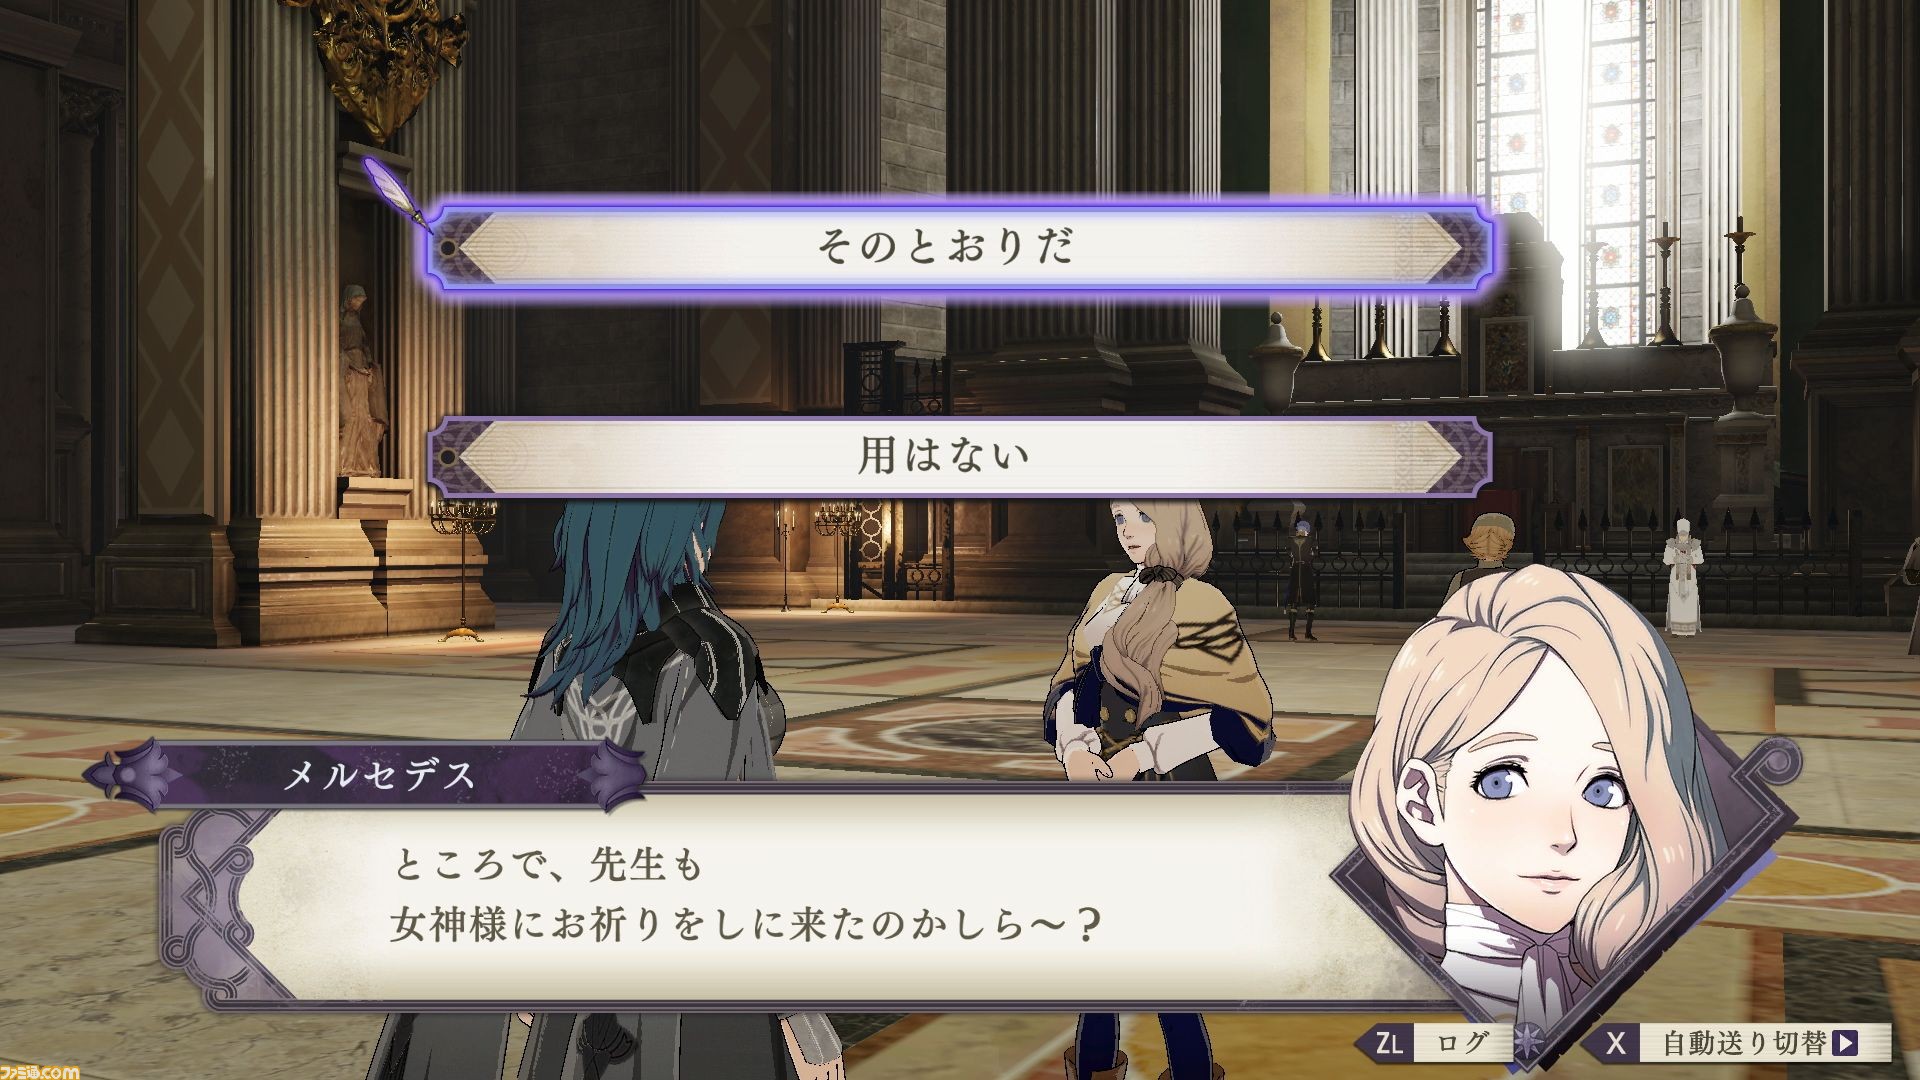

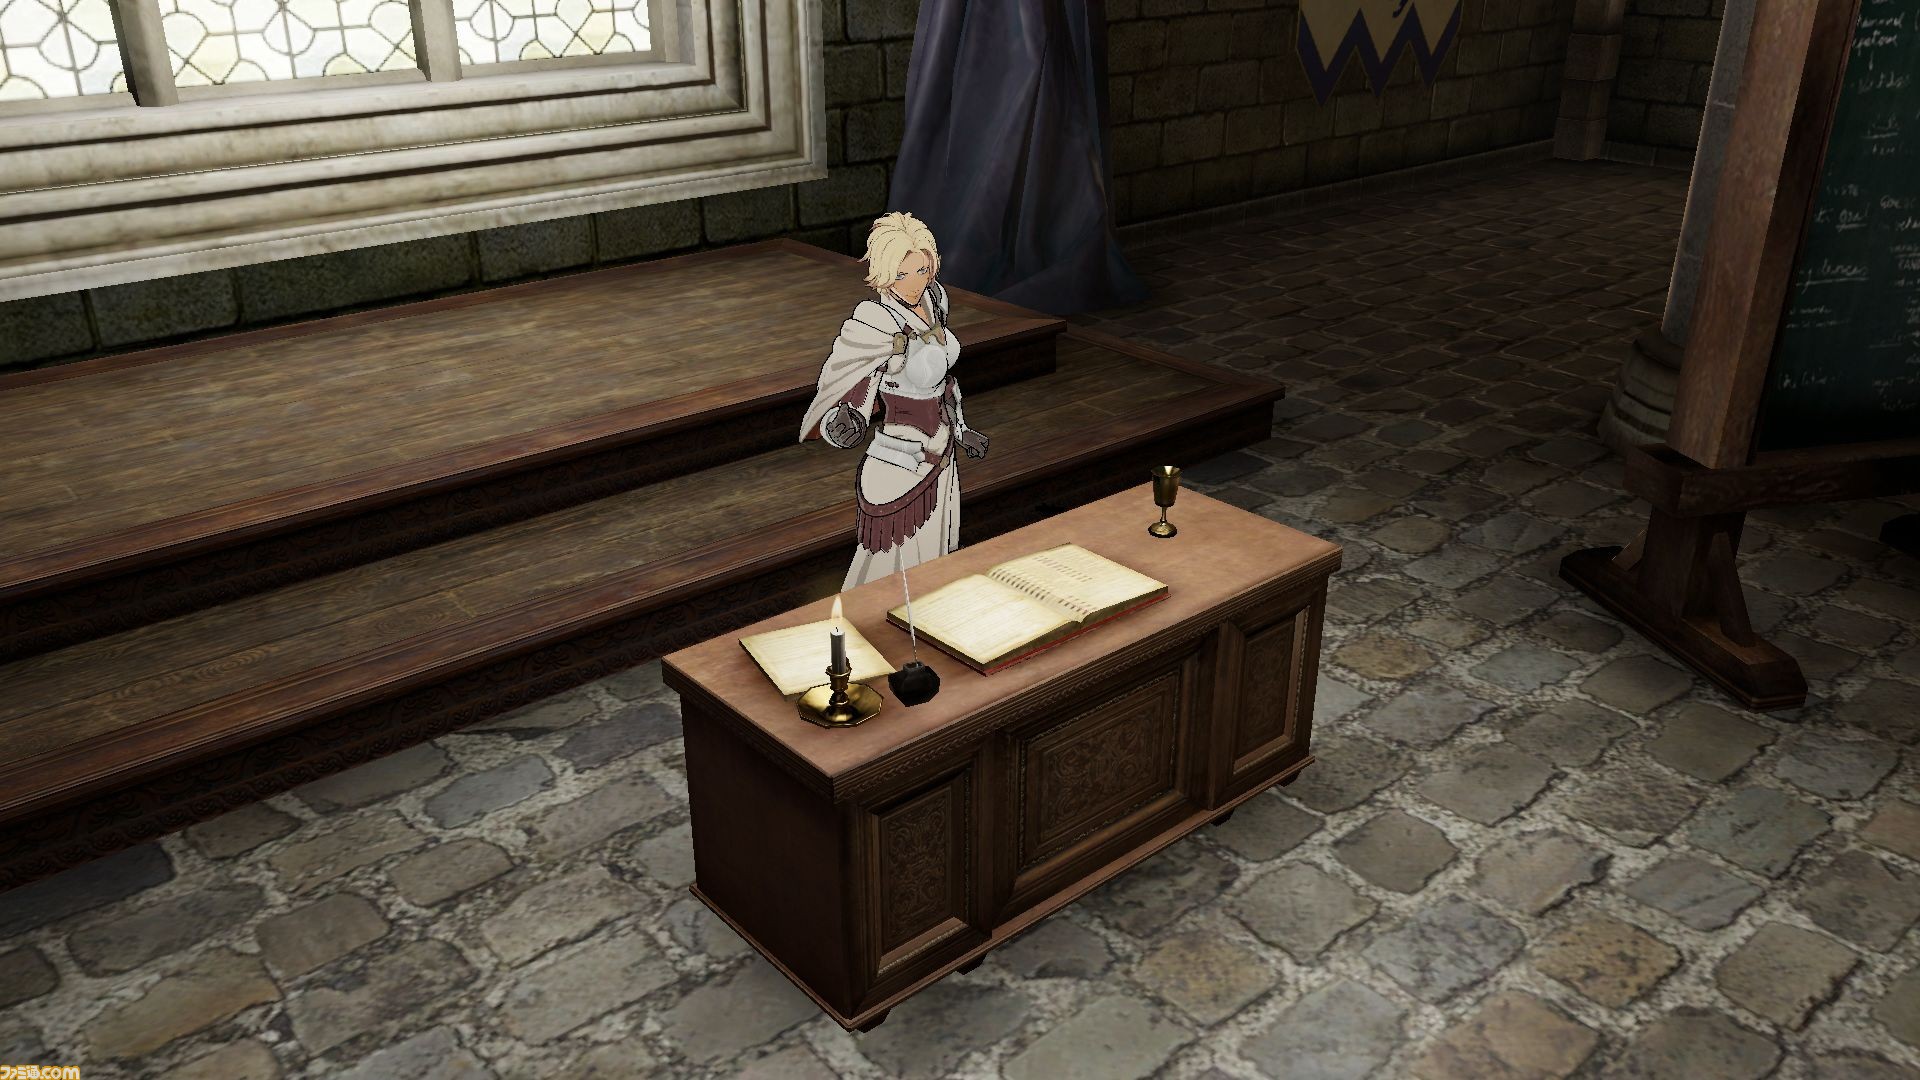
Gasp, you can talk to people in the monastery! You can enjoy conversations with people in the monastery, including teachers and students from other houses who are self-studying during the weekend. Above, Mercedes is asking if you pray to the Goddess. Reply “yes” and she’ll invite you to pray together.

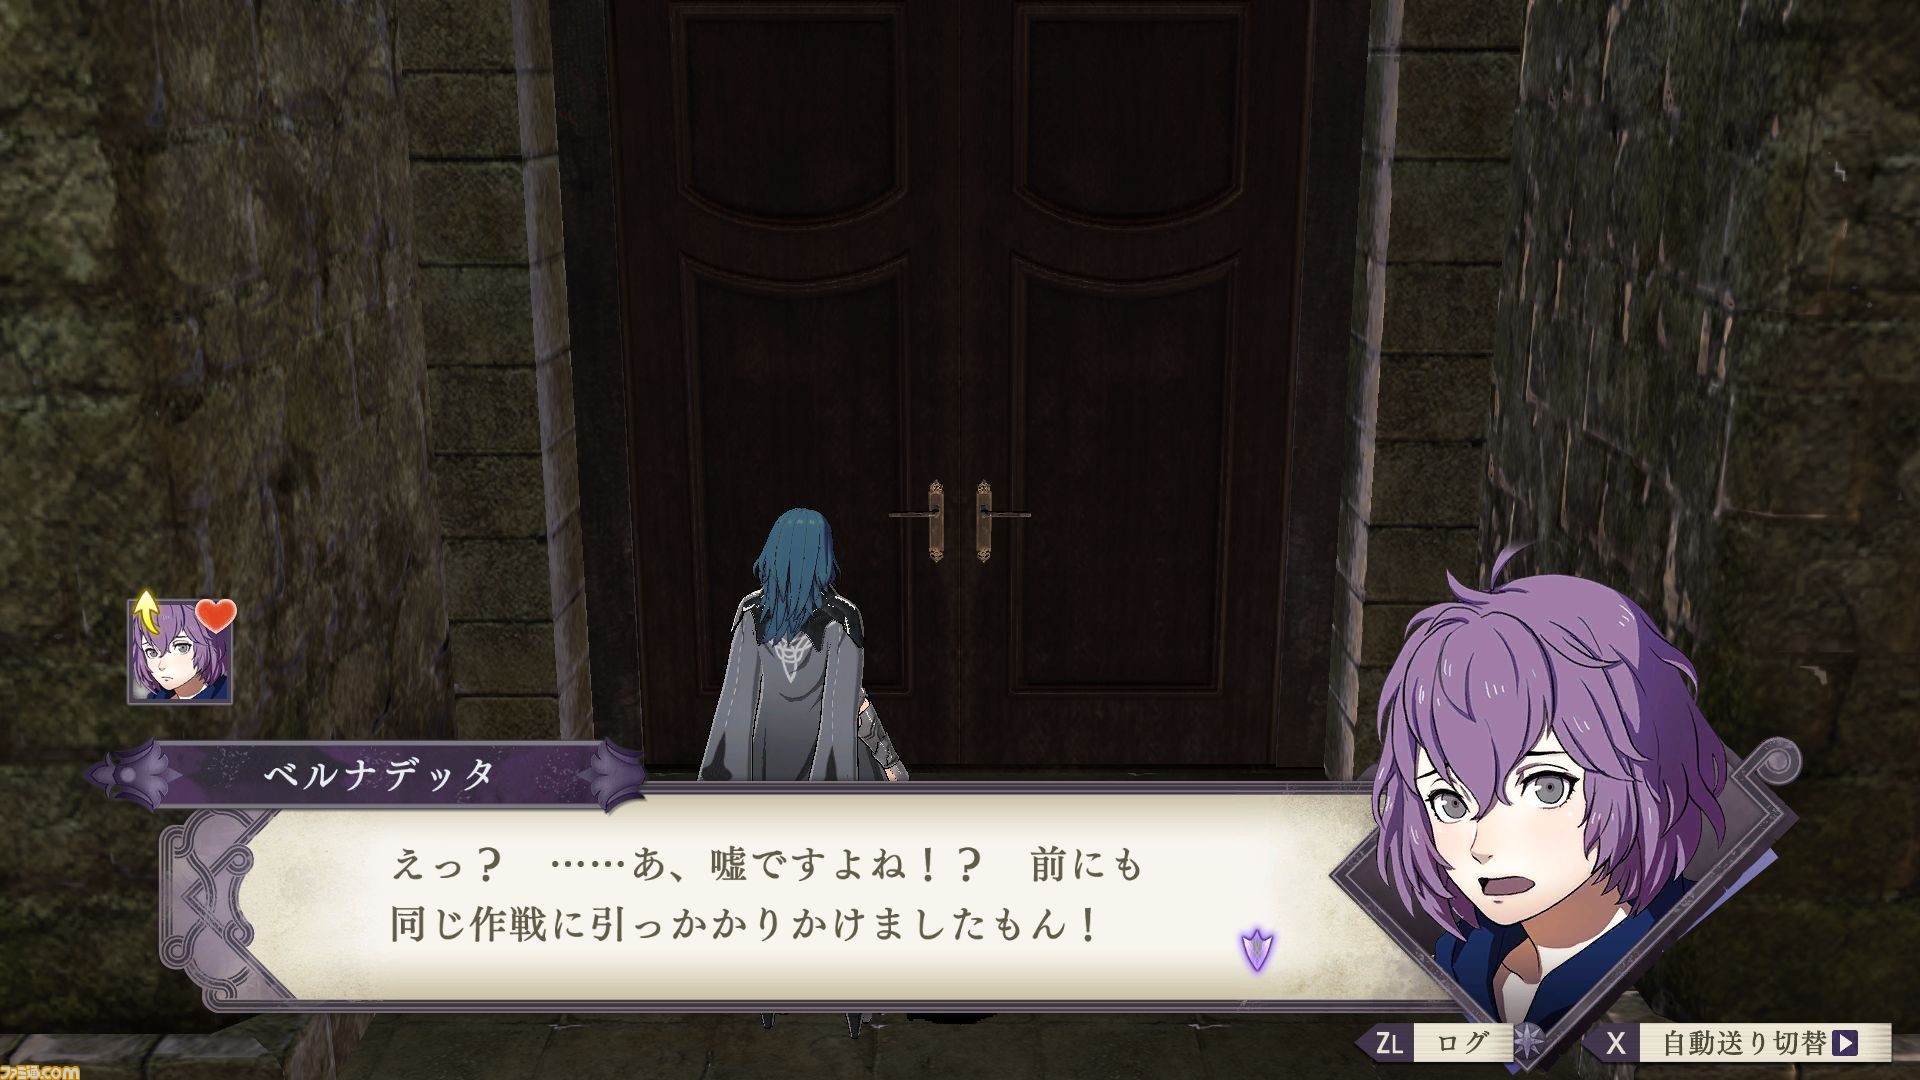
The next pair of screenshots, Bernadetta is asking what you’re doing sneaking around. If you answer that you were looking for delicious sweets, she’ll be surprised because that’s what she was planning. Great minds think alike, huh?
Quest
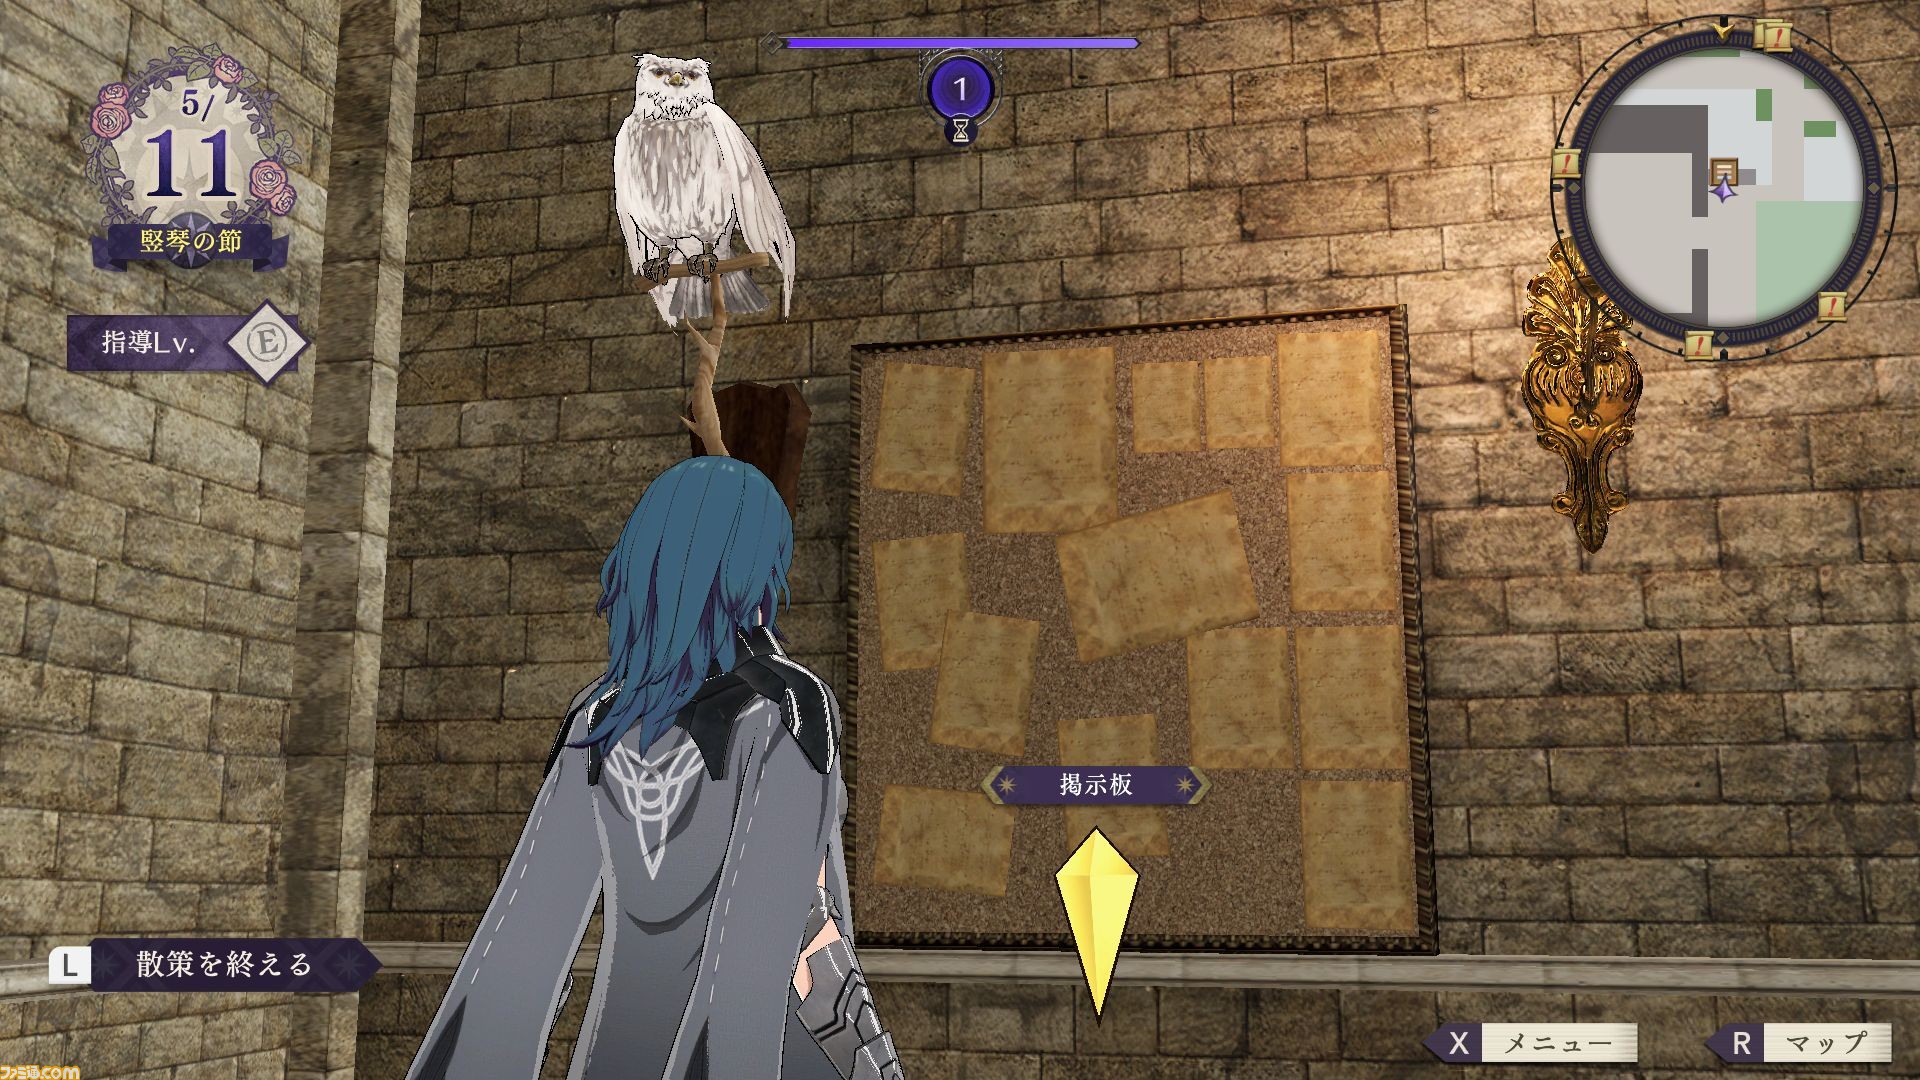
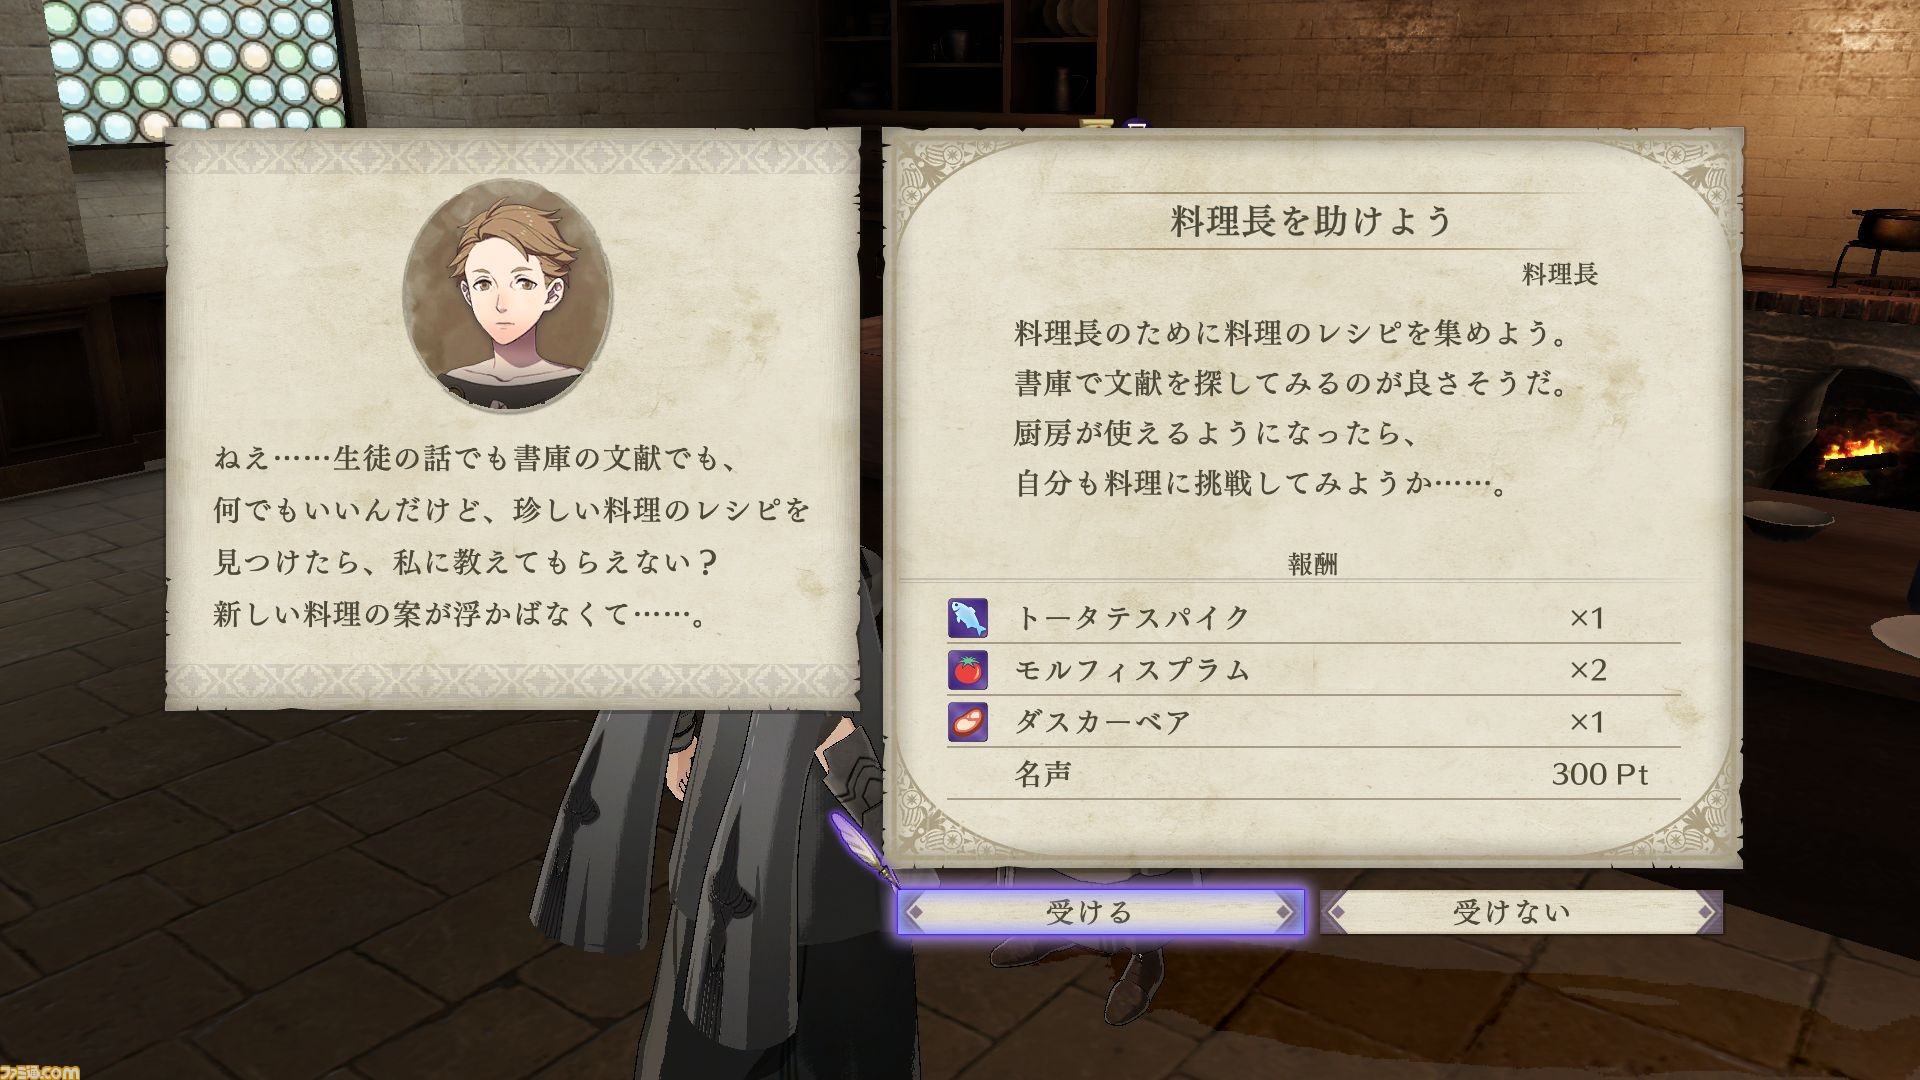
Are you feeling generous, productive or totally bored? Or all of the above? You’re in luck, because you can undertake quests and solve other peoples’ problems, in exchange for some nice rewards. Quests appeared in Echoes too, but were hard to keep track of. This time, you can receive quests from a bulletin board.
Hang on, is that… Feh from Heroes?! Also, it’s currently the 5th month, which is the Harp Season. Strangely, your Stroll Gauge has a maximum value of 1 at this point in time. Is that its initial value? If so, you can’t really do much during weekends… By the 8th month, it can rise to 3 like the Instructor Gauge for teaching.
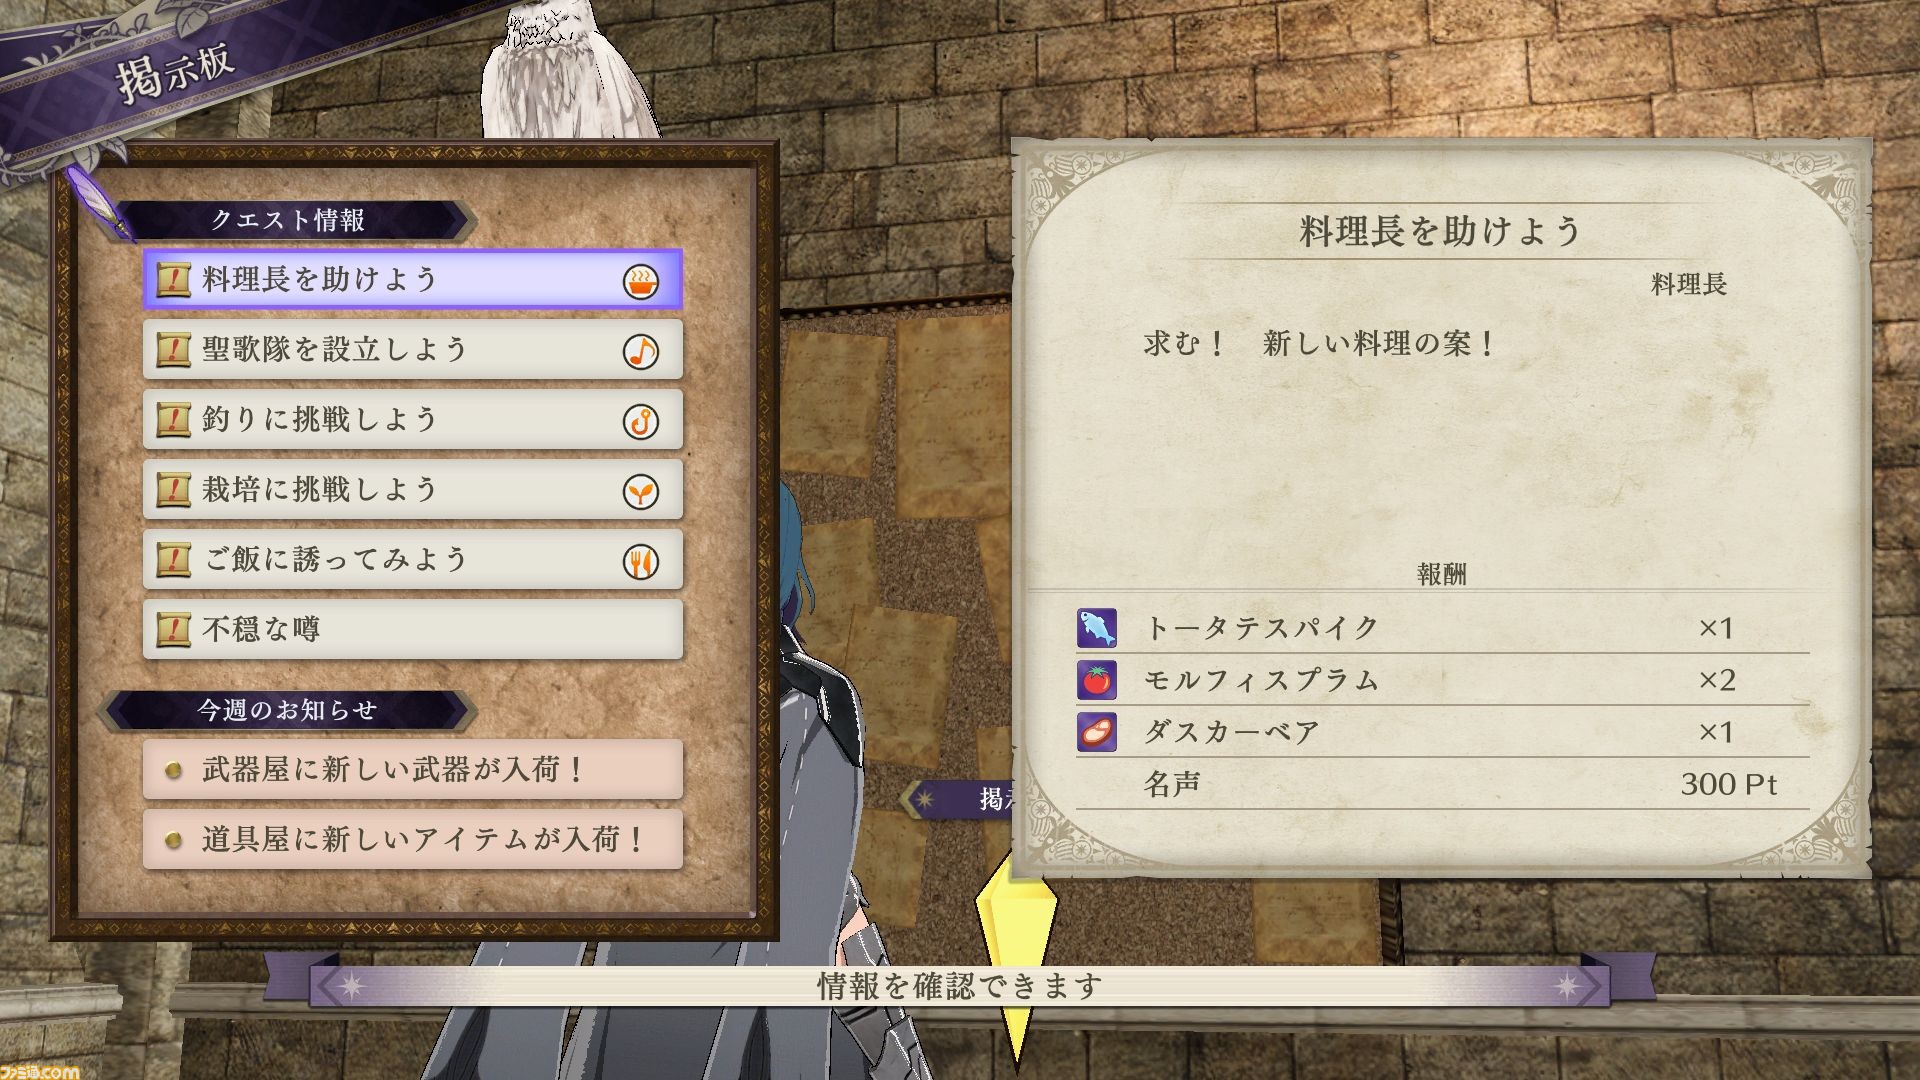
The available quests include: Helping the Chef (cooking), Building a Choir (song), Let’s Go Fishing (fishing), Let’s Grow Crops (crops), Invitation to Lunch (dining), Disturbing Rumour (no icon). There are also weekly notices: New Weapons in Stock at the Armoury! and New Supplies in the Vendor! It seems like shops gain new stock as time goes on.
The selected quest is the top one, Helping the Chef. Apparently they need help looking for new ingredients. The rewards include Teutates Pike, Morfis Plum and Daska Pear. Plus some Renown. Oh my, it seems like Renown from Awakening through Echoes is back.
You may have noticed all the rewards are named after world map places. Teutates is near the Adrestian-Faerghus border and Morfis is the island(?) to the far south-east. I don’t see Daska, but it could be outside the map; it’s the place where Dedue is from, north-west of Faerghus.
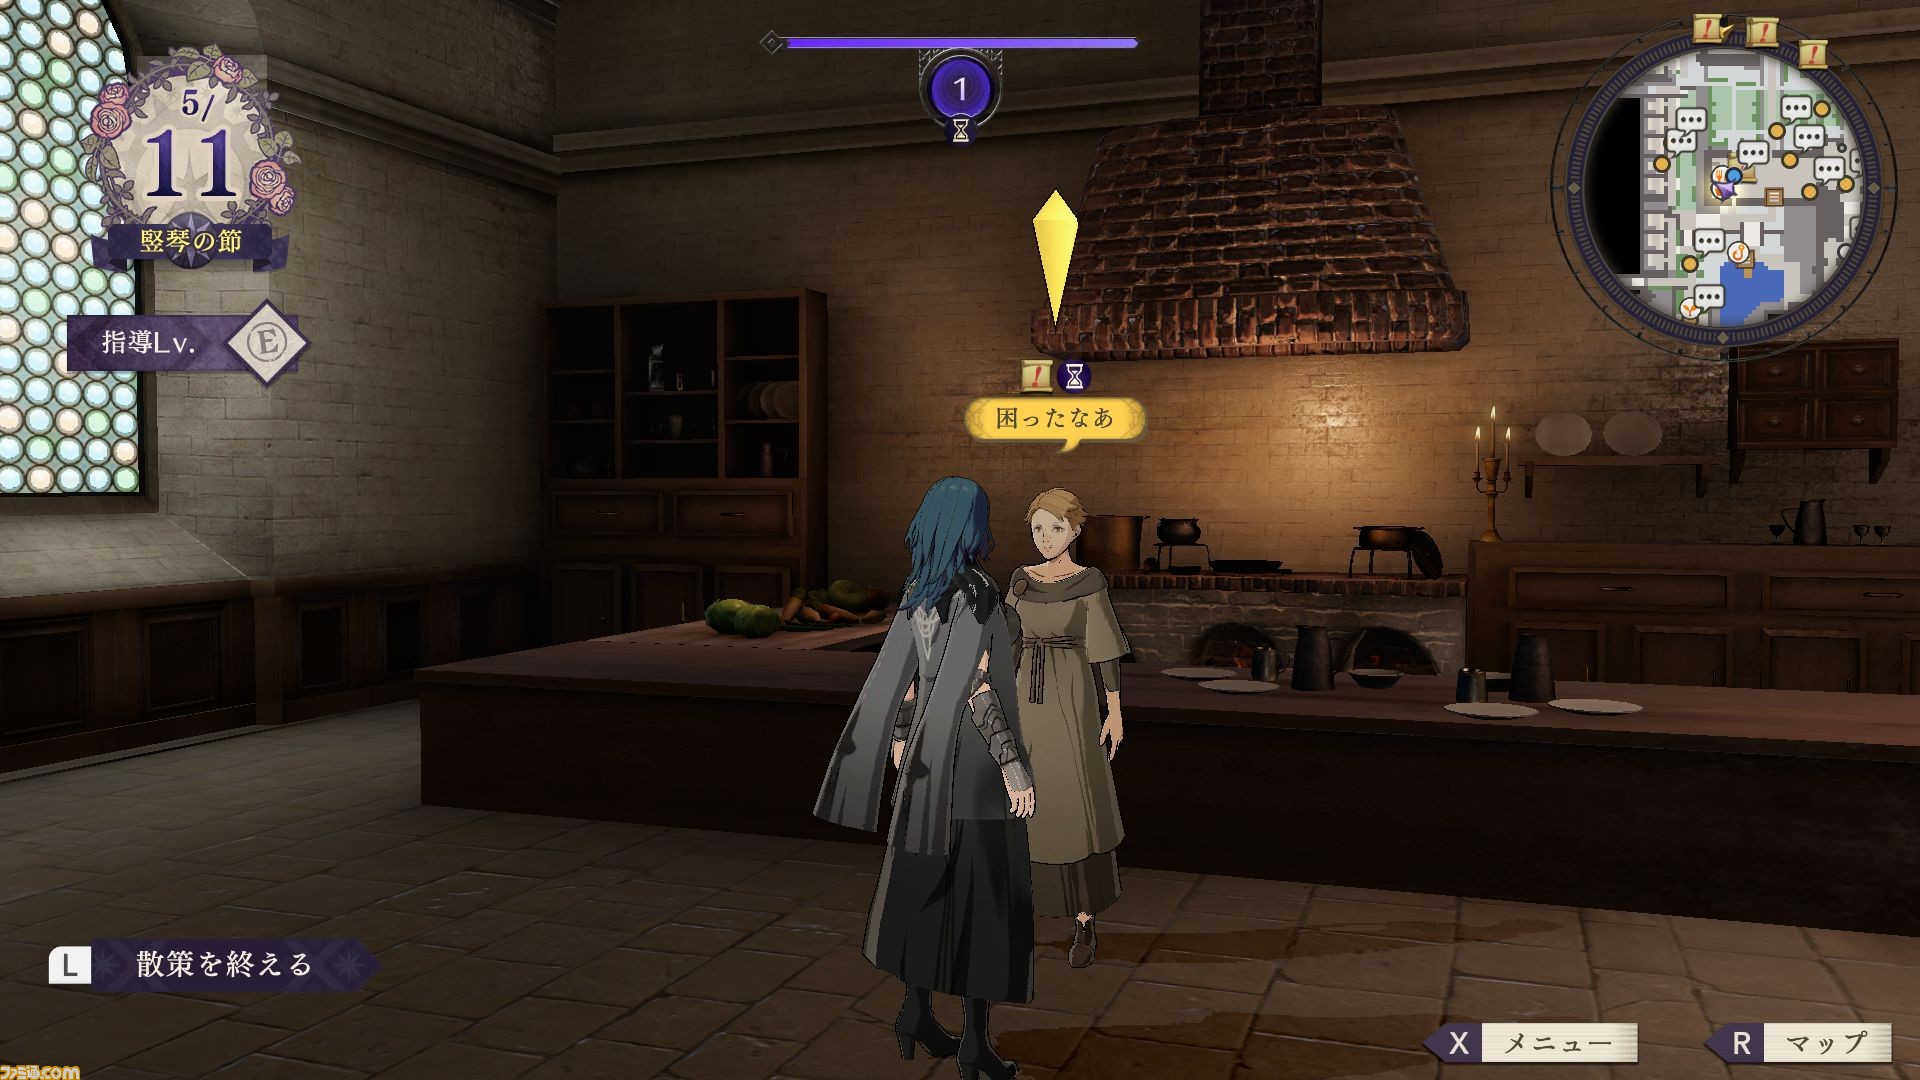
Once you’ve chosen a quest, you need to find the quest-giver. It’s basic RPG manners. As expected, quest-givers are indicated by a scroll icon (also shown on the map). There’s a hourglass icon too, matching the one on the Stroll Gauge. This probably means you must consume the gauge to complete the quest.
Oh dear, there are are 6 quests and only 1 gauge use. Never mind the other activities that require the gauge. Obviously, things will get easier as you increase your Instructor Level and your gauge goes up. I’m guessing the gauge gets refilled at the start of each weekend as well. Still, the time management seems abnormally tight.
Anyway… speaking with the quest-giver opens up a similar window as the one from the bulletin board, but with the NPC’s portrait, their comments and a detailed description of the quest. From here, you can opt to accept or decline the quest. Well, since you came all this way, you might as well hear them out.
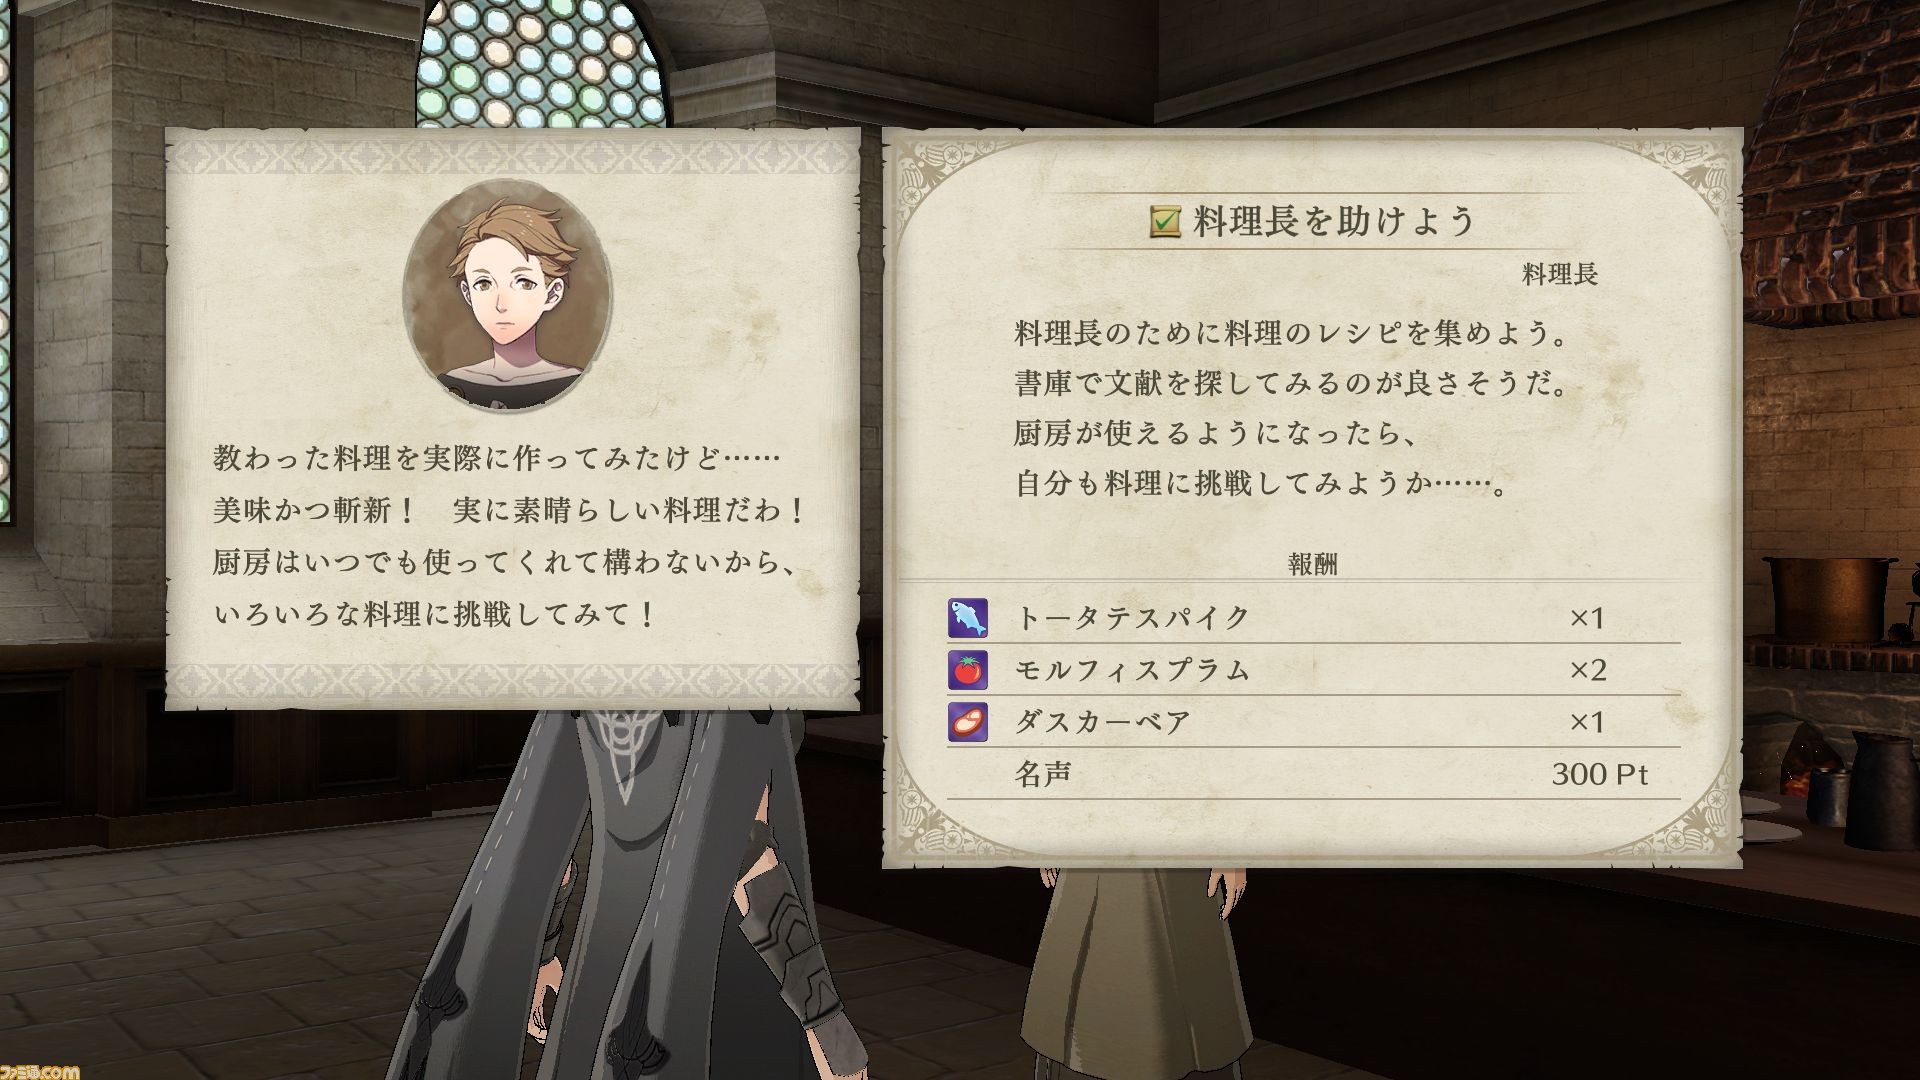

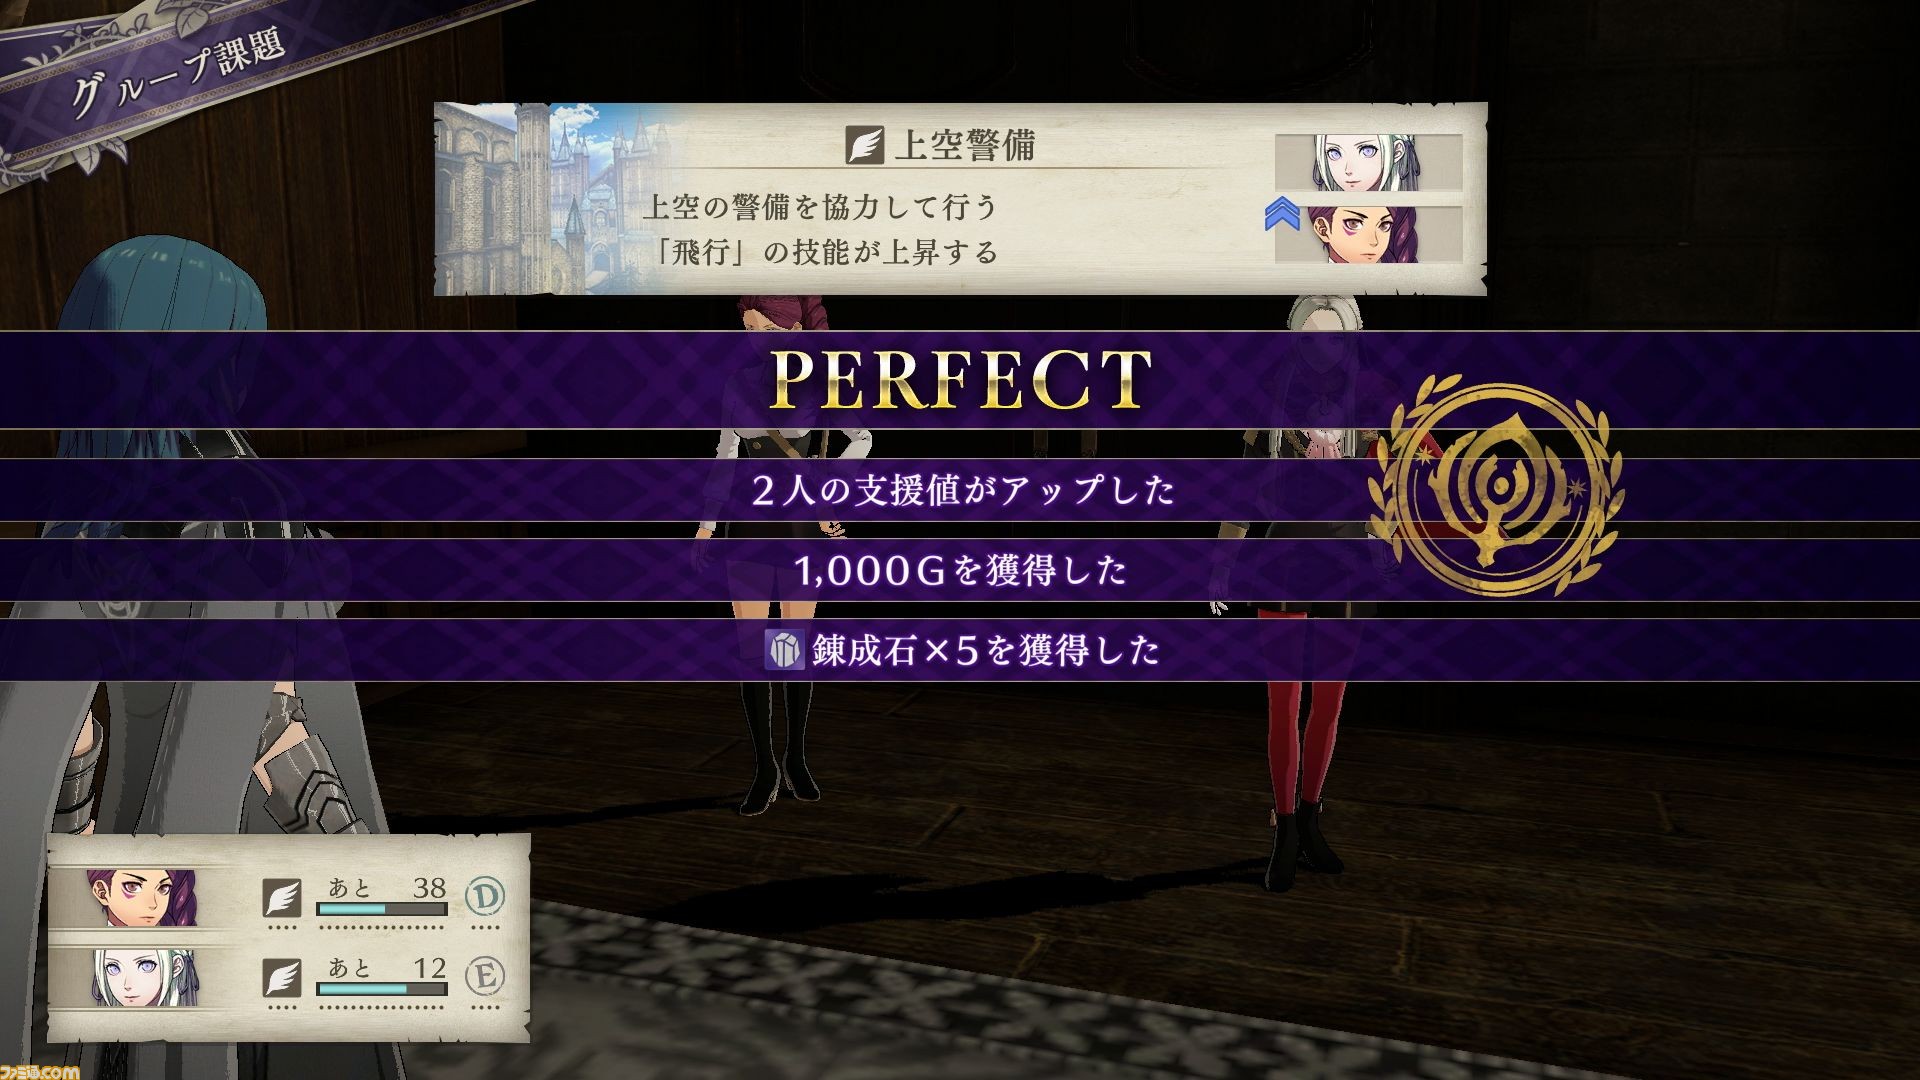
Once the quest is over, you’ll get the same screen, but with a tick in front of the quest title and a different comment from the happy customer. Then you’ll get a quest clear screen with all your rewards, similar to the ones for completing Group Tasks, as seen in the previous Famitsu article.
Apparently some quests involve clearing special battles. Not only that, but you may be able to recruit certain battalions. Neat.
Teacher Training
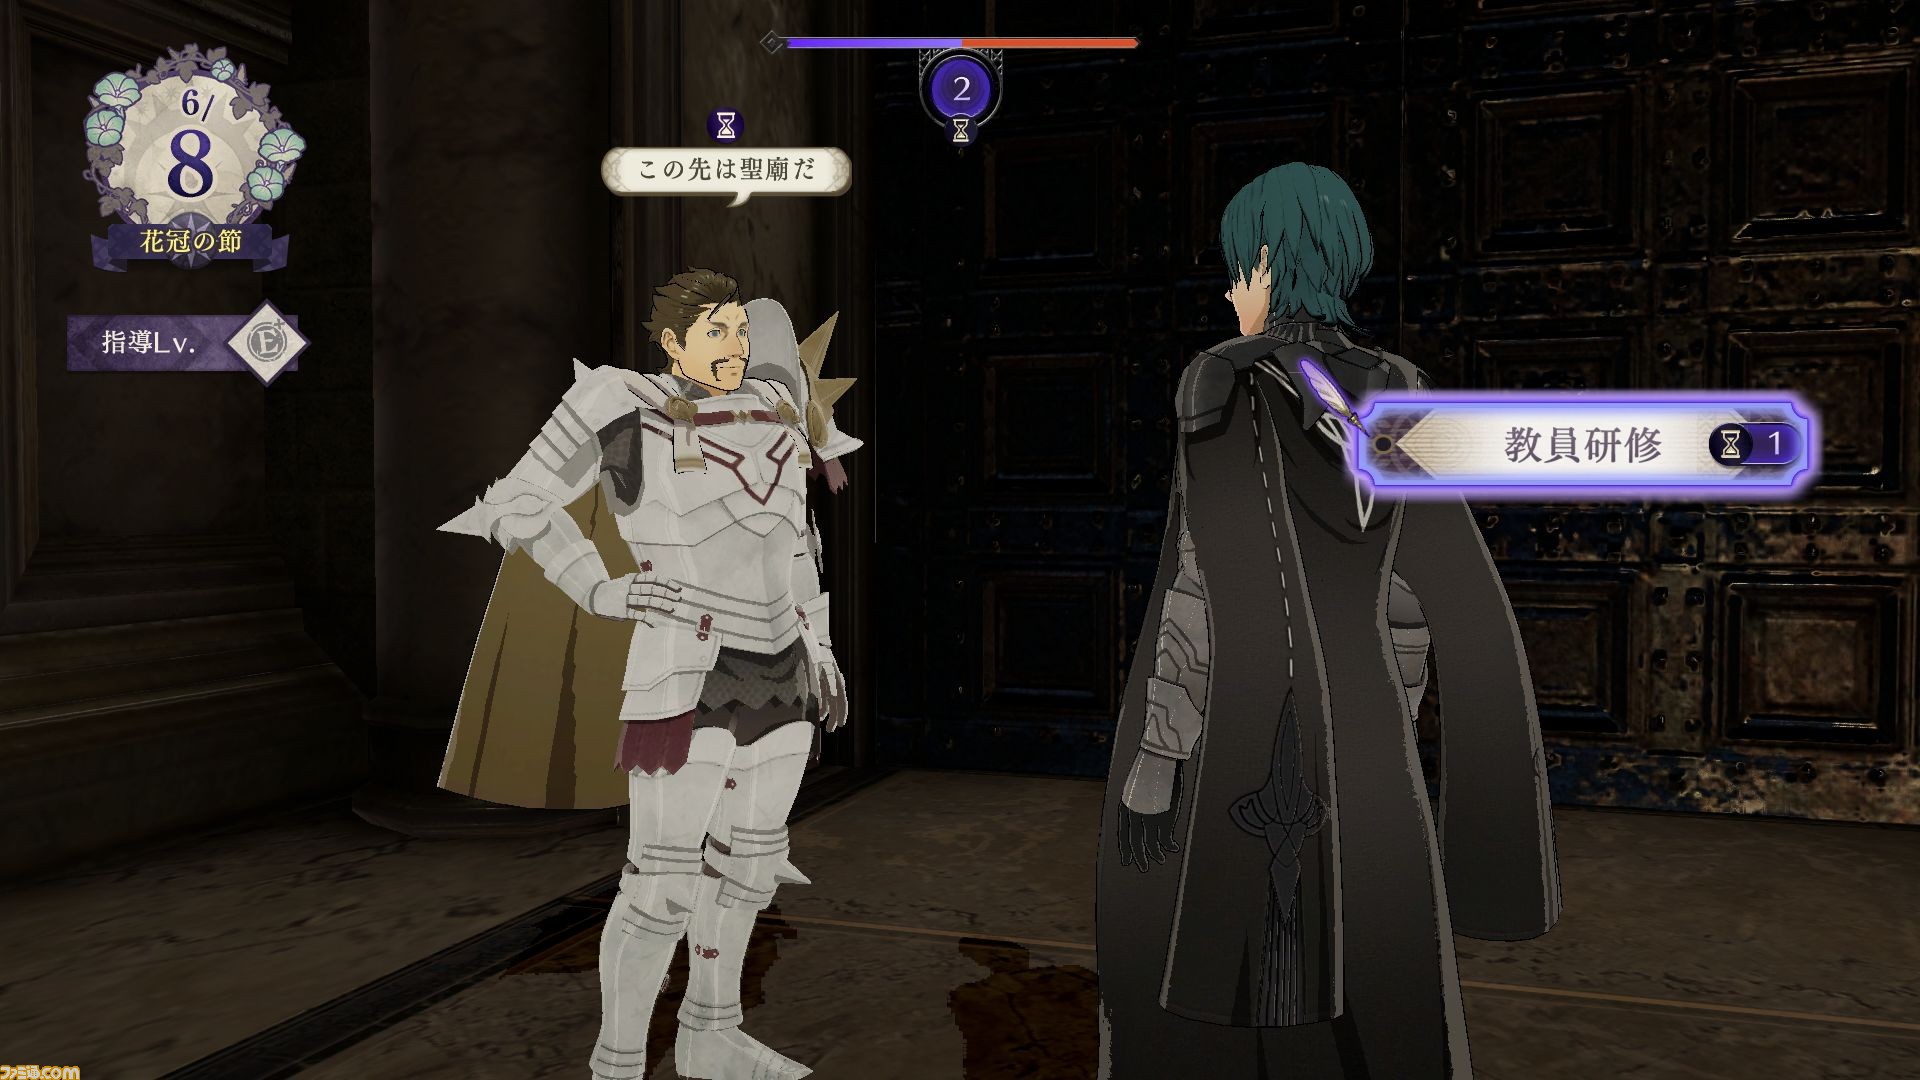
As you can imagine, the protagonist probably hasn’t taught in his/her life. But that’s not an issue as you can receive special training from other teachers! Again, this consumes the Stroll Gauge. By the 6th month, you have two uses so things are a tiny bit more flexible now. I believe the increase is because your Instructor Level is now E+ instead of just E.
The guy here seems to be the knight who’s friendly with your dad at the very start of the game. Since your dad used to a captain of the Knights of Seiros, it’s possible they have a long history together. We’ll learn his name very soon anyway.
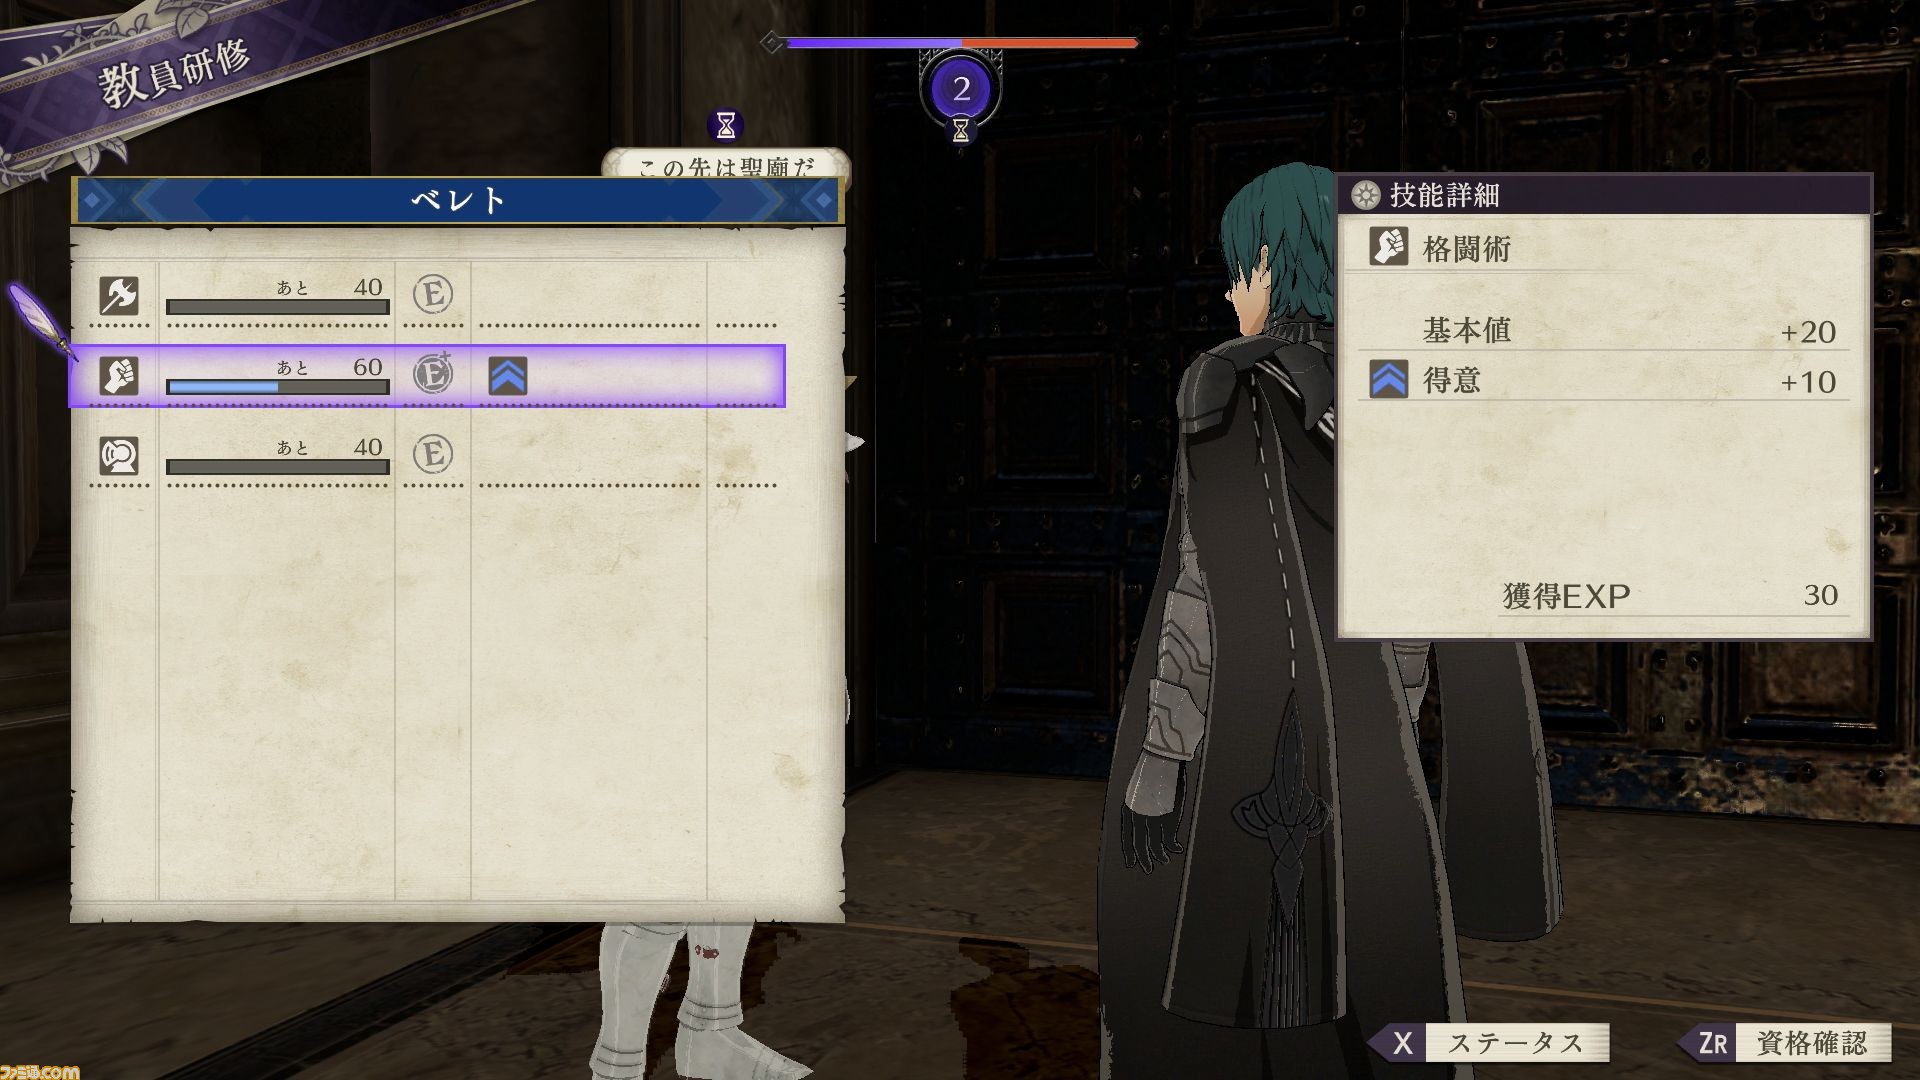
Similar to teaching your own students, players can choose a professor level to increase. Unlike standard lessons, only certain professor levels can be selected–depending on the teacher. Right now, Axe, Fighting and Heavy Armour are available. Byleth also has a strength in Fighting, although I’m curious if you can choose your strengths and weaknesses.
Also, you seem to gain a lot more experience than usual. A base of 20 and an additional 10 for having a strength. Students gain a base of 4 exp for comparison. Of course, this is probably balanced because training is simply one of many weekend activities, while teaching your students is (presumably) mandatory.
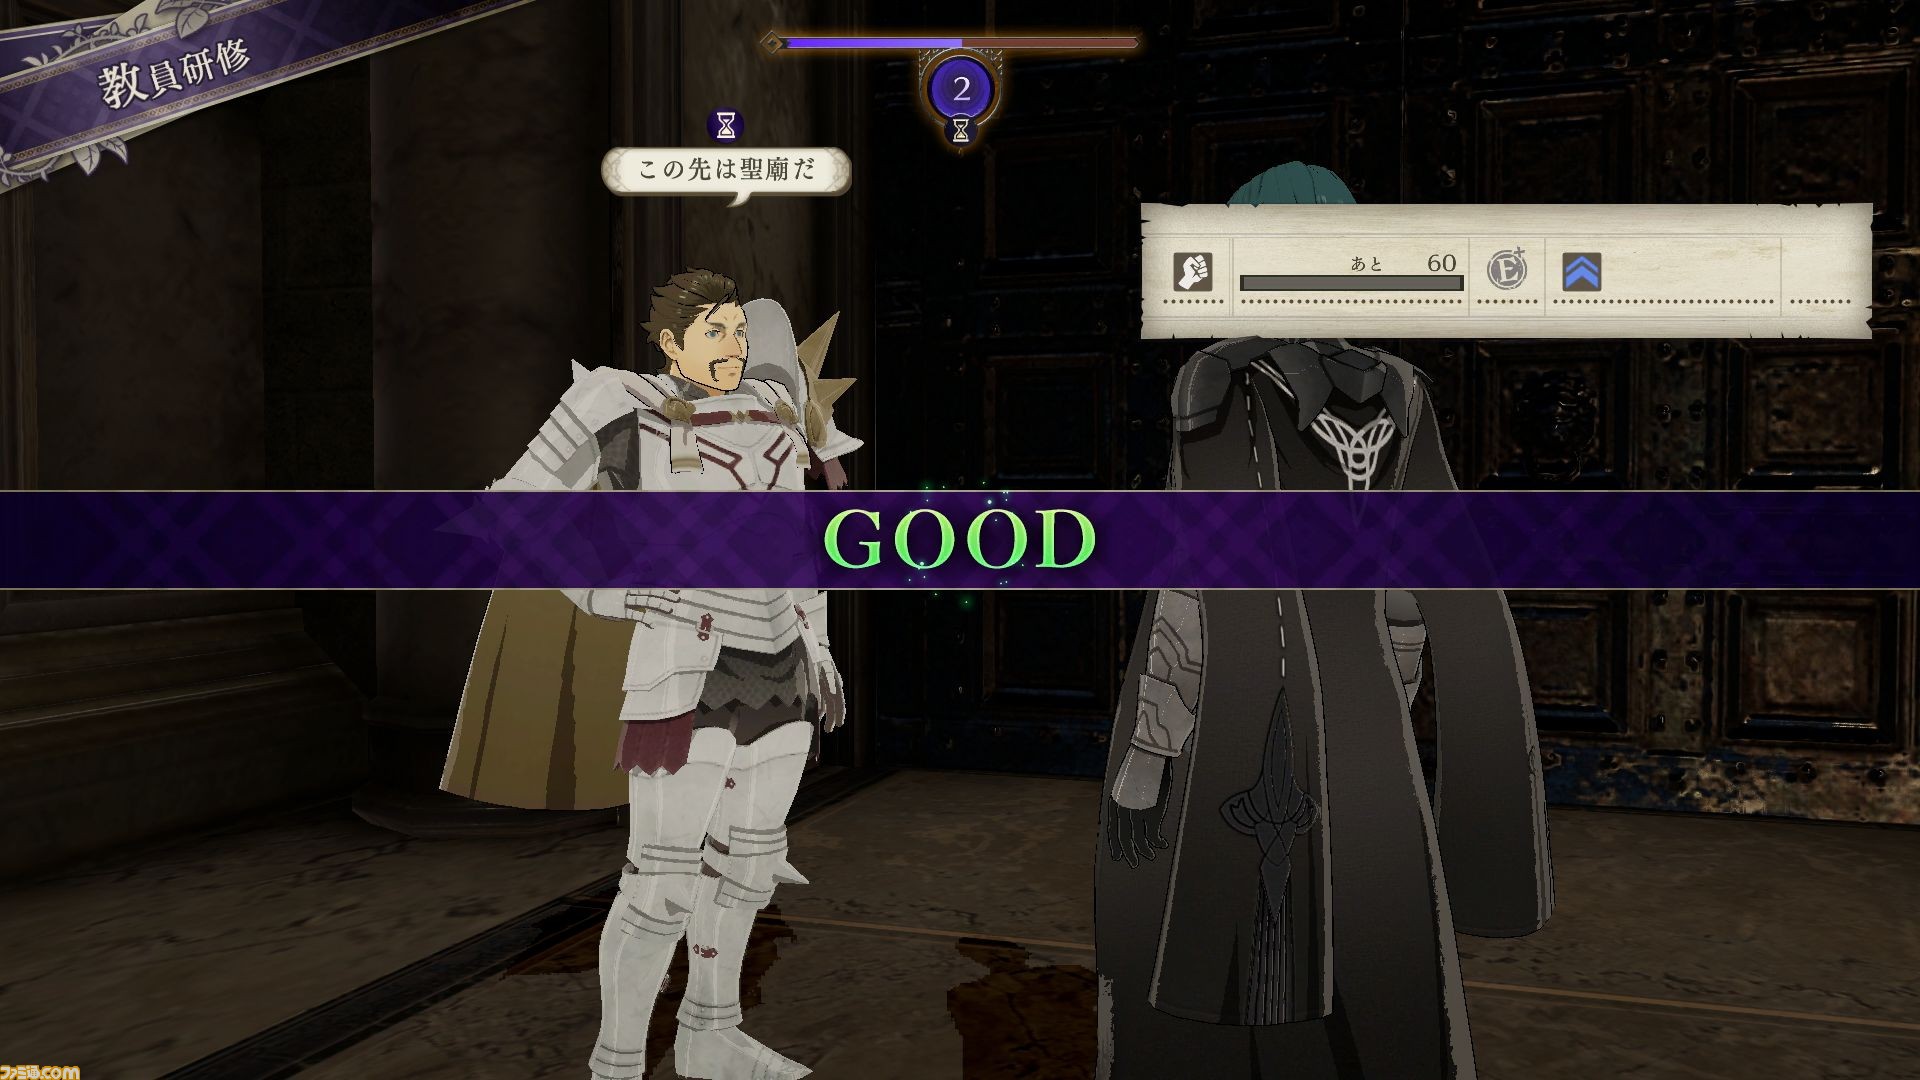
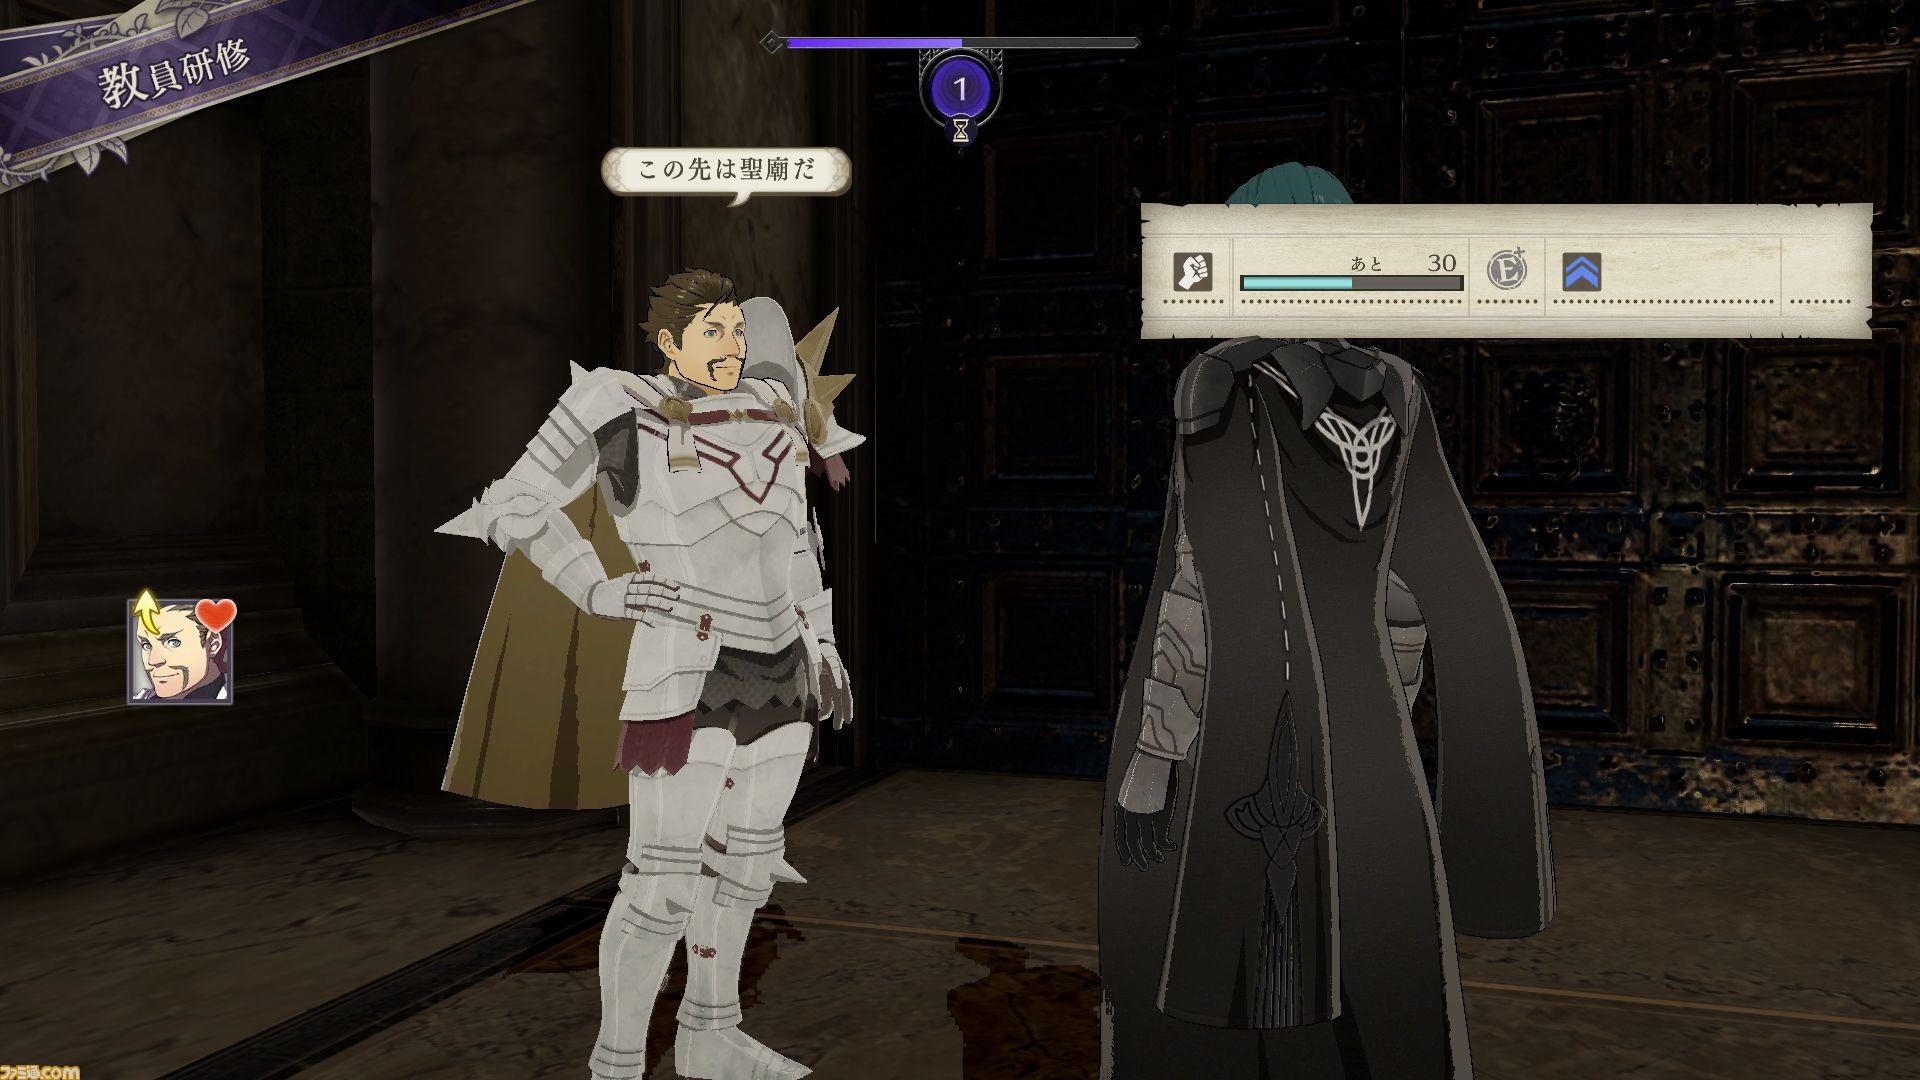
The results of training seem otherwise identical to teaching students. The better the result, the more experience earned. Afterwards, you can gain support points with the teachers too.
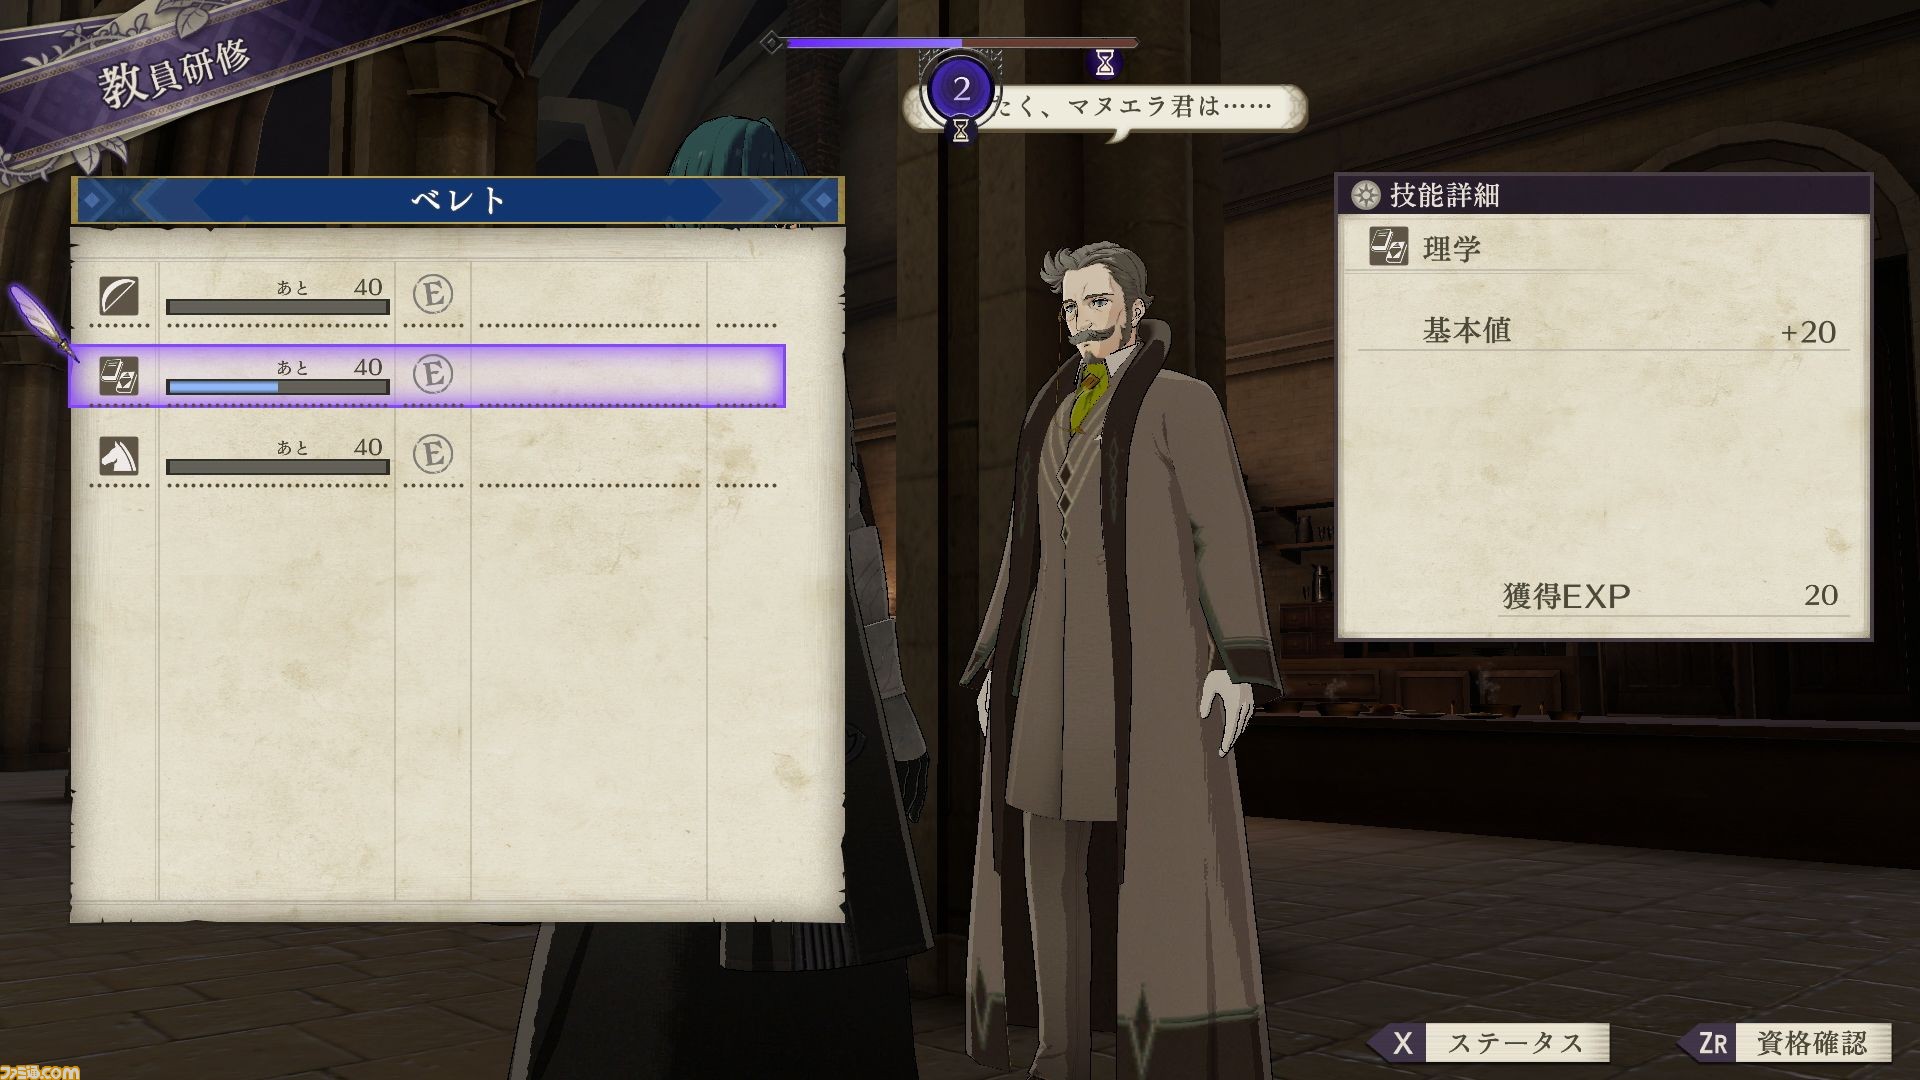

For another example, we have Hanneman the crest-researcher. He seems to offer lessons in Bow, Reason and Riding. Perhaps he aspires to be a Brave Lyn or a Reinhardt? I’m just kiddin’. After this, the Stroll Gauge depletes by 1 and the player also earns support points for Hanneman.
Fishing
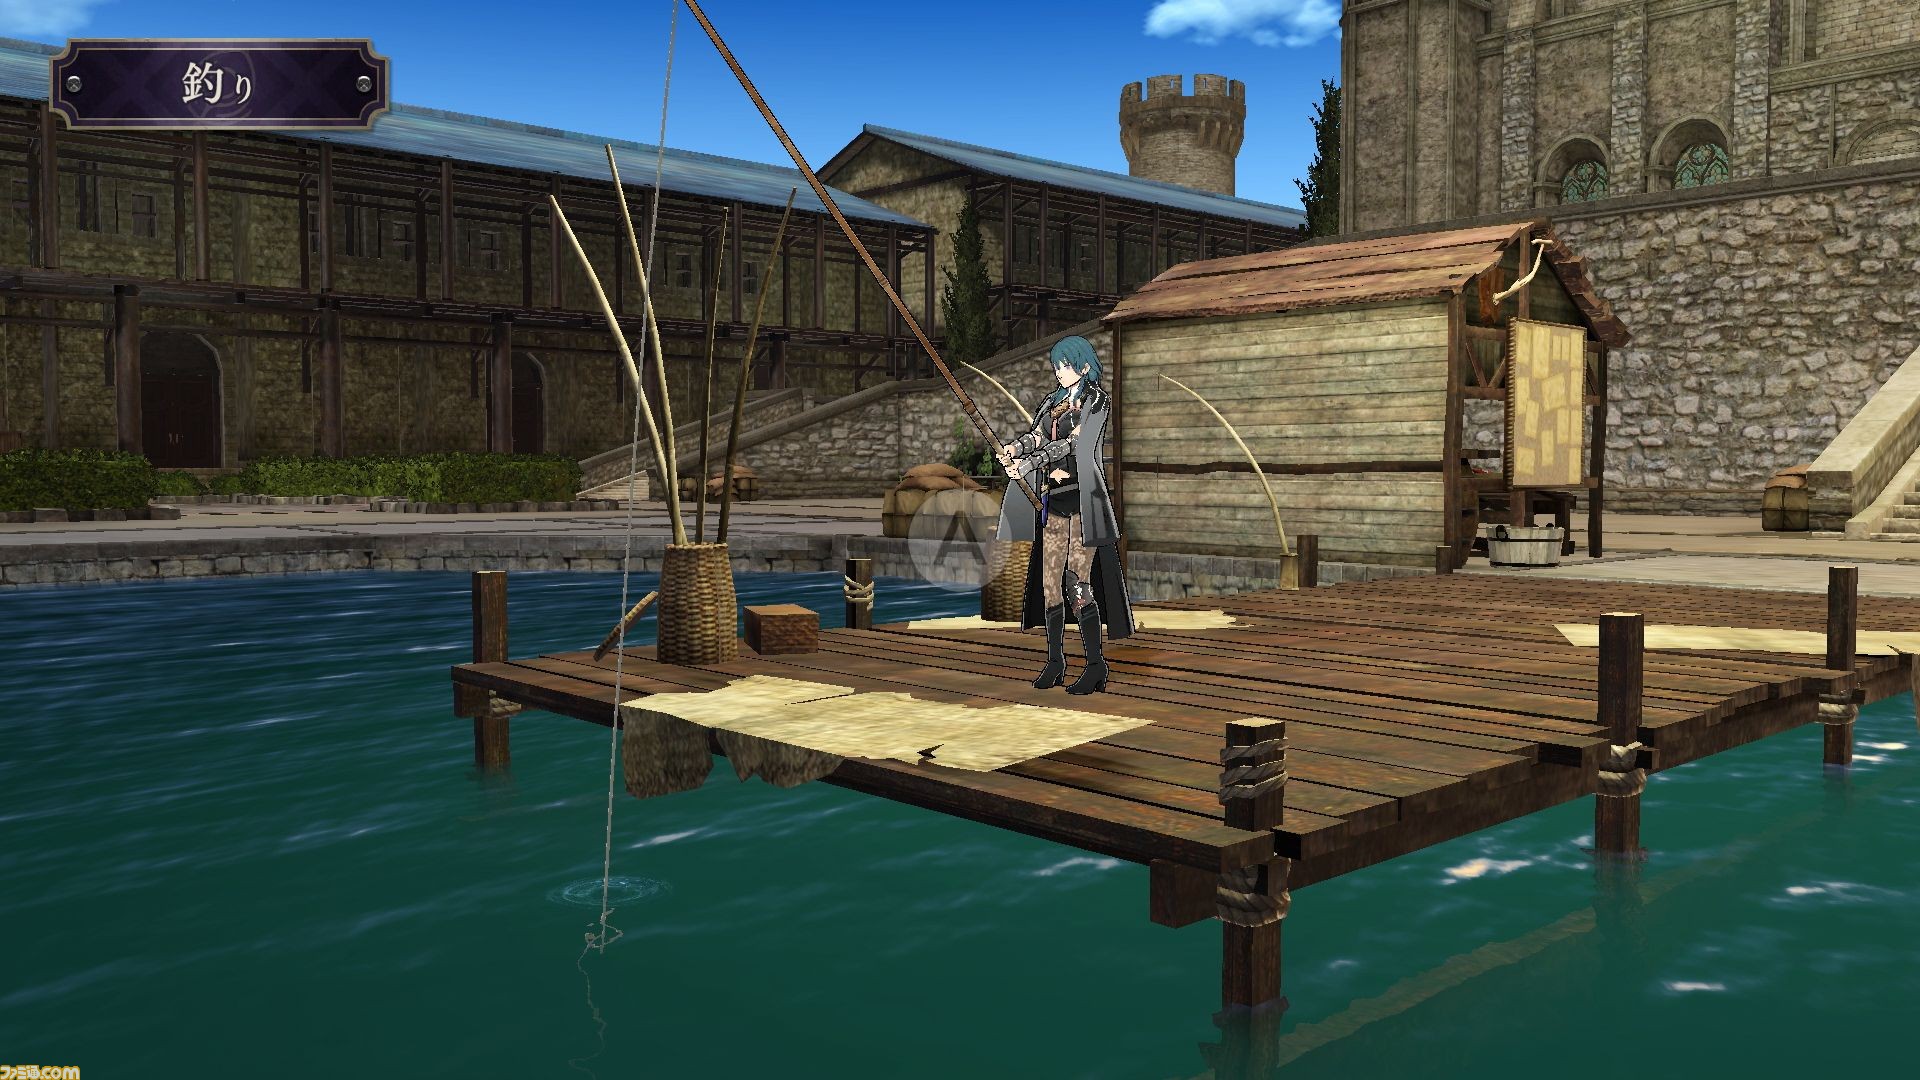
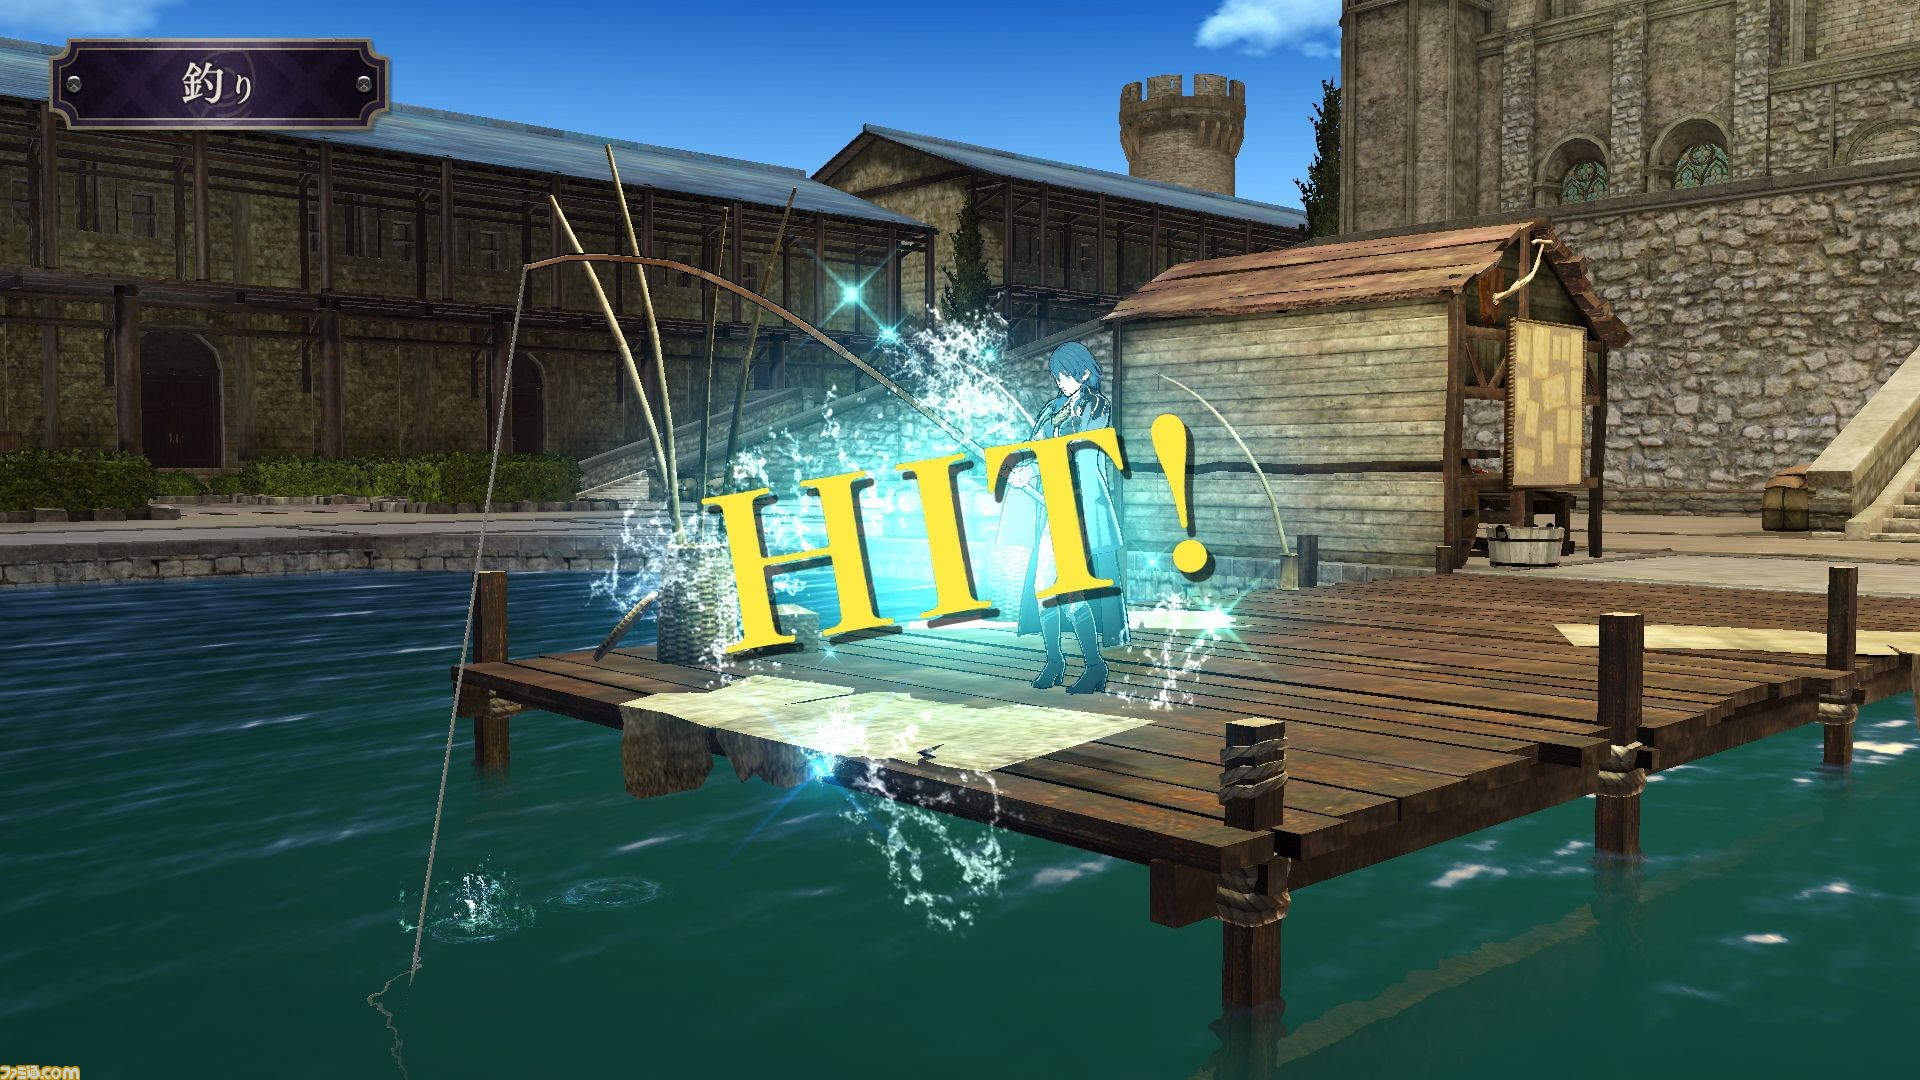
You can’t have a proper RPG without a fishing mini-game, it seems. I’m sure you can imagine how fishing works just from looking at the pictures. After casting your reel, you need to press the A button when a fish bites. Succeed and you’ll pull in a catch…
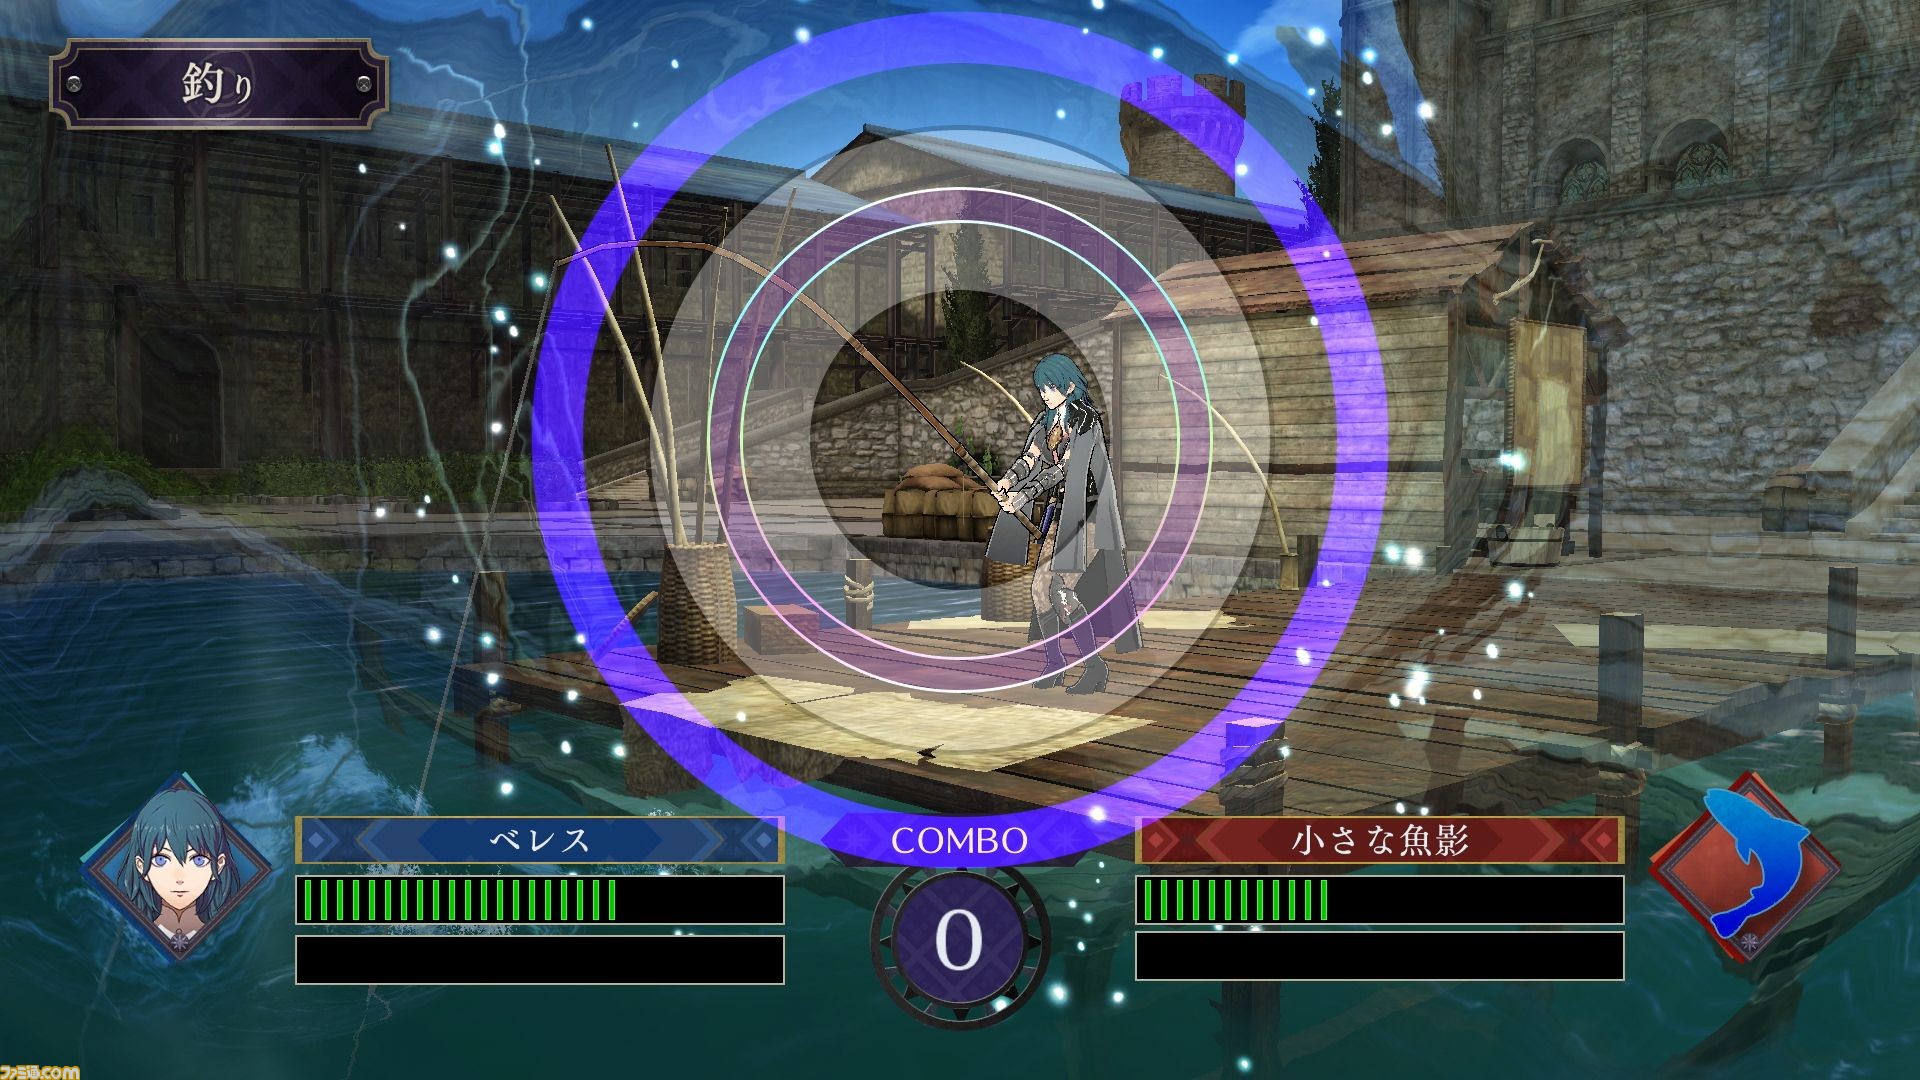
…Wait, the battle has only just begun! Stamina bars will appear for you and the fish caught on the string. Hilariously, the bars are designed like HP bars from the old-school Fire Emblem games. From the look of things, you need to play a Quick Time Event similar to the QTEs in Xenoblade Chronicles.
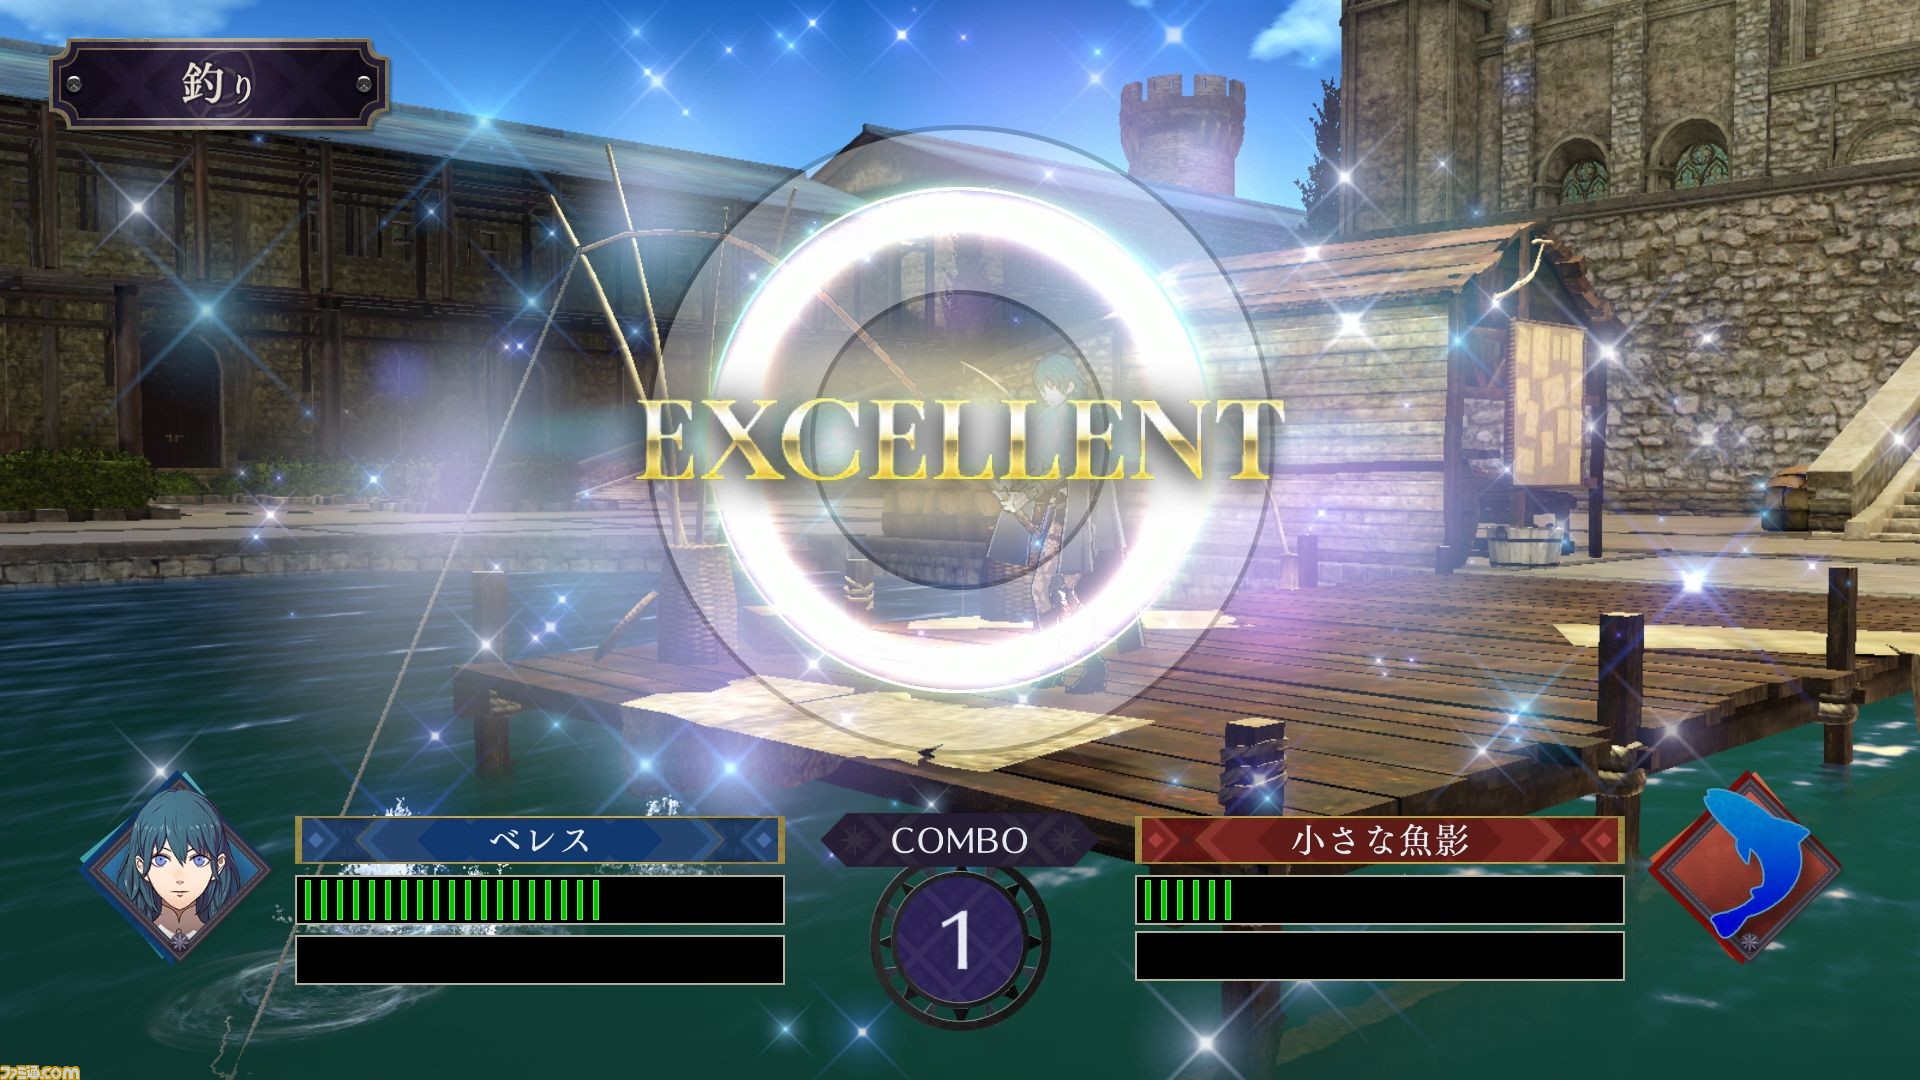
Towards the centre of the screen is a circle marker. Outside it, a blue circle will slowly–or maybe quickly–get smaller. If you can stop the circle within the circle marker, you can deplete the fish’s stamina; the closer inside the narrow region indicated by rainbow-colour lines, the better.
I think if you stop at least inside the circle marker, you can build up your combo counter, which again probably helps somehow. Hmm, I can’t wait until you can encounter legendary fish with maxed out stamina bars that require dozens of perfectly timed QTEs to ensnare…
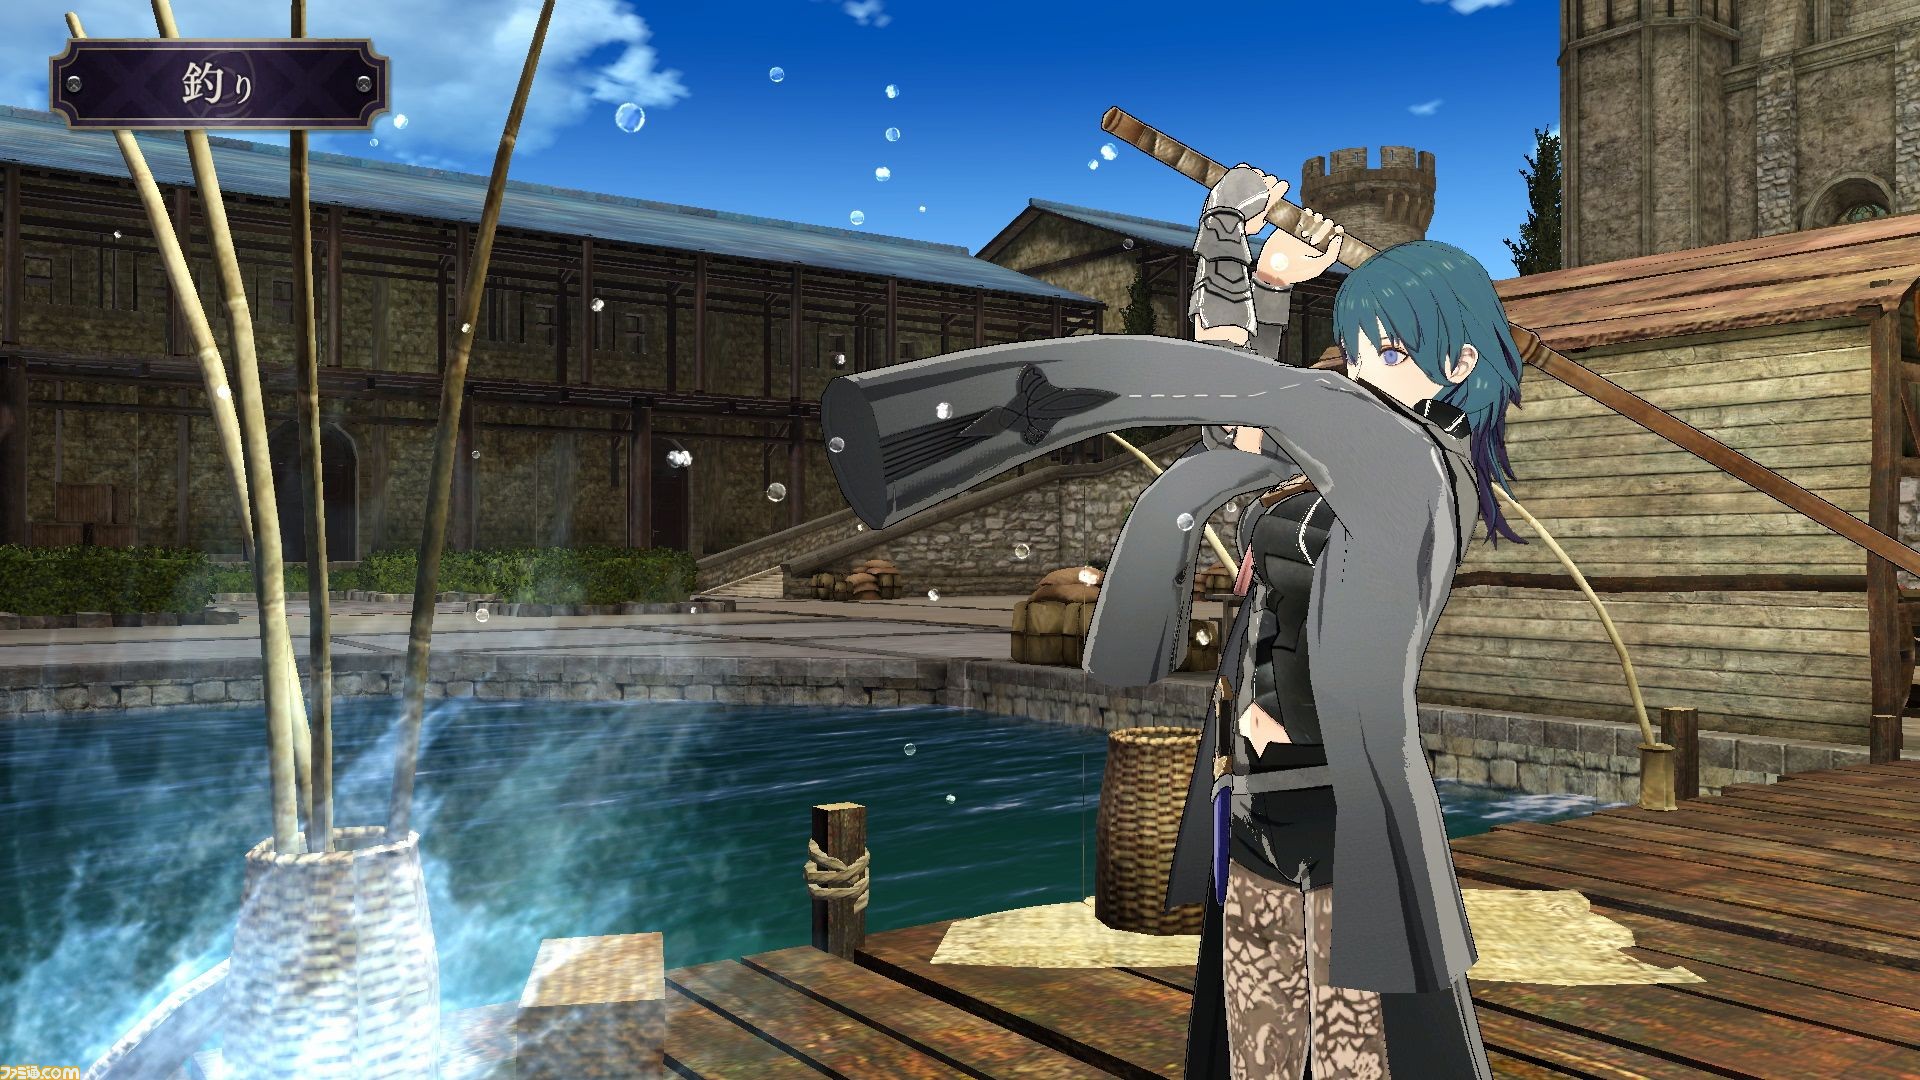
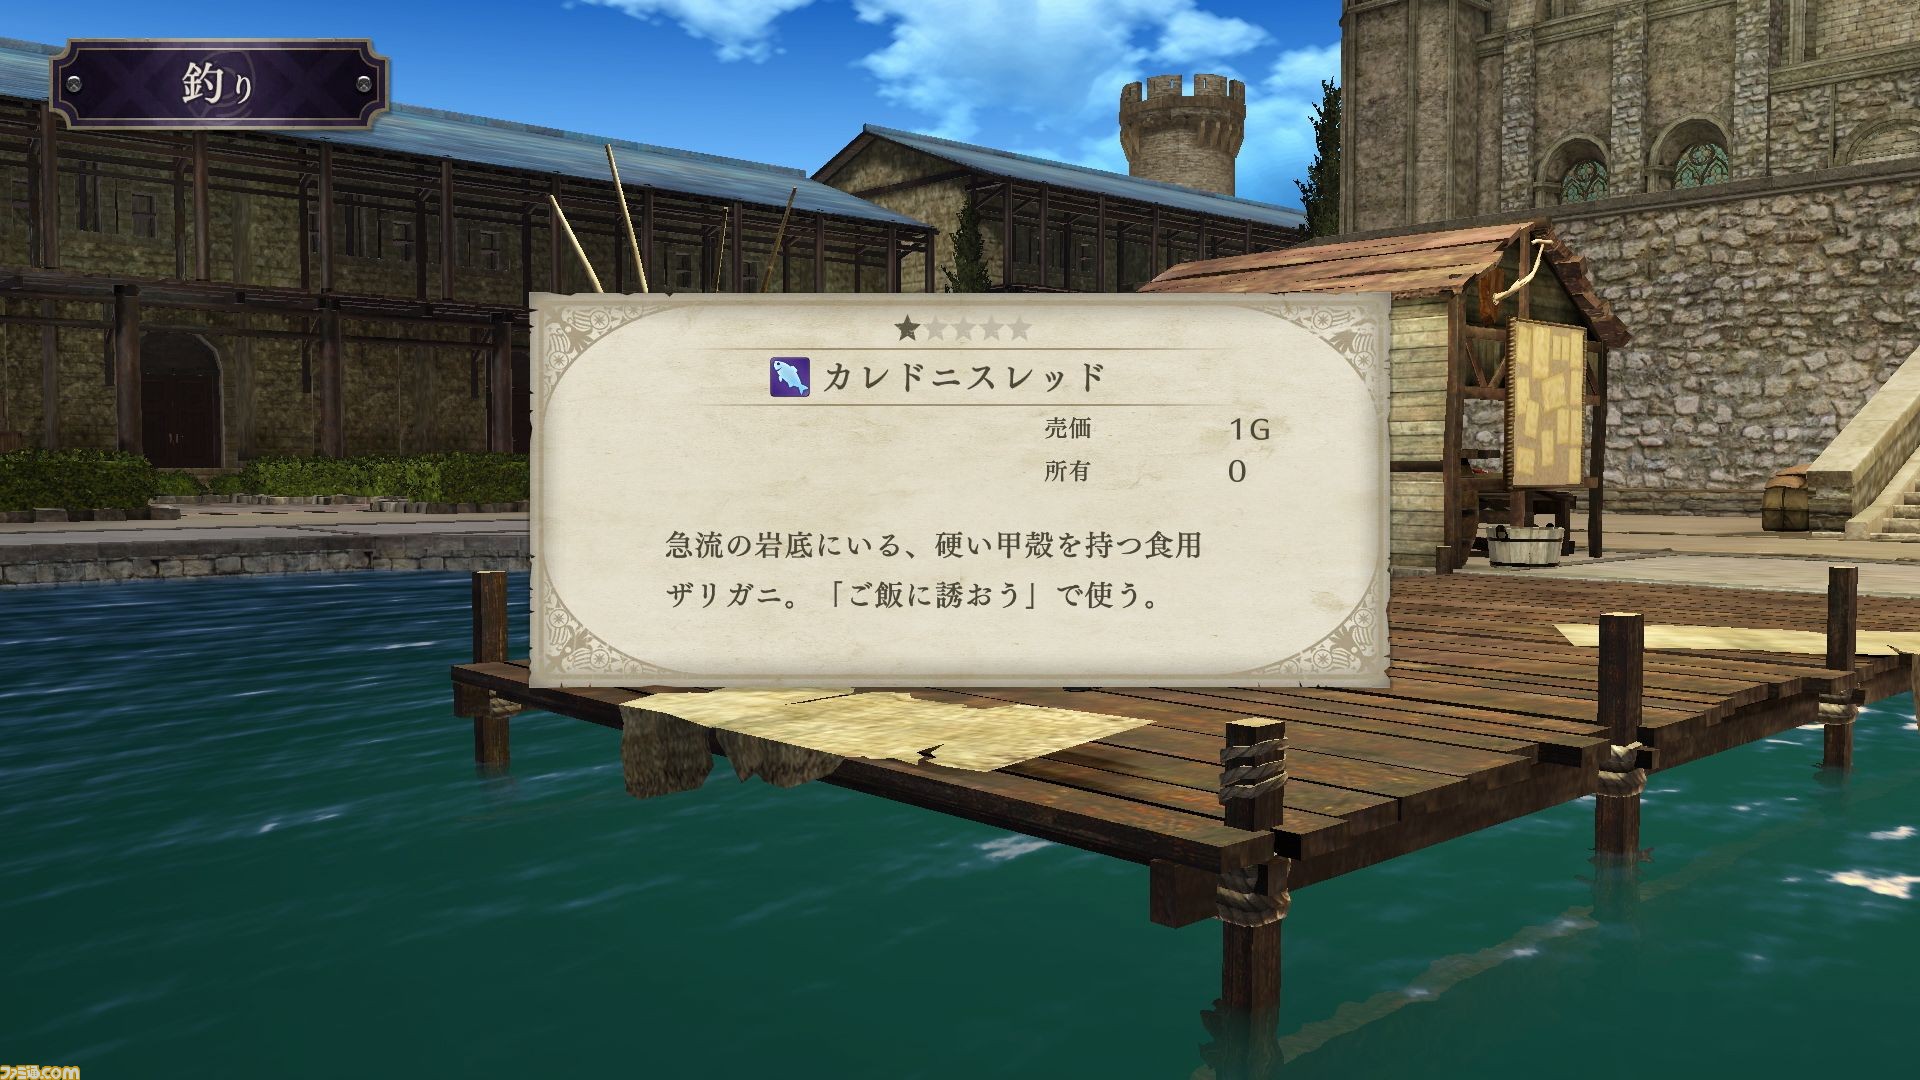
Once the poor fish is out of energy, up it goes! Today’s fish is a Caledonensis Red, which is a low level fish worth a measly 1G. I hope that didn’t cost any of the Stroll Gauge to hook up. Besides selling fish, you can also use fish as ingredients when dining at the Mess Hall.
Mess Hall
Speak of the devil. The Mess Hall from Fates makes a return! It seems to function in a similar manner, letting you feed your students to temporarily enhance their stats. Again, you need to bust out your Stroll Gauge to use this facility. Choices, choices…
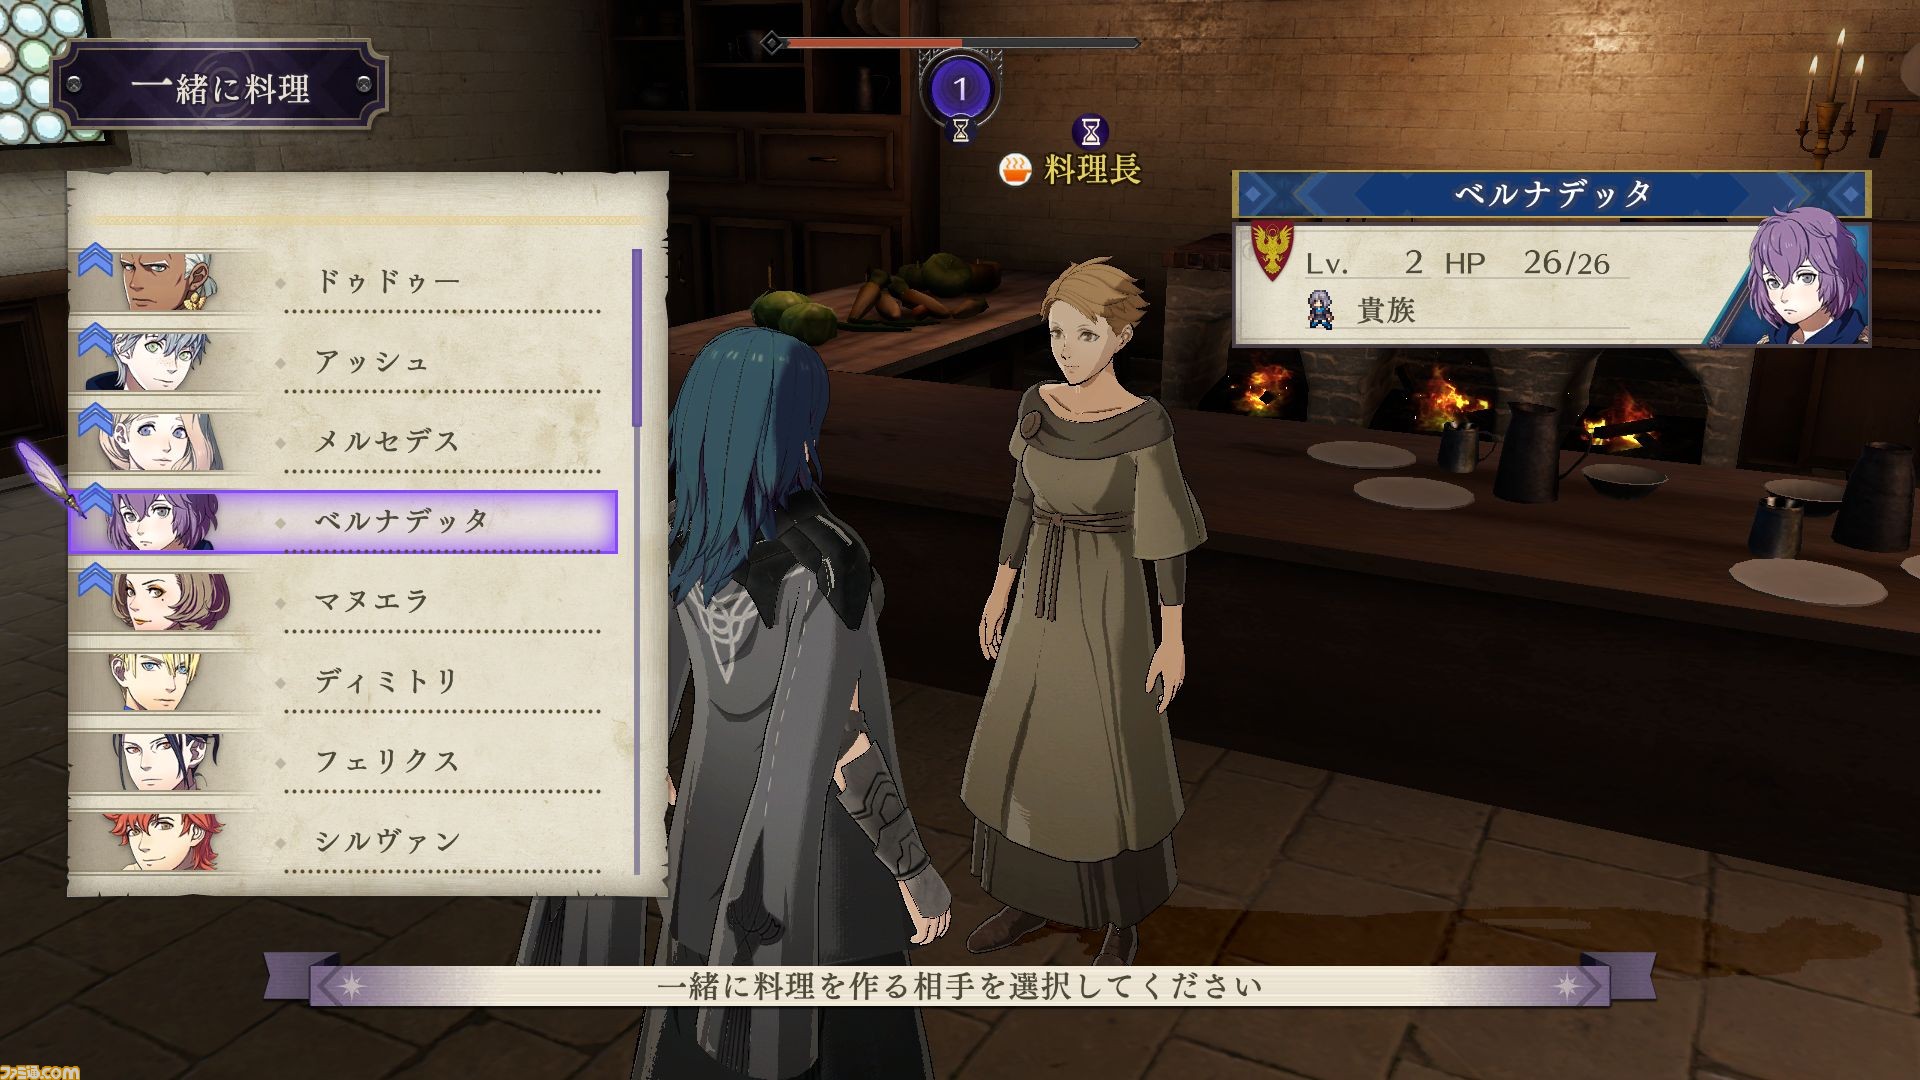
There are two main options. The first feeds everyone. You can choose a chef yourself, from all of the students from all three houses and even the teachers! At this stage, I don’t think this confirms that you can control all of them, but I wouldn’t be surprised if it happens eventually.
There’s an up arrow next to five of the characters; I assume they’re the best choices right now. Afterwards, you choose the dish. This is where things are a tiny bit confusing. Generally, you pick a dish and then the character, in that order. That way, you can choose a dish that the character is good at making. But it seems to be reversed unless Famitsu made a mistake.
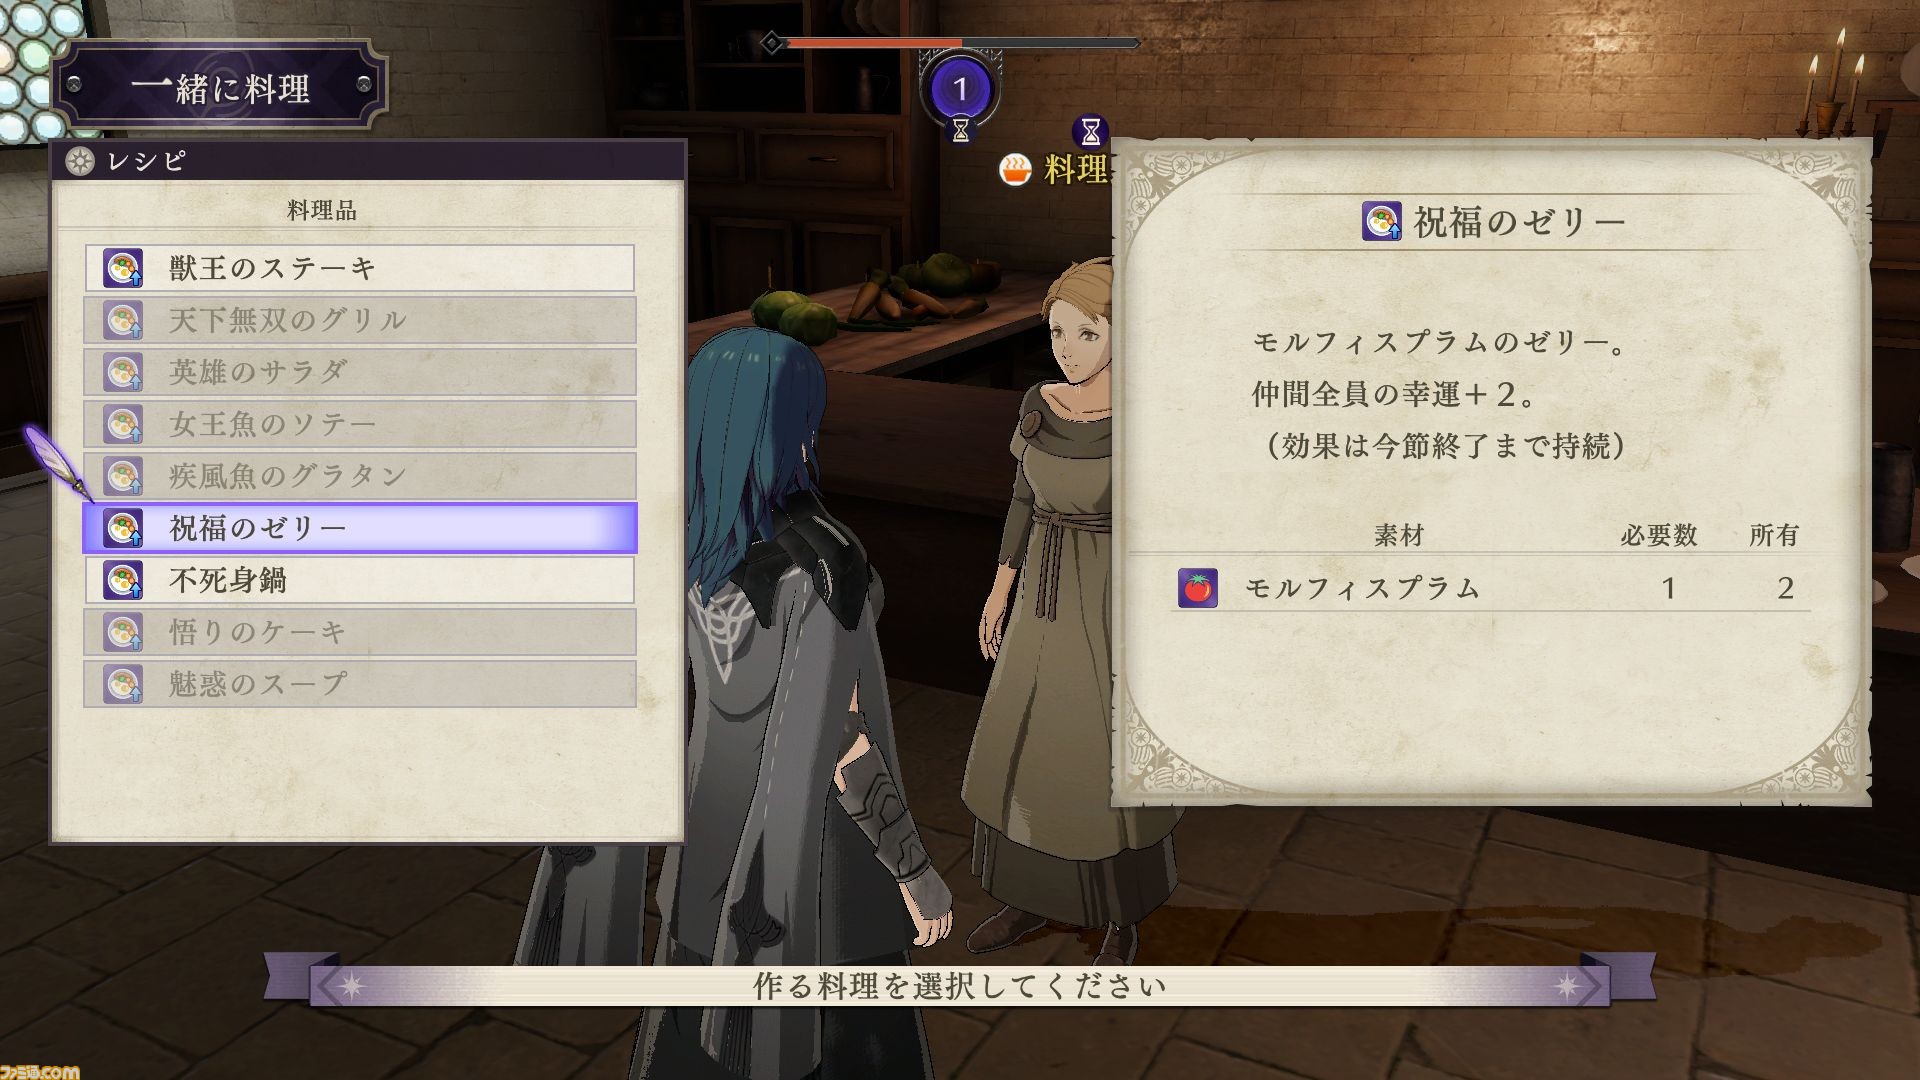
Regardless, the following recipes are available: Beast Lord’s Steak, Unbeatable Grill, Champion’s Salad, Queen-Fish’s Saute, Gale-Fish Gratin, Blessed Jelly, Immortal Hot Pot, Enlightened Cookie and Enchanted Soup. I could not make these up if I tried. Currently the Blessed Jelly is chosen. It requires a Morfis Plum and grants Luck +2 until the season’s end.
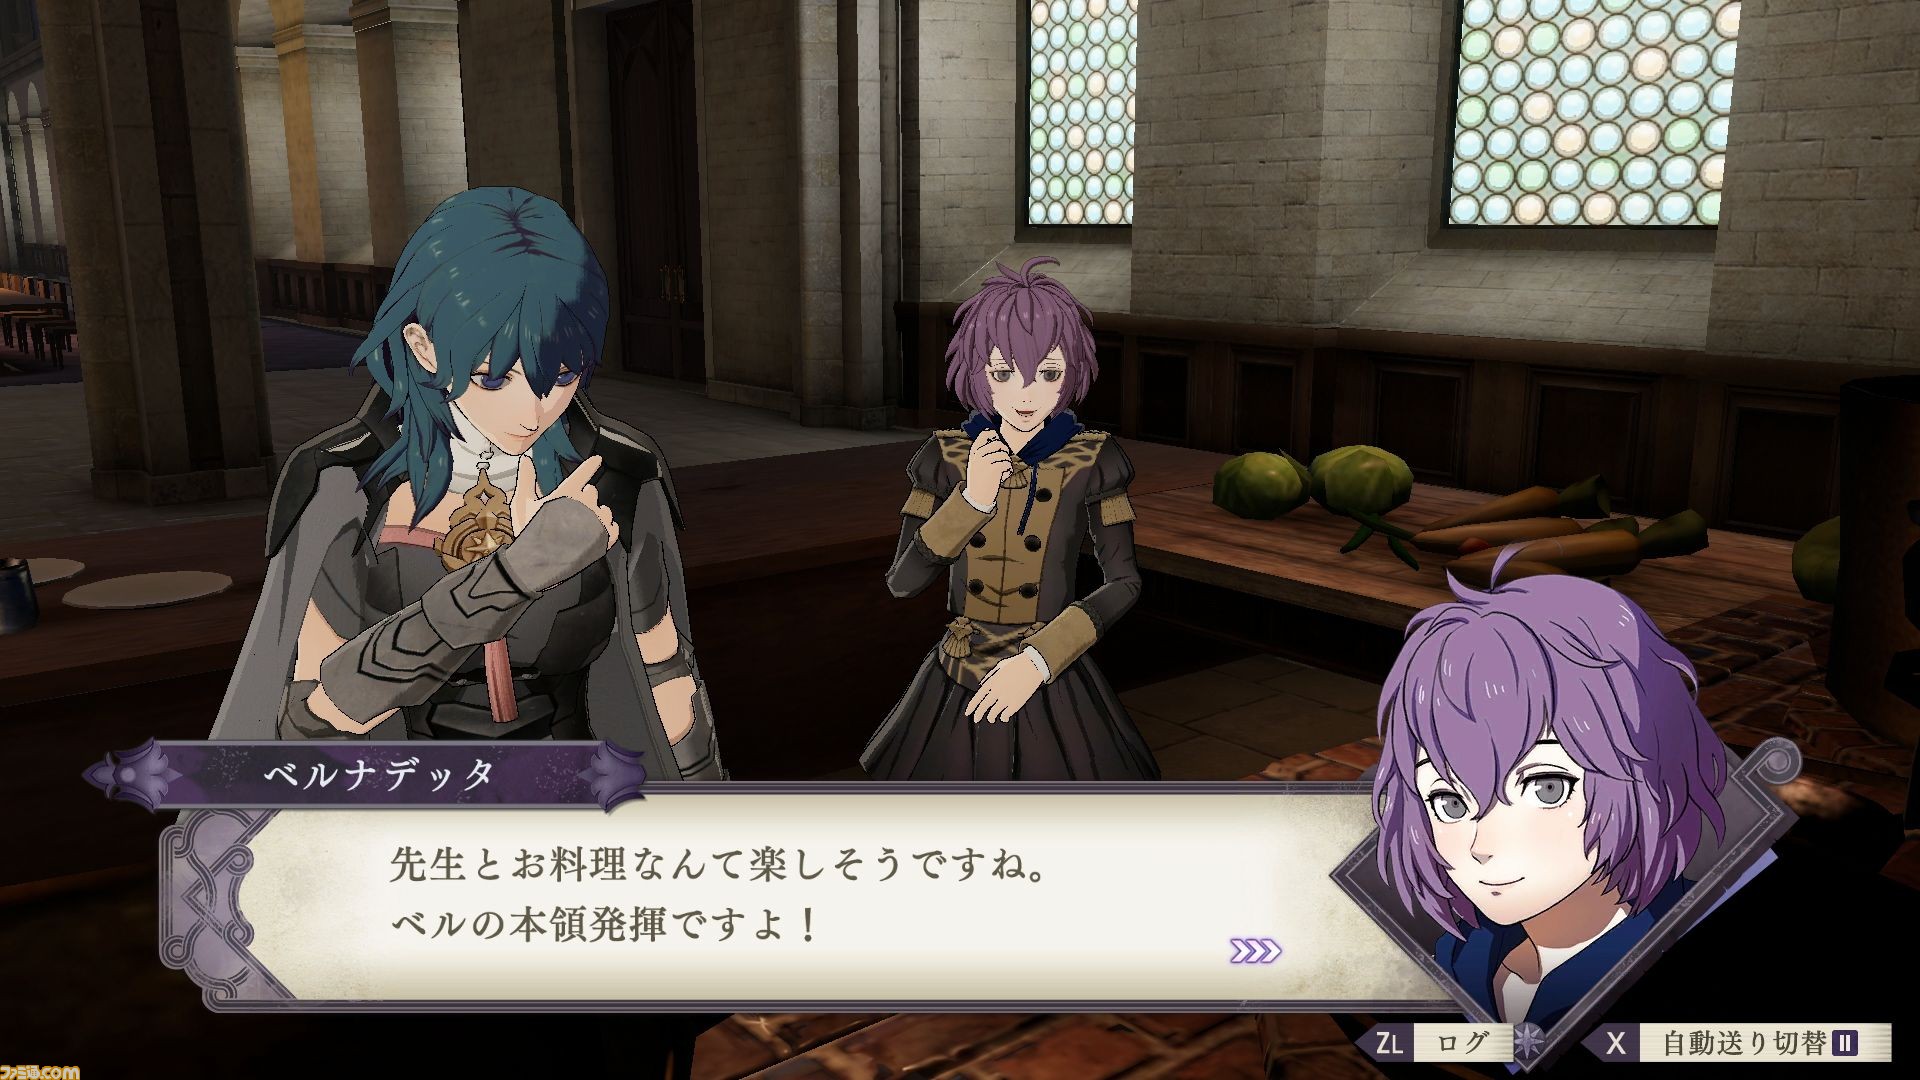
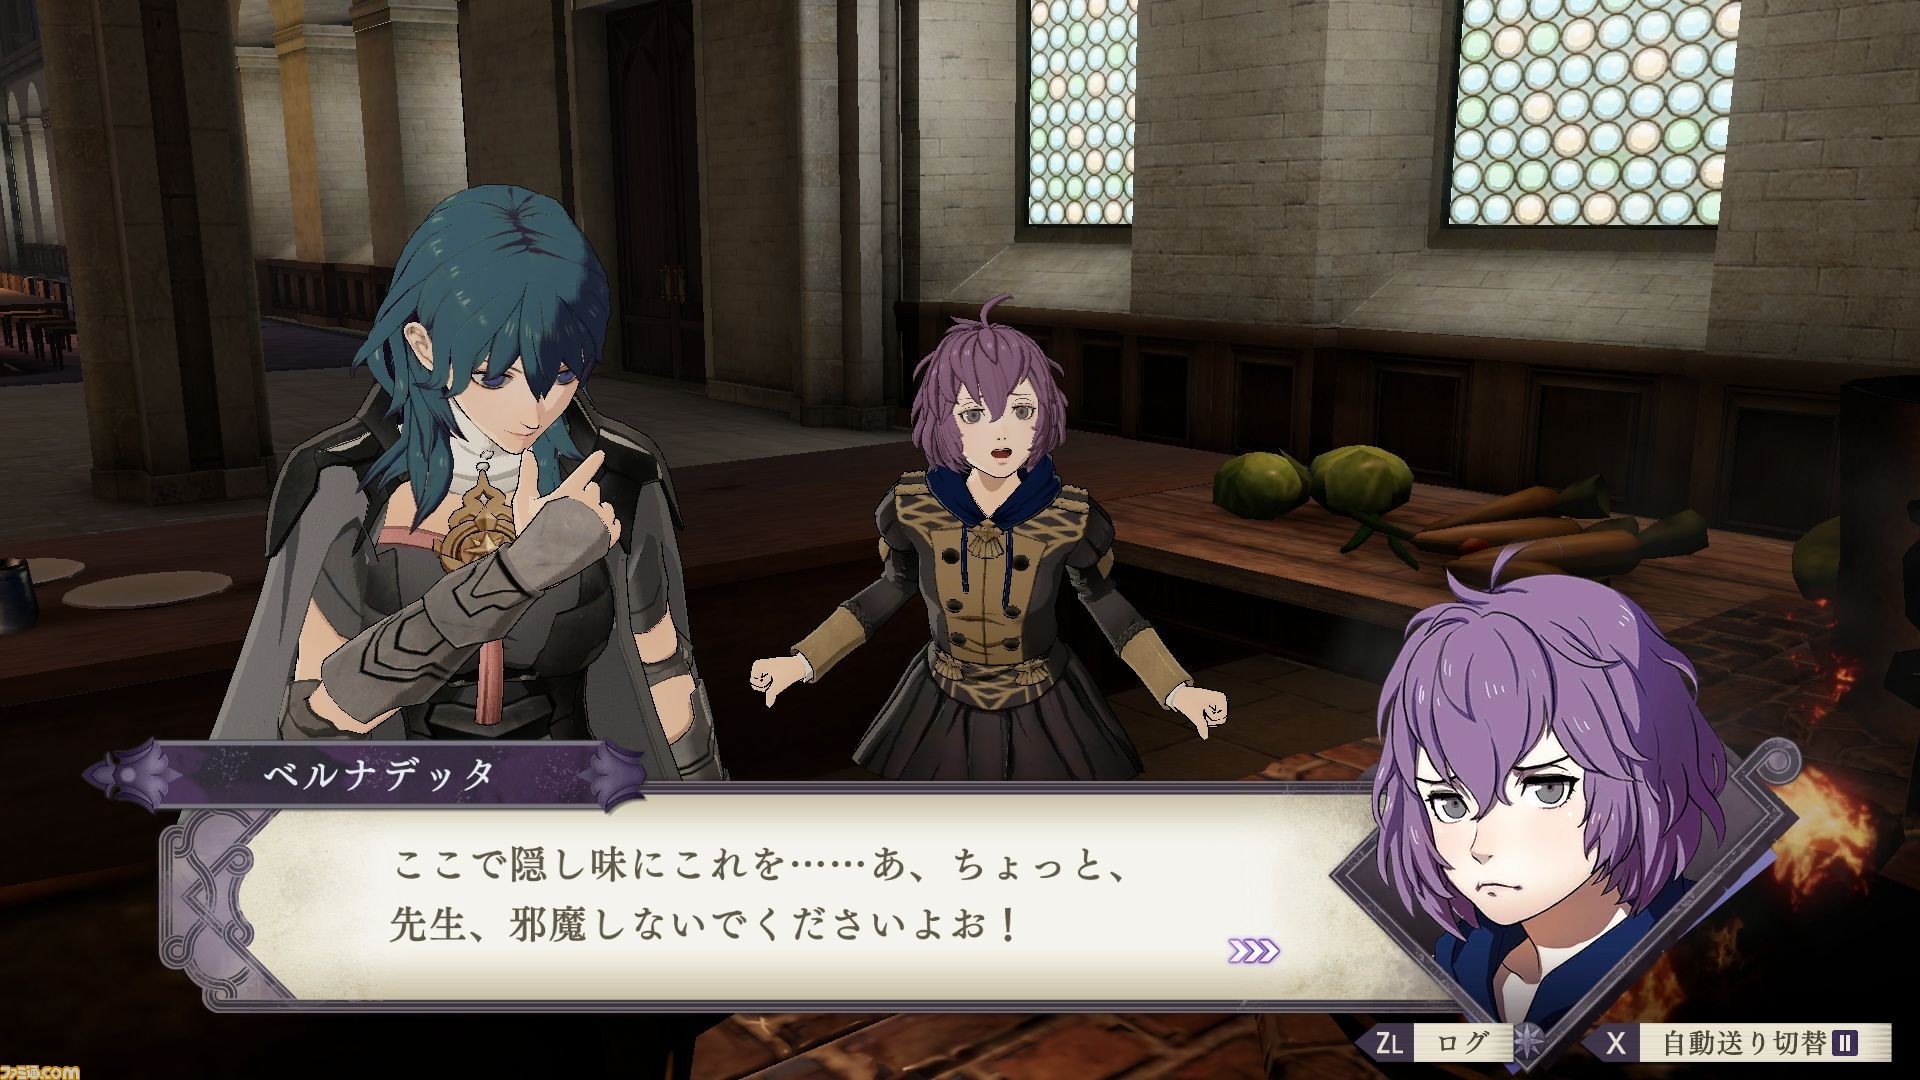
Now time for the cooking… Bernadetta seems pretty confident with her cooking abilities. Maybe it’s one of her hobbies? However it seems Bernadetta catches the protagonist sneaking in some hidden ingredients and is less than pleased. Oops, I thought it’d help the flavour, honest!
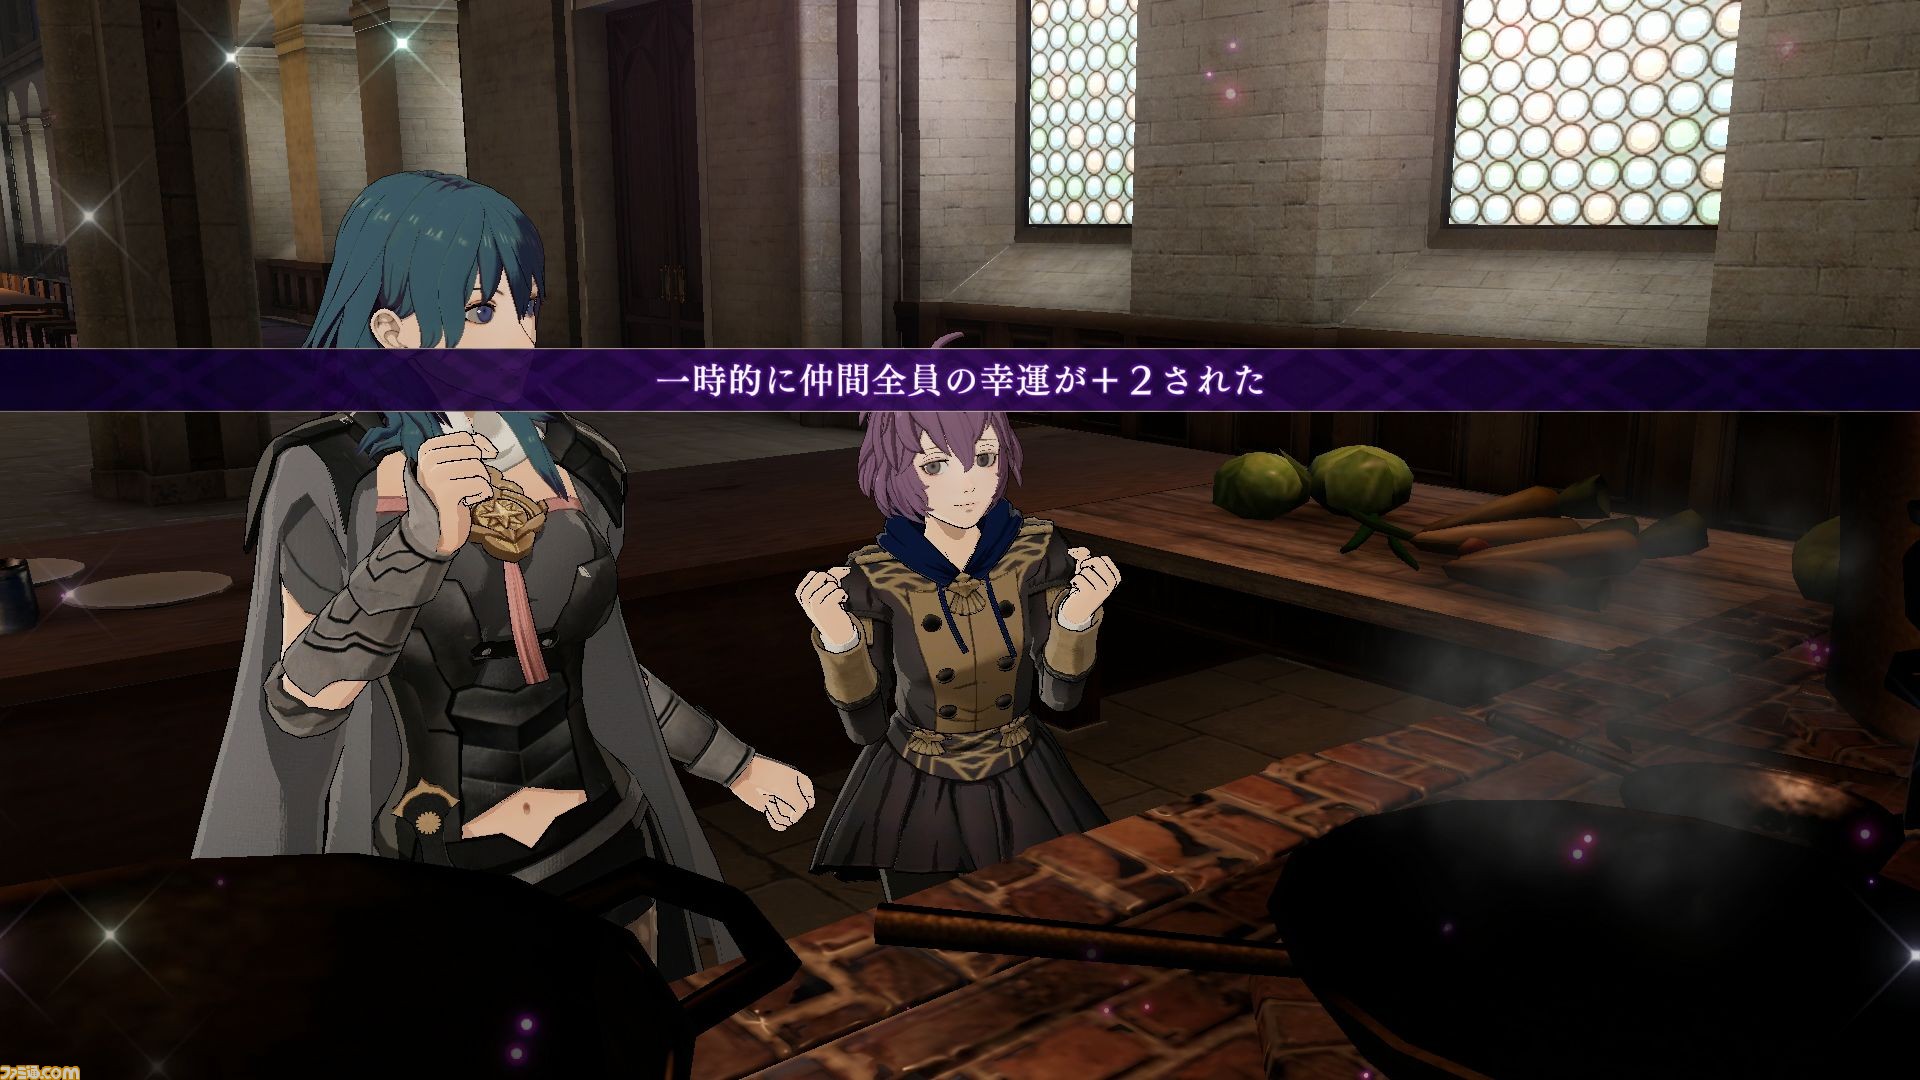

Thus, everyone gets Luck +2 temporarily. In addition, your Instructor Level increases a bit and so does your support level with Bernadetta. This time, there are two arrows in the support icon, which could be related to the up arrows before you started cooking. Perhaps the up arrows indicate the characters’ moods?

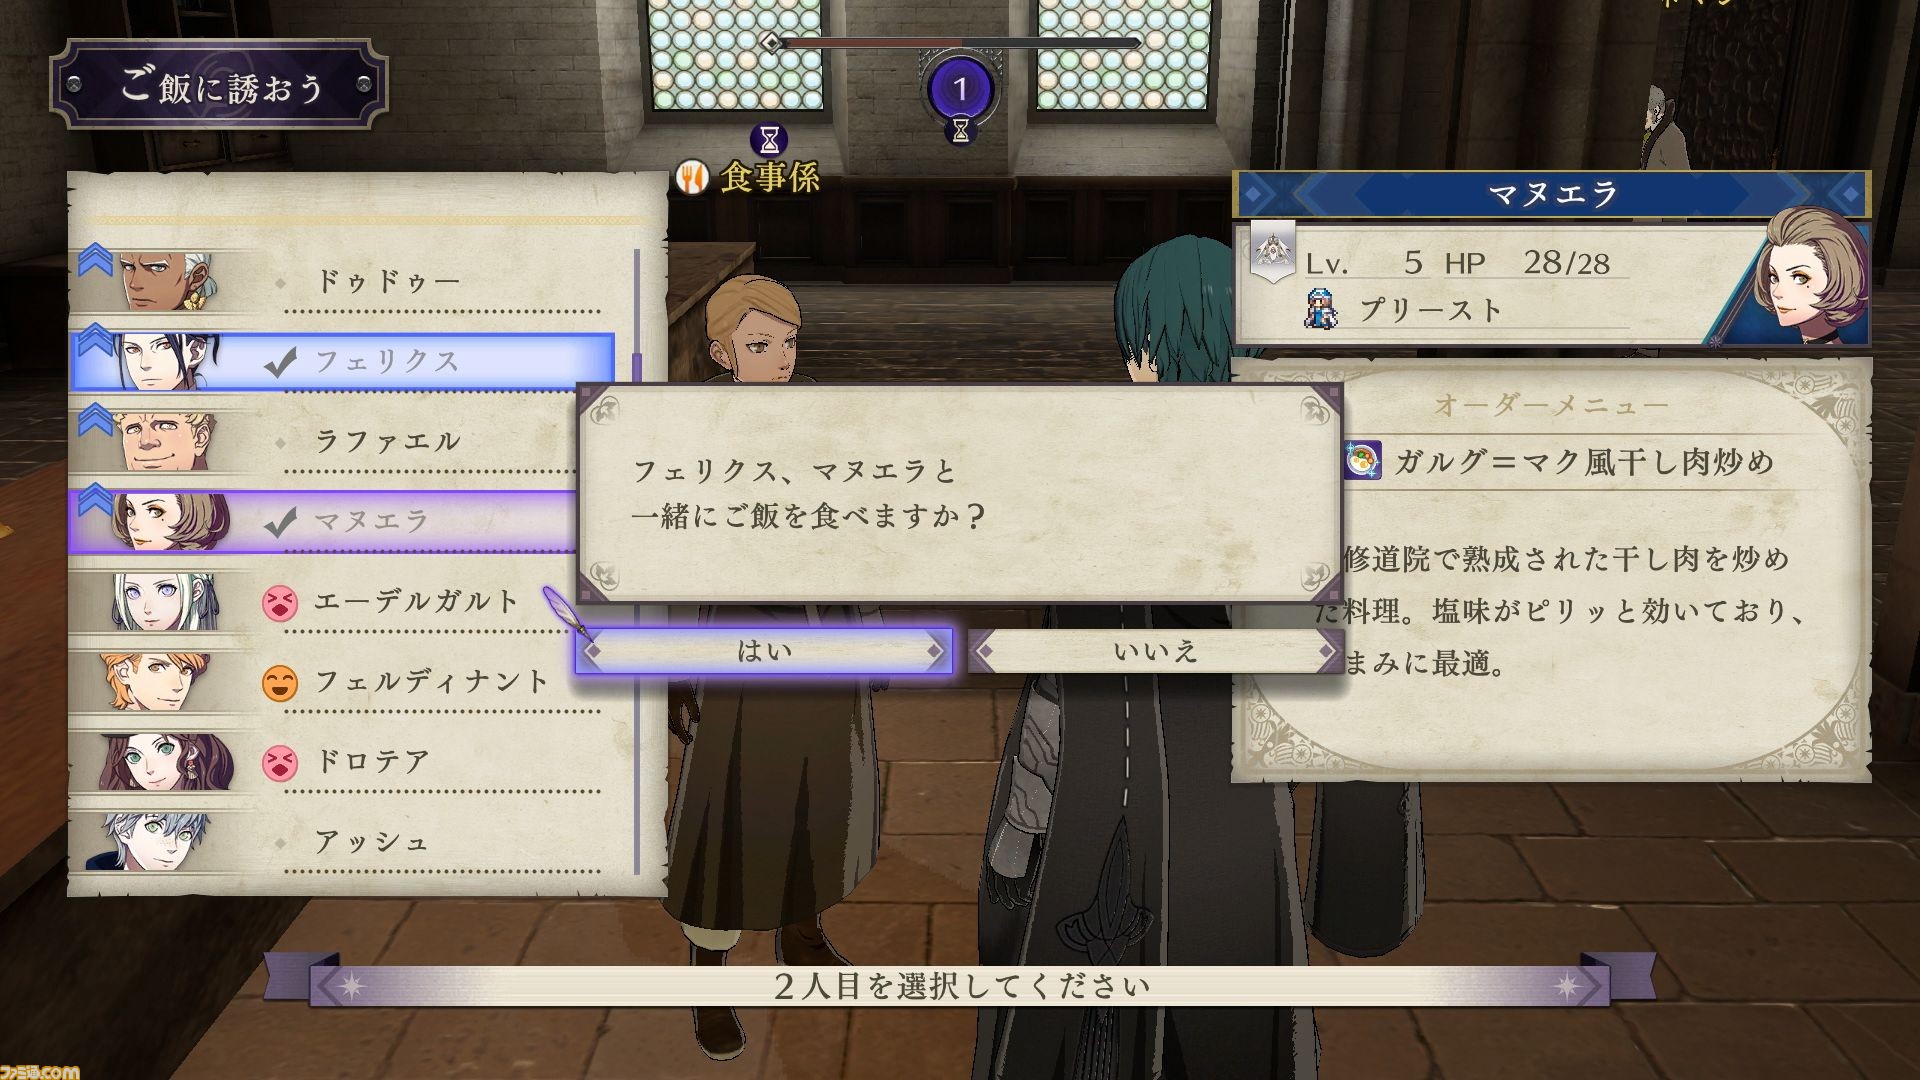
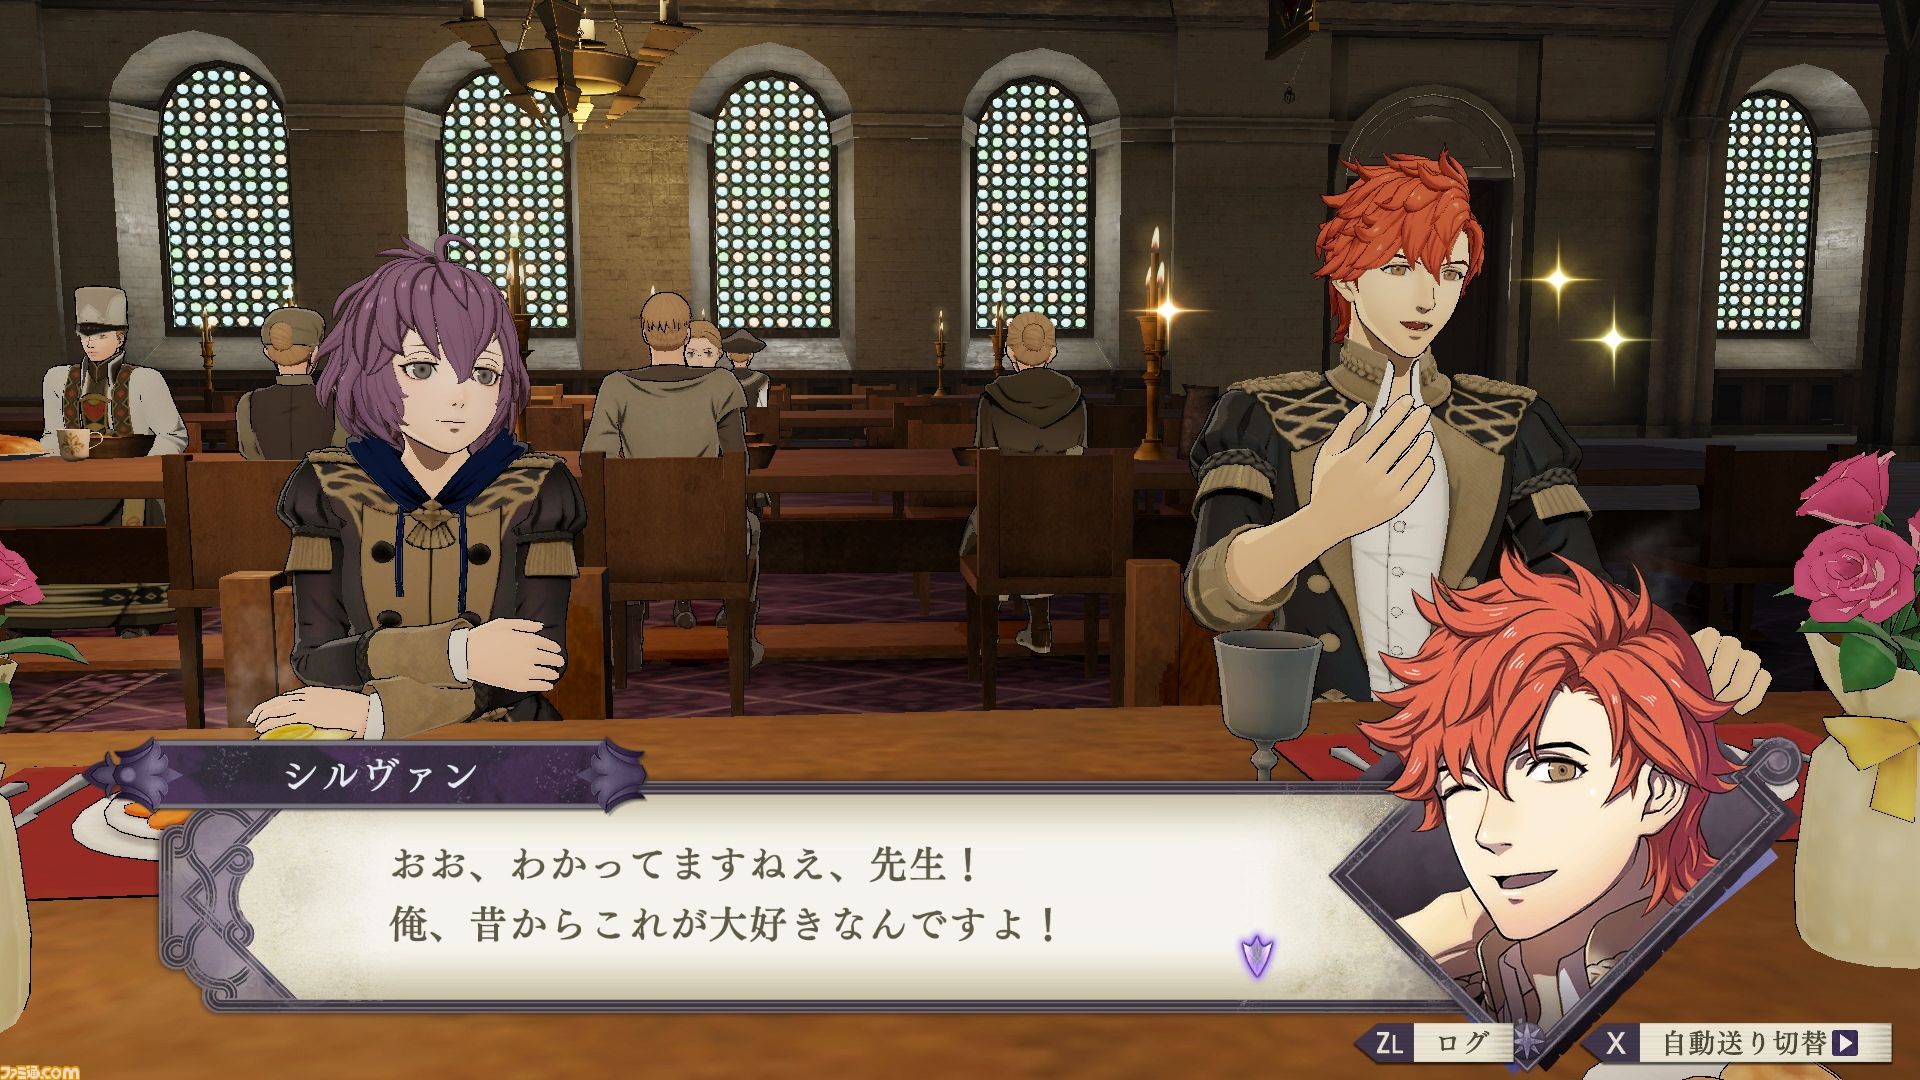
The second option lets you invite a select number of people to lunch. The lunch menu is different as well: Stir-fried Vegetables, Herring Hot Pot, Herring and Nut Tart, Fish Sandwich, 2-fish Butter Grill, Sumptuous Pike Grill, Garreg-Mach Style Meat Stir-fry, Spicy Boiled Fish and Cabbage.
The player is ordering the Garreg-Mach Style Meat Stir-fry, which requires Bird Meat and Chickpeas. Before ordering, it shows some of the characters who enjoy the highlighted meal. Next, you can choose two characters to dine with. This time, at least, the up arrows correspond to characters who enjoy the meal.
Notice how the Black Eagle students have Motivation icons (the smiley faces) next to their portraits and names. Feeding your students lets you boost their Motivation, so you can teach them more. This suggests that only they are under your command; the other characters are probably independent, but you can still interact with them.
In fact, we’ve already seen a screenshot of two students from different houses dining together. Of course, logically, it shouldn’t be strange for students from the same academy to be with each other, despite being from different classes. Anyhow, the player picks Felix and Manuela.
Update: Nearly forgot, Manuela is listed as a Level 5 Priest. Funnily enough, Priest is an intermediate class available at Level 10–and Class-Changing apparently doesn’t reset your Level. So Manuela seems to have cheated the system. Or perhaps she took the exam elsewhere…

The benefit of picking characters is that you can increase the support points between the two characters and the protagonist. By this, I mean the protagonist gains points with Felix and Manuela, while Felix and Manuela also gain points with each other. Like eating with everyone, you’ll gain experience towards your Instructor Level.
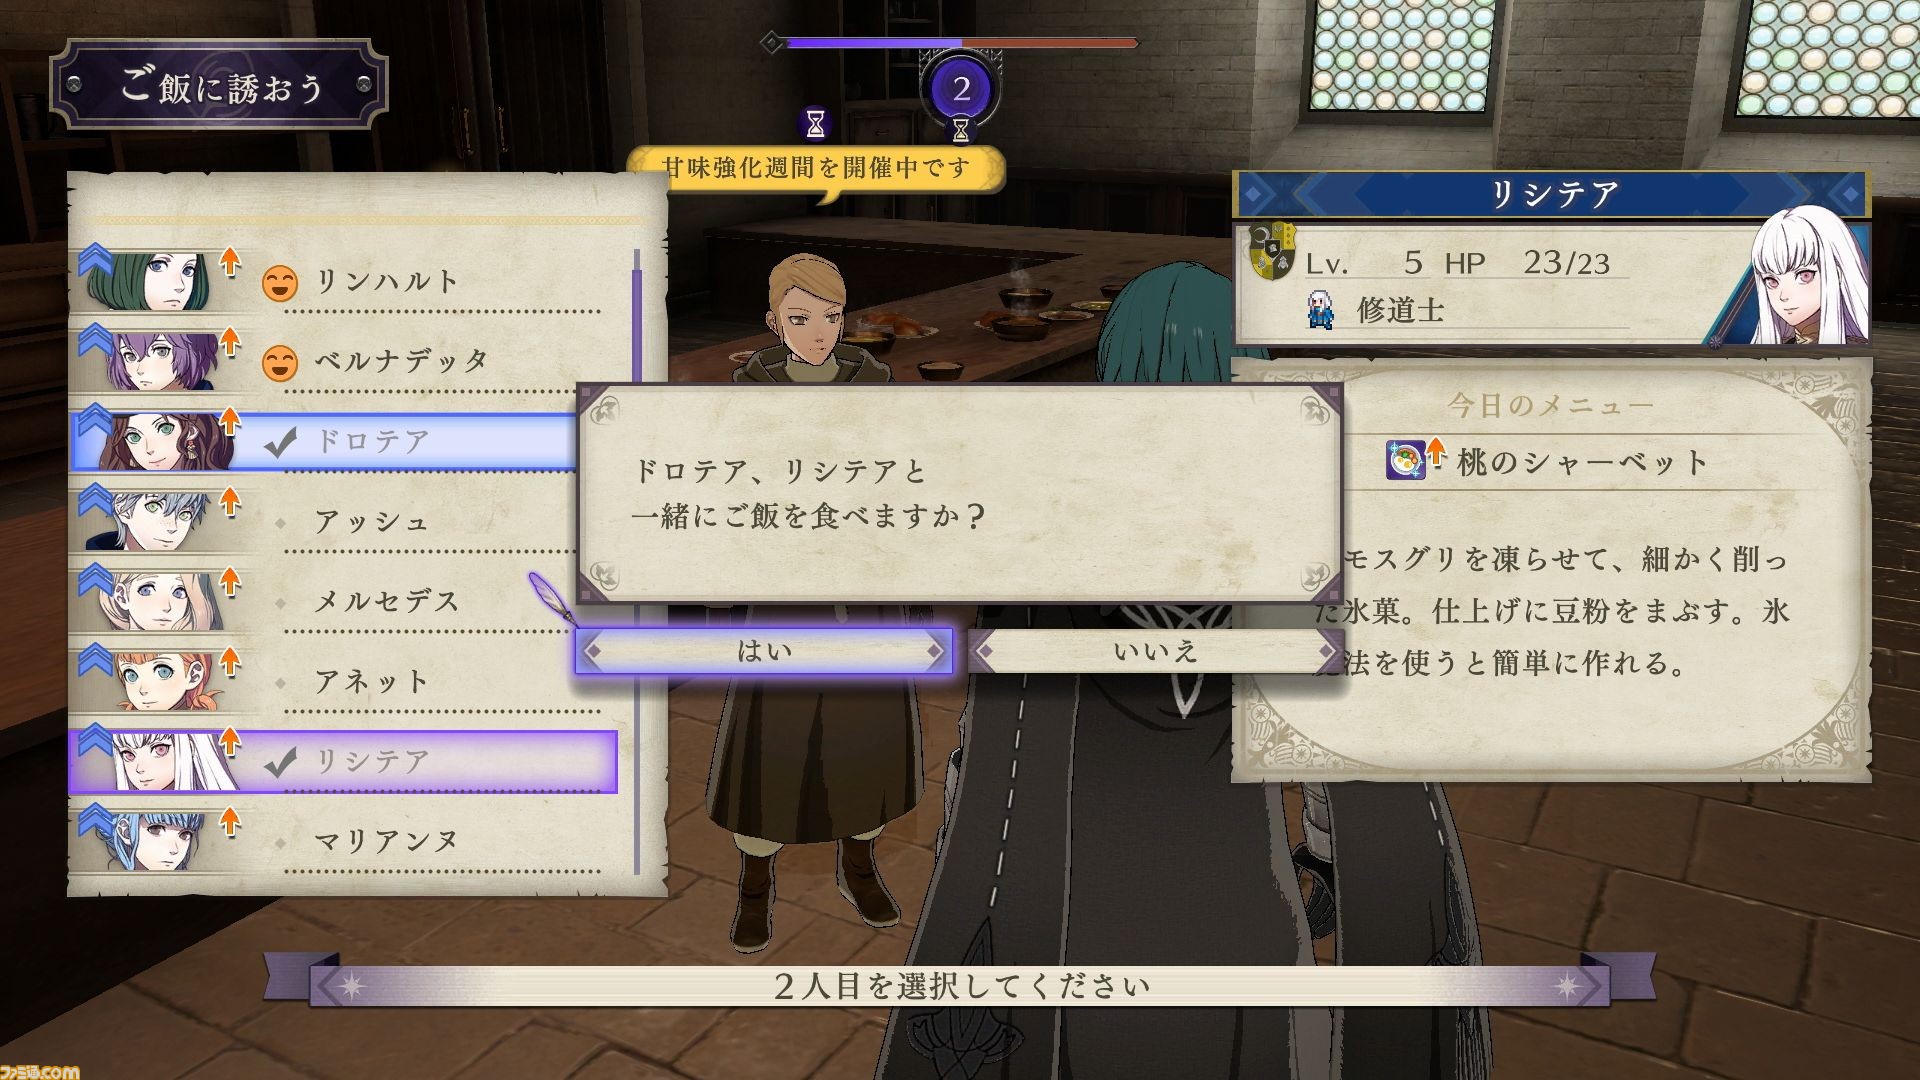
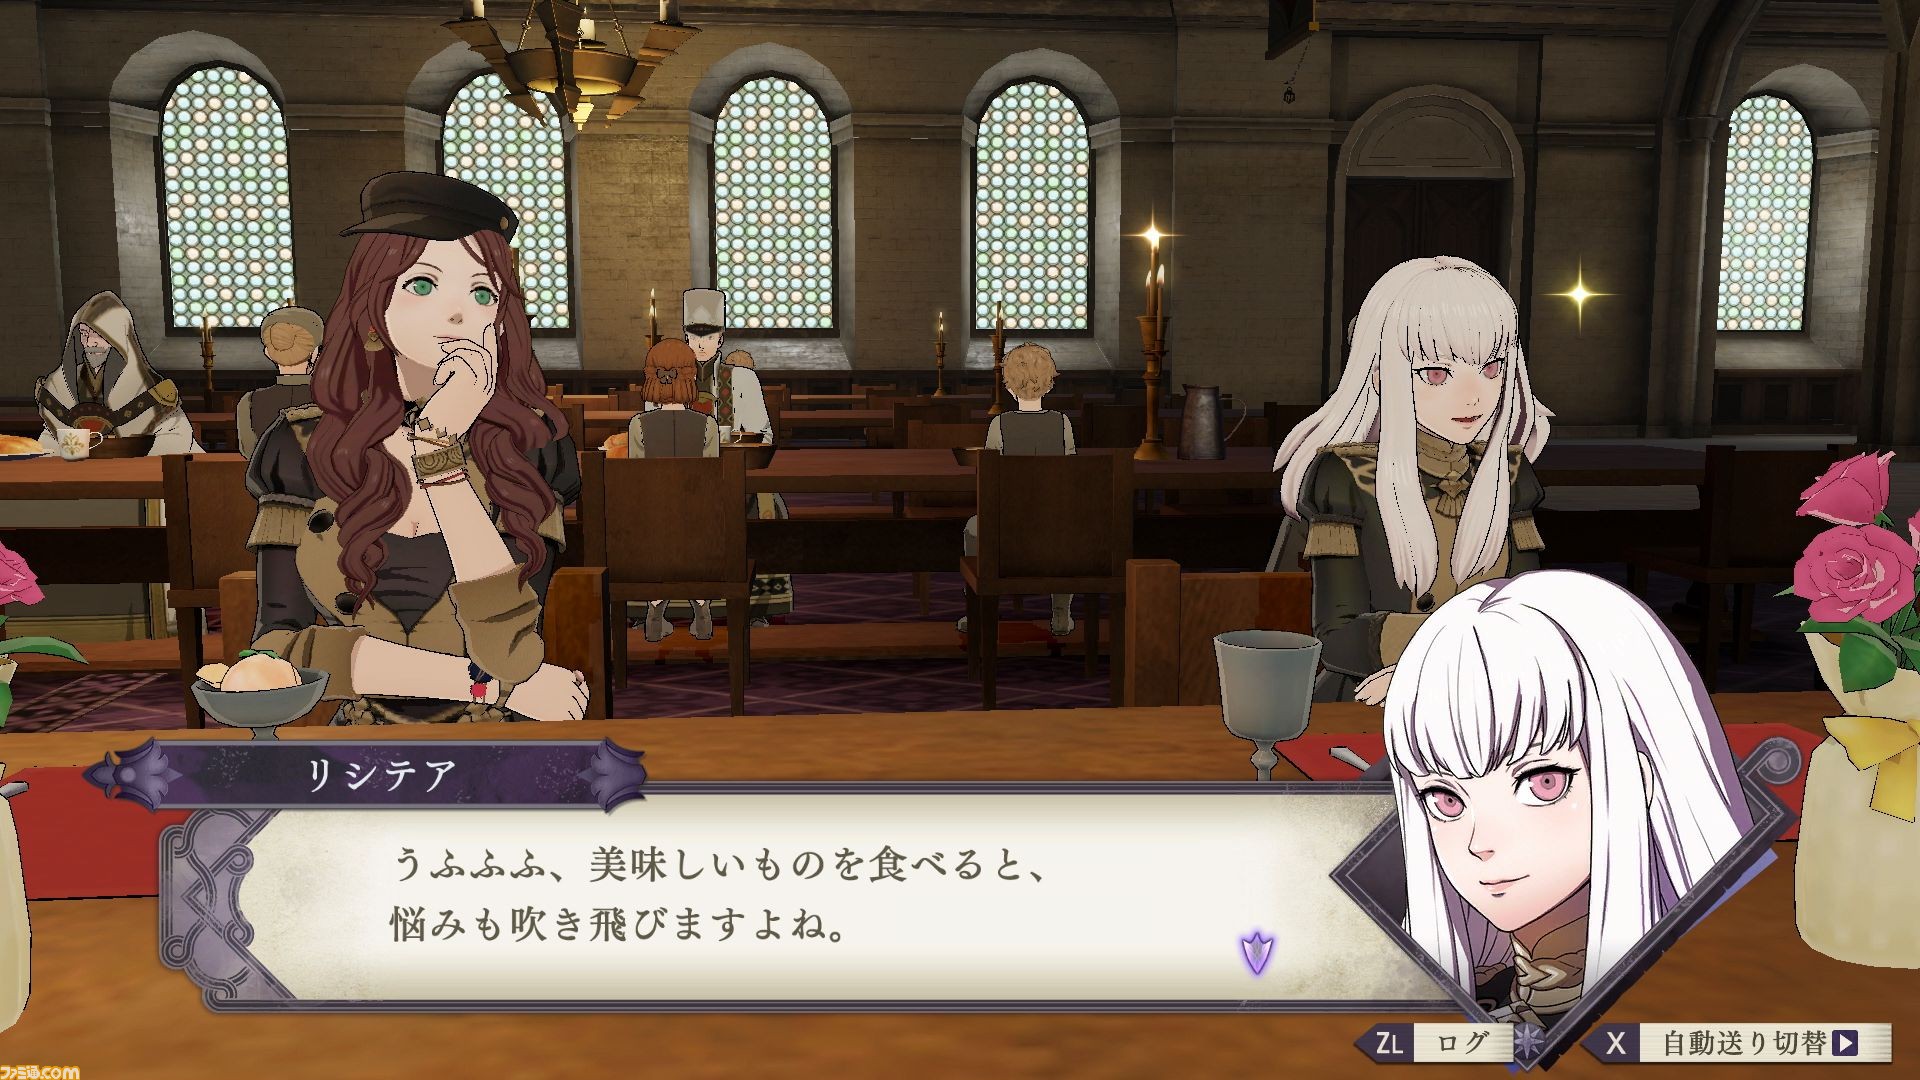

Our third example seems to be a special mini-event. This is the “sweet-enhancing weekend” during the 8th of the Flower Crown season. There’s a special menu item, the Peach Sherbet, which seems to temporarily boost stats and every character seems to enjoy. Who doesn’t like sweets?
The player chooses Dorothea and Lysithea. Again, all three characters (including yourself) gain support points between each other. Also, since you’re apparently leading the Black Eagles, Dorothea’s Motivation is increased as well. Looks like she’s ready for more lessons now!
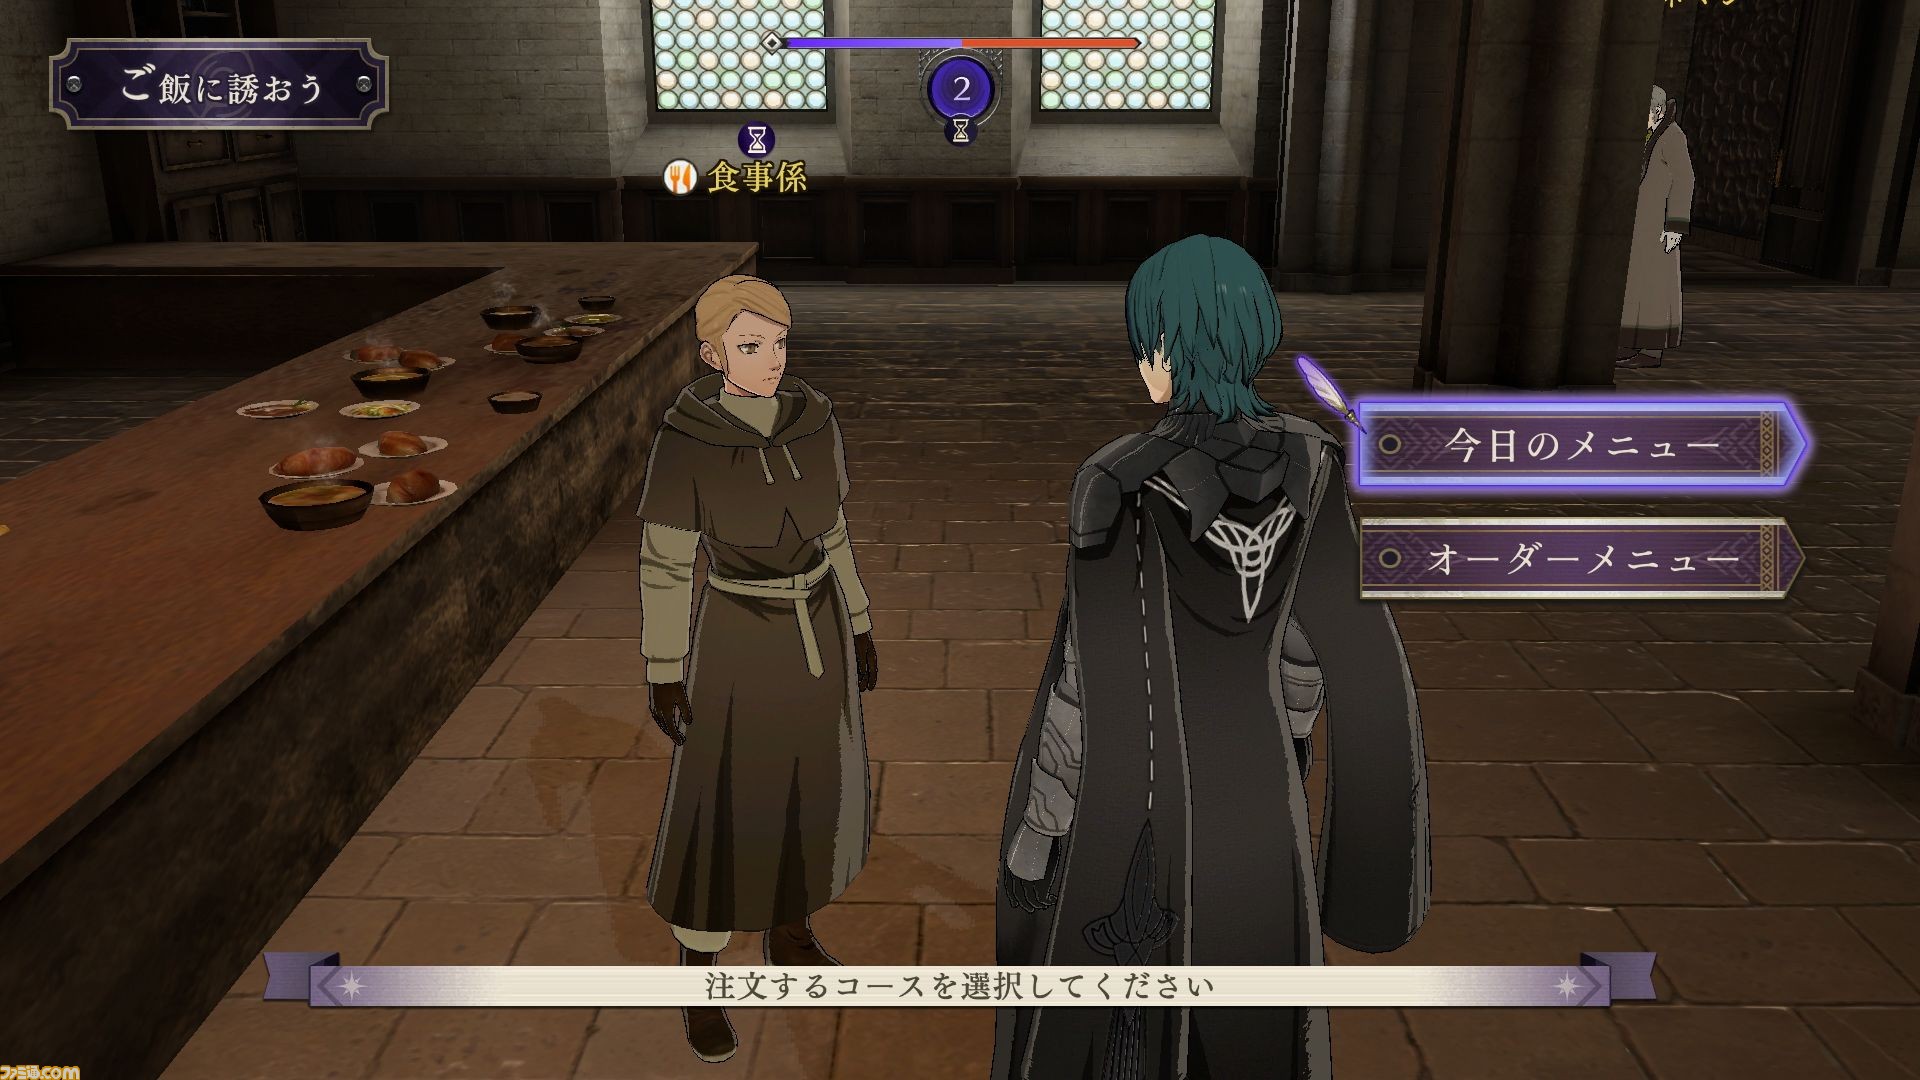
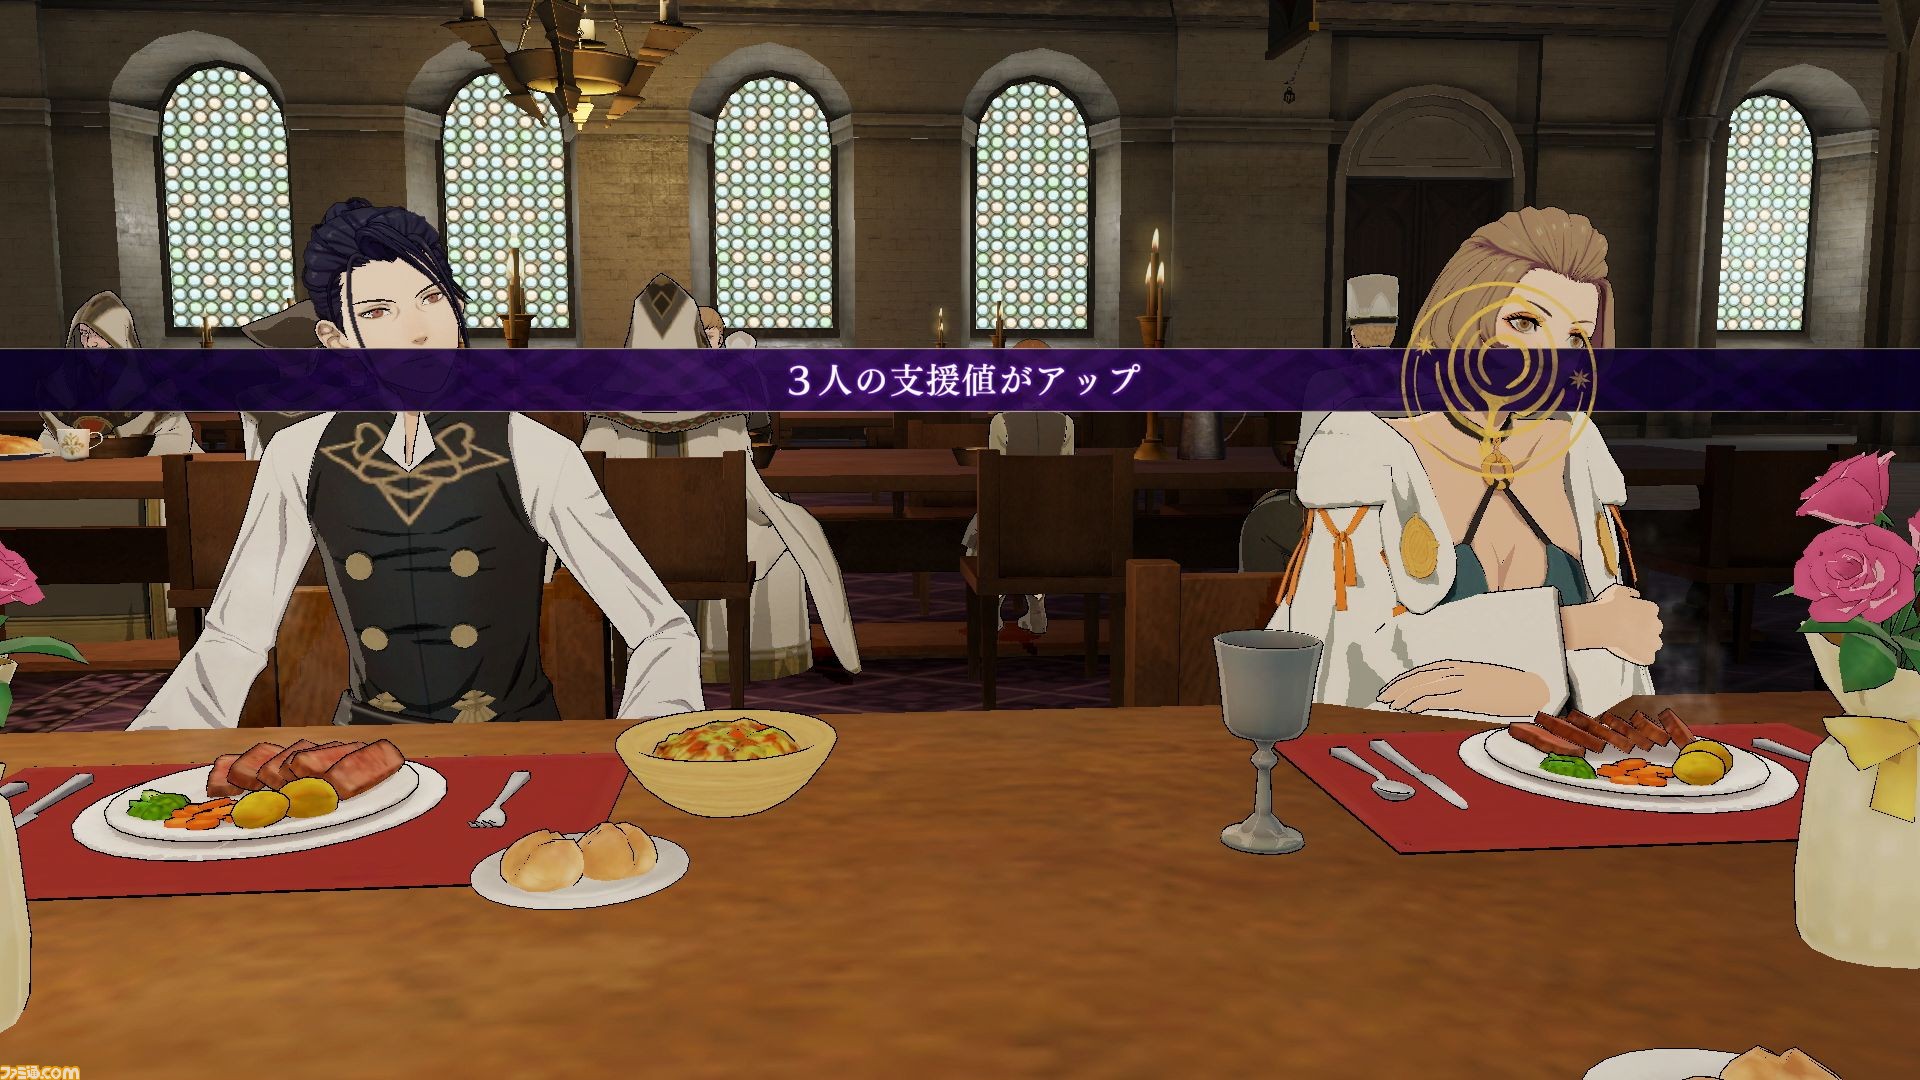
D’ya want another example? Sorry, “no” isn’t an option. This time, we can see the initial choices for the lunch invitation option. The two choices are Today’s Menu and Order Menu. I’m not sure what’s different–maybe today’s menu includes the featured dishes for the day? Anyway, I think the player selects this one.
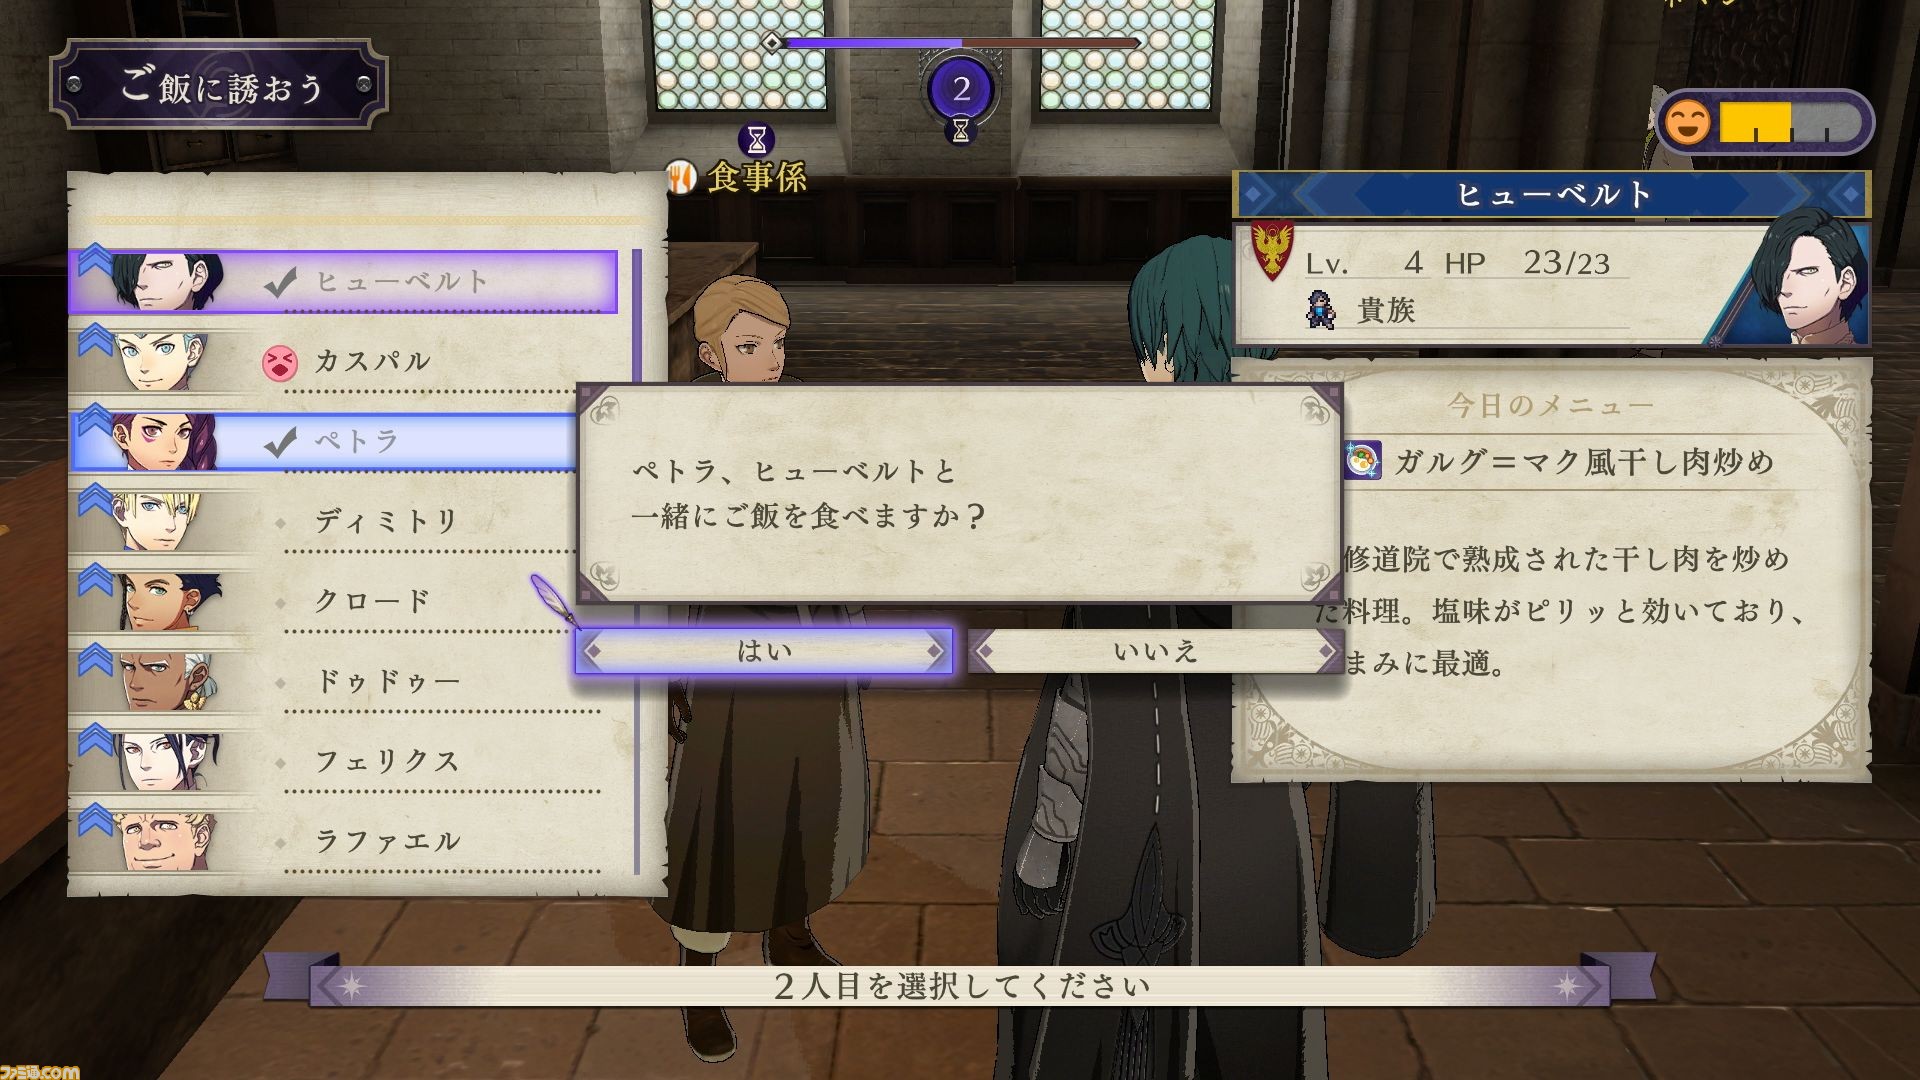
Once again, they choose the Garreg-Mach Style Meat Stir-fry. I’m not surprised it’s popular! Hubert and Petra are the lucky diners today.
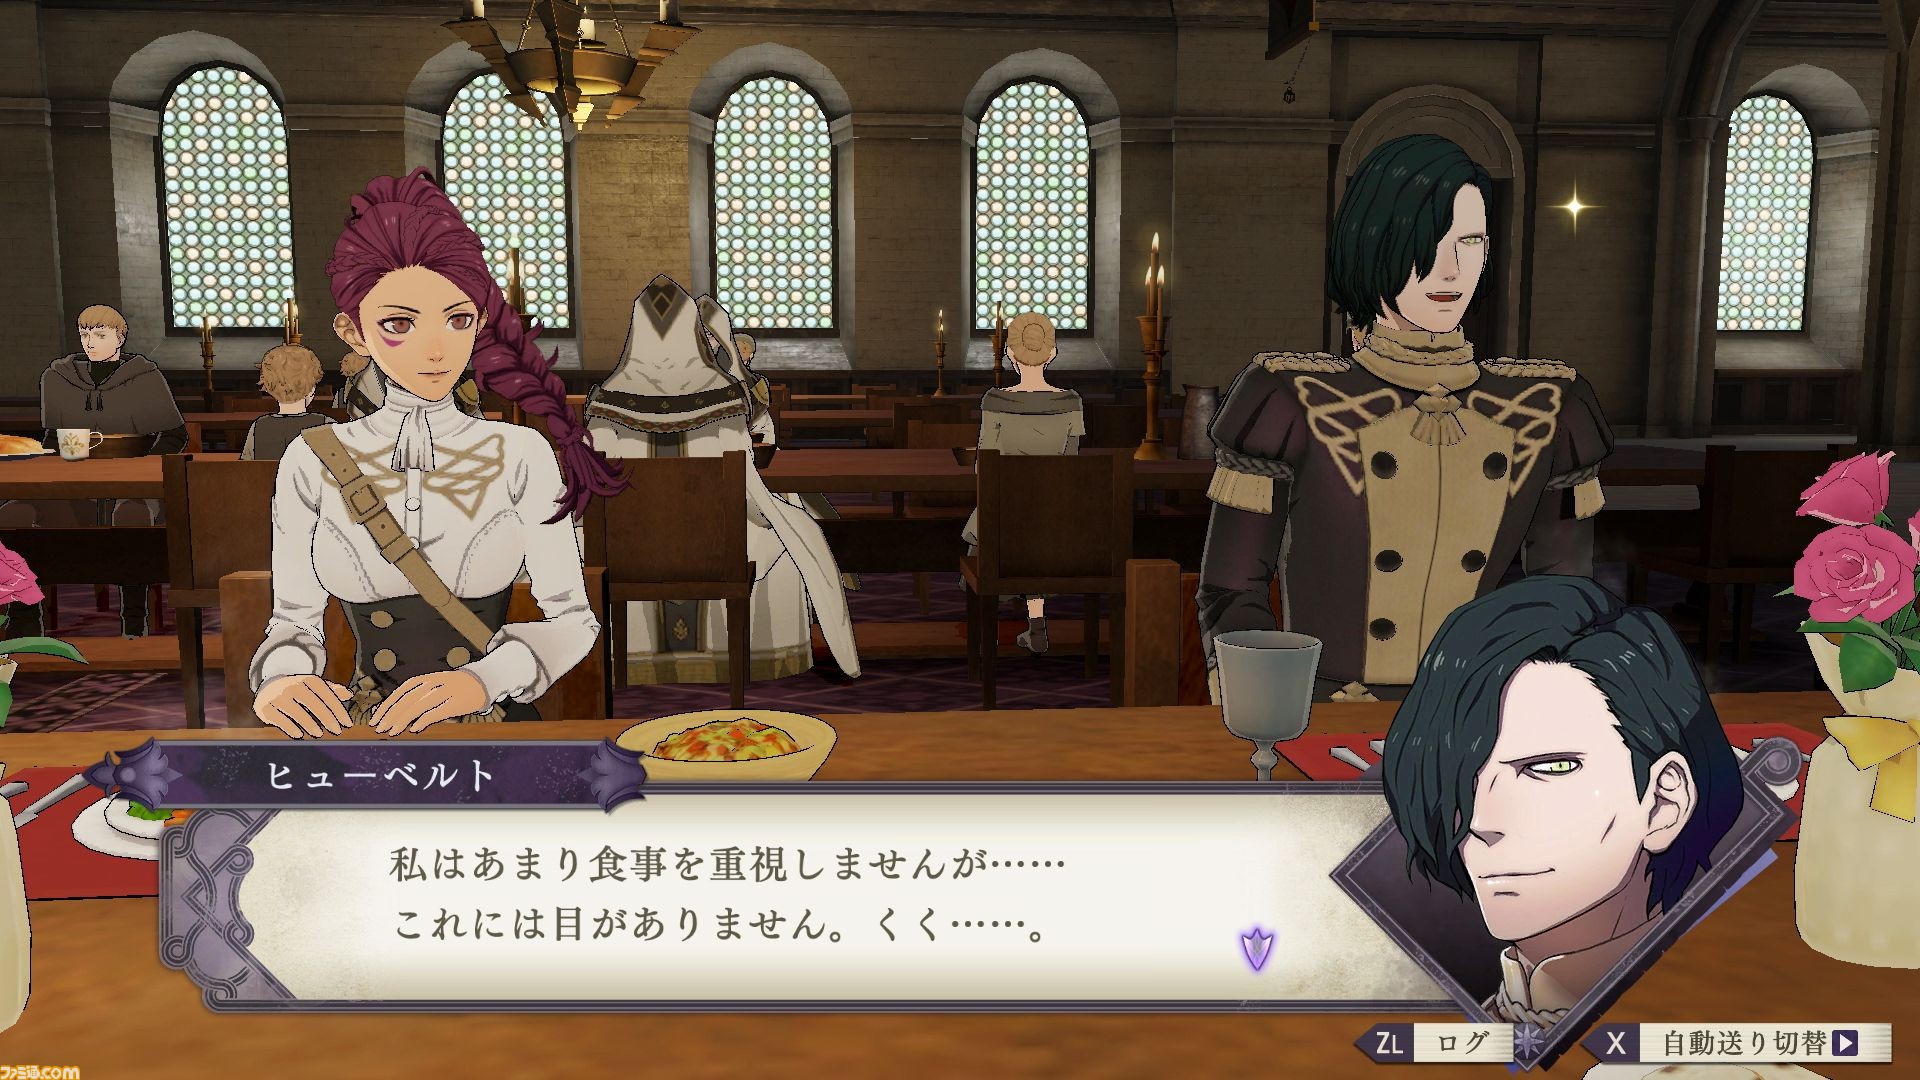
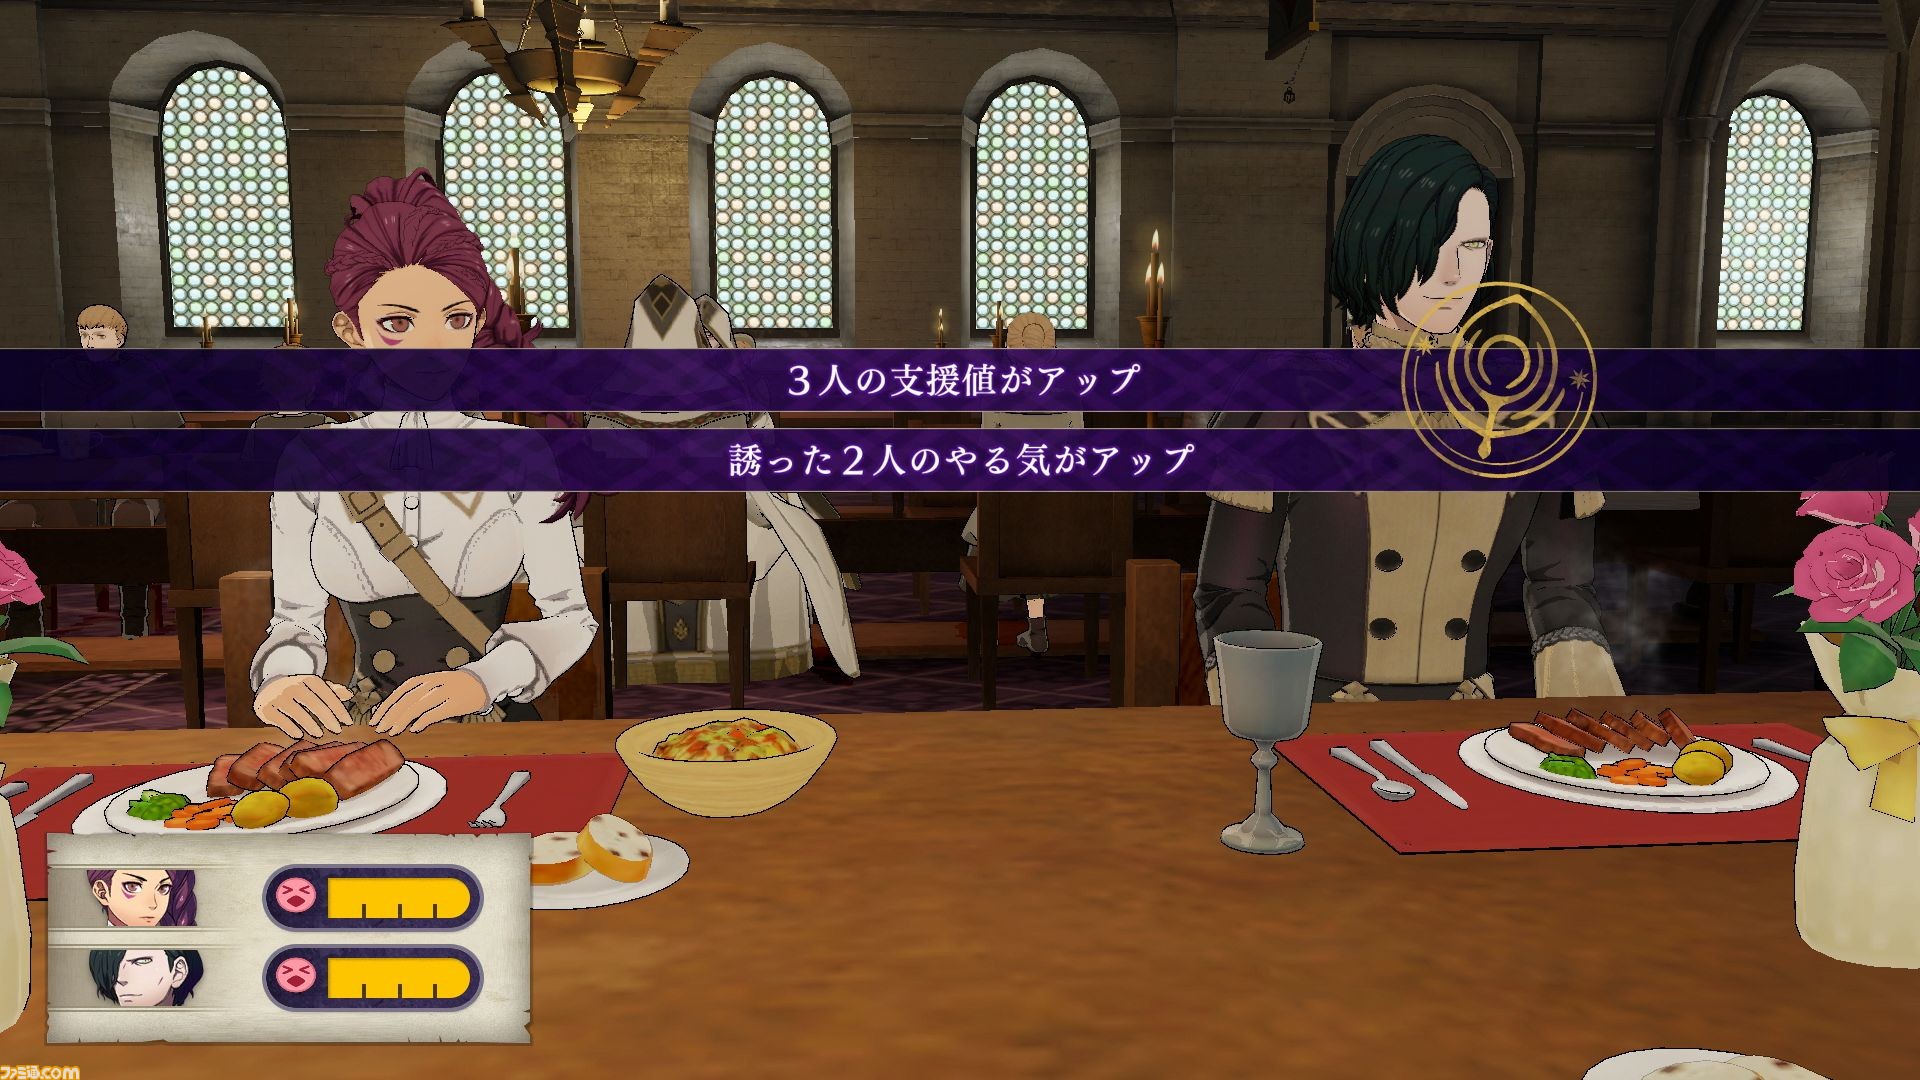
As expected, the protagonist, Hubert and Petra all gain support points between each other. Also, since both students are from your chosen house–the Black Eagles–they both gain Motivation. I’m guessing players can choose to dine with their own students to boost their Motivation to raise their professor levels faster, or other students to boost their support levels (since you don’t fight using them, to build supports that way).
Greenhouse

Man, the academy just keeps on giving. But if you feel like giving back, you can spend time at the greenhouse, growing crops. Thankfully there isn’t a brutal war being waged. Not yet anyway. So don’t worry about misspending your time. To begin with, you can select a seed. The current ones are Grass, Fódlan West Flowers and Yellow Flowers.
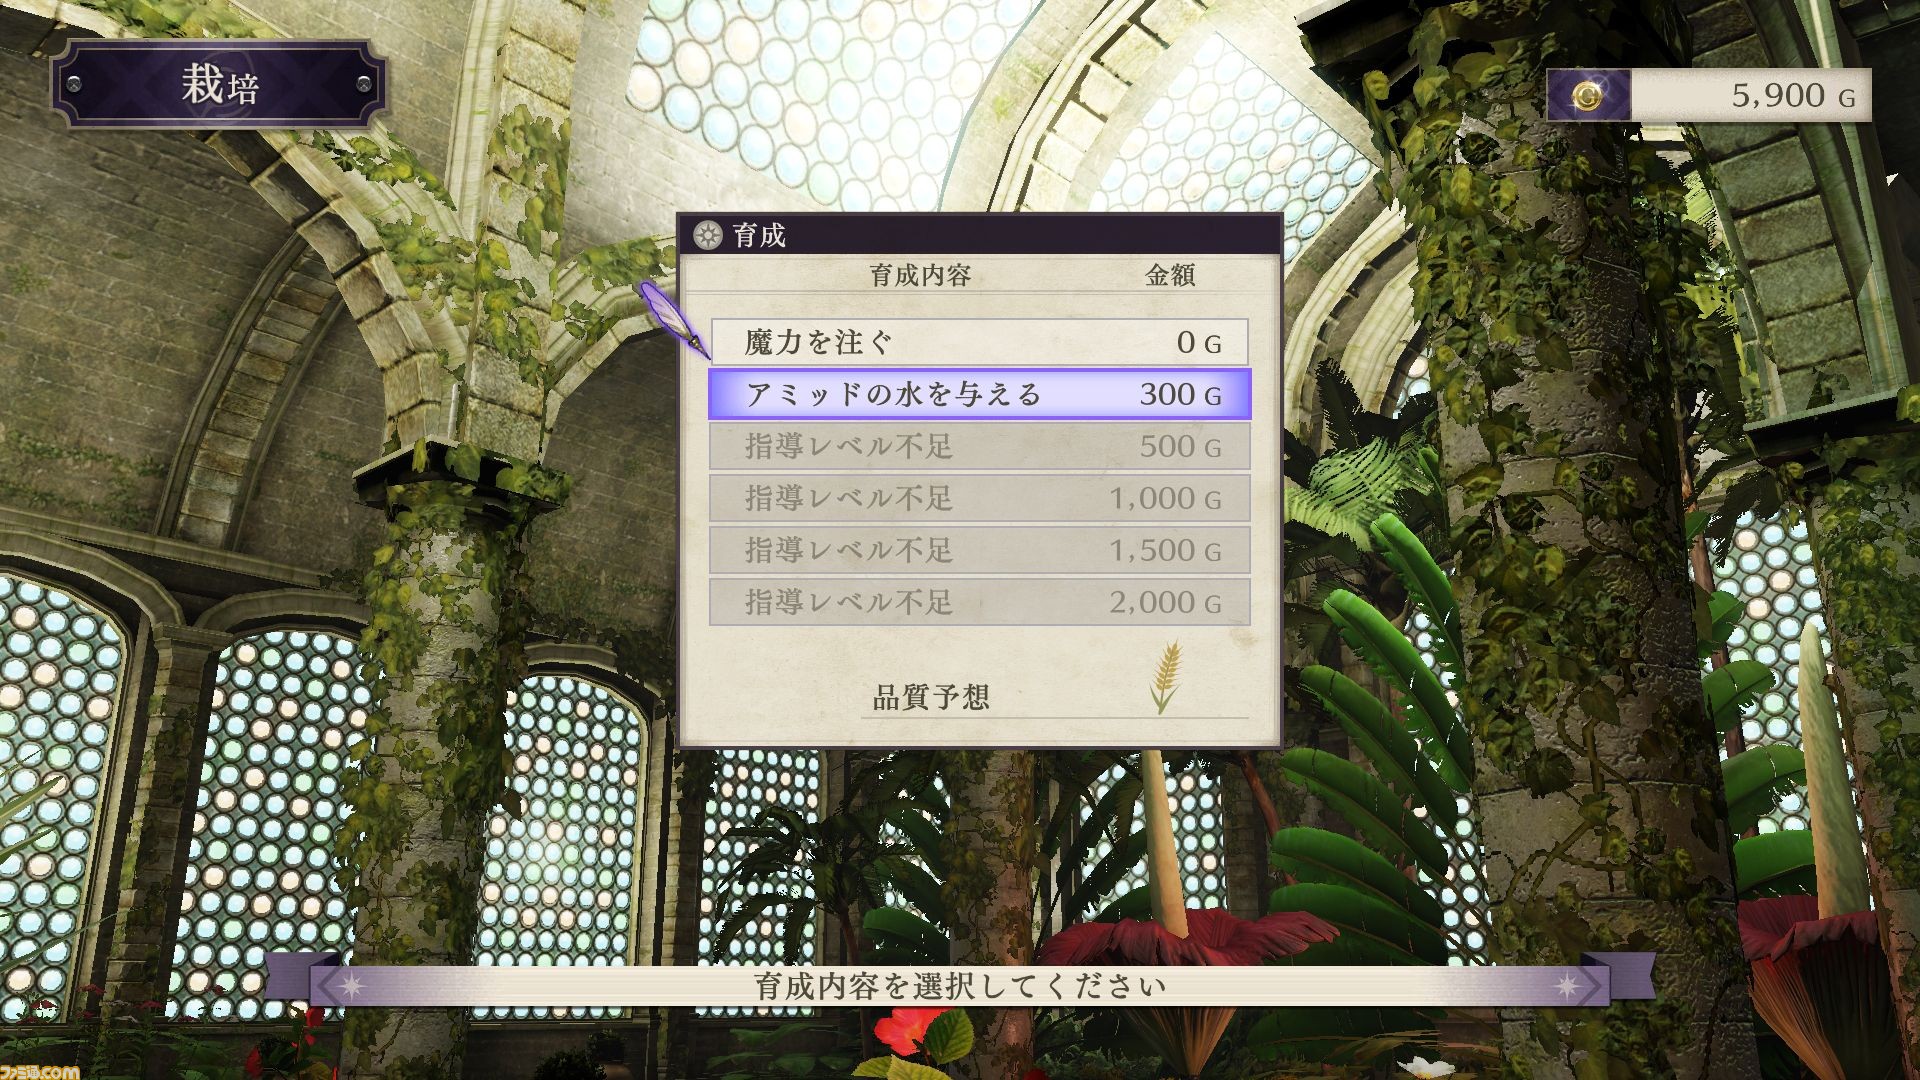
Next, you can choose a nurturing program. But it’ll cost money. Available ones include Use Magic and Give Airmid Water. The first one costs 0G and probably isn’t recommended (unless you want magically-enhanced crops) while the second costs 300G. Other options are unlocked as you raise your Instructor Level.
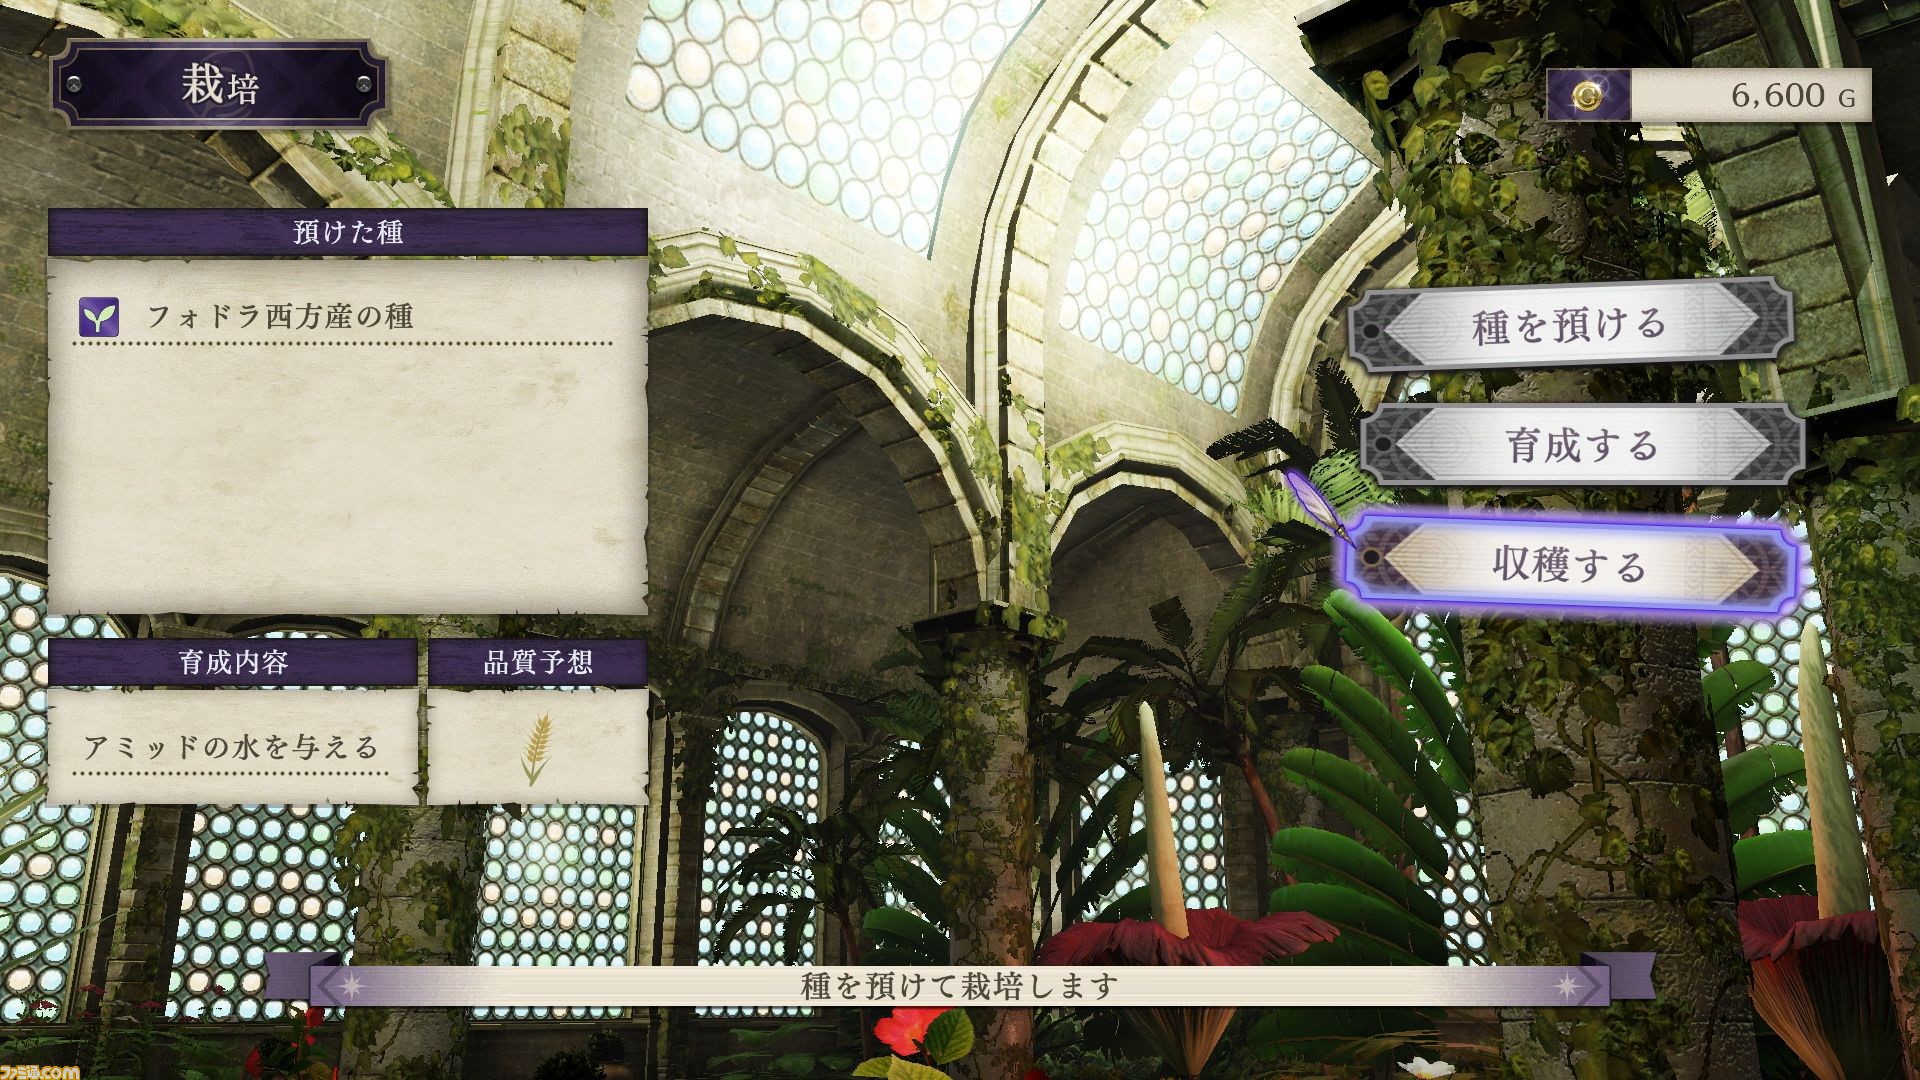
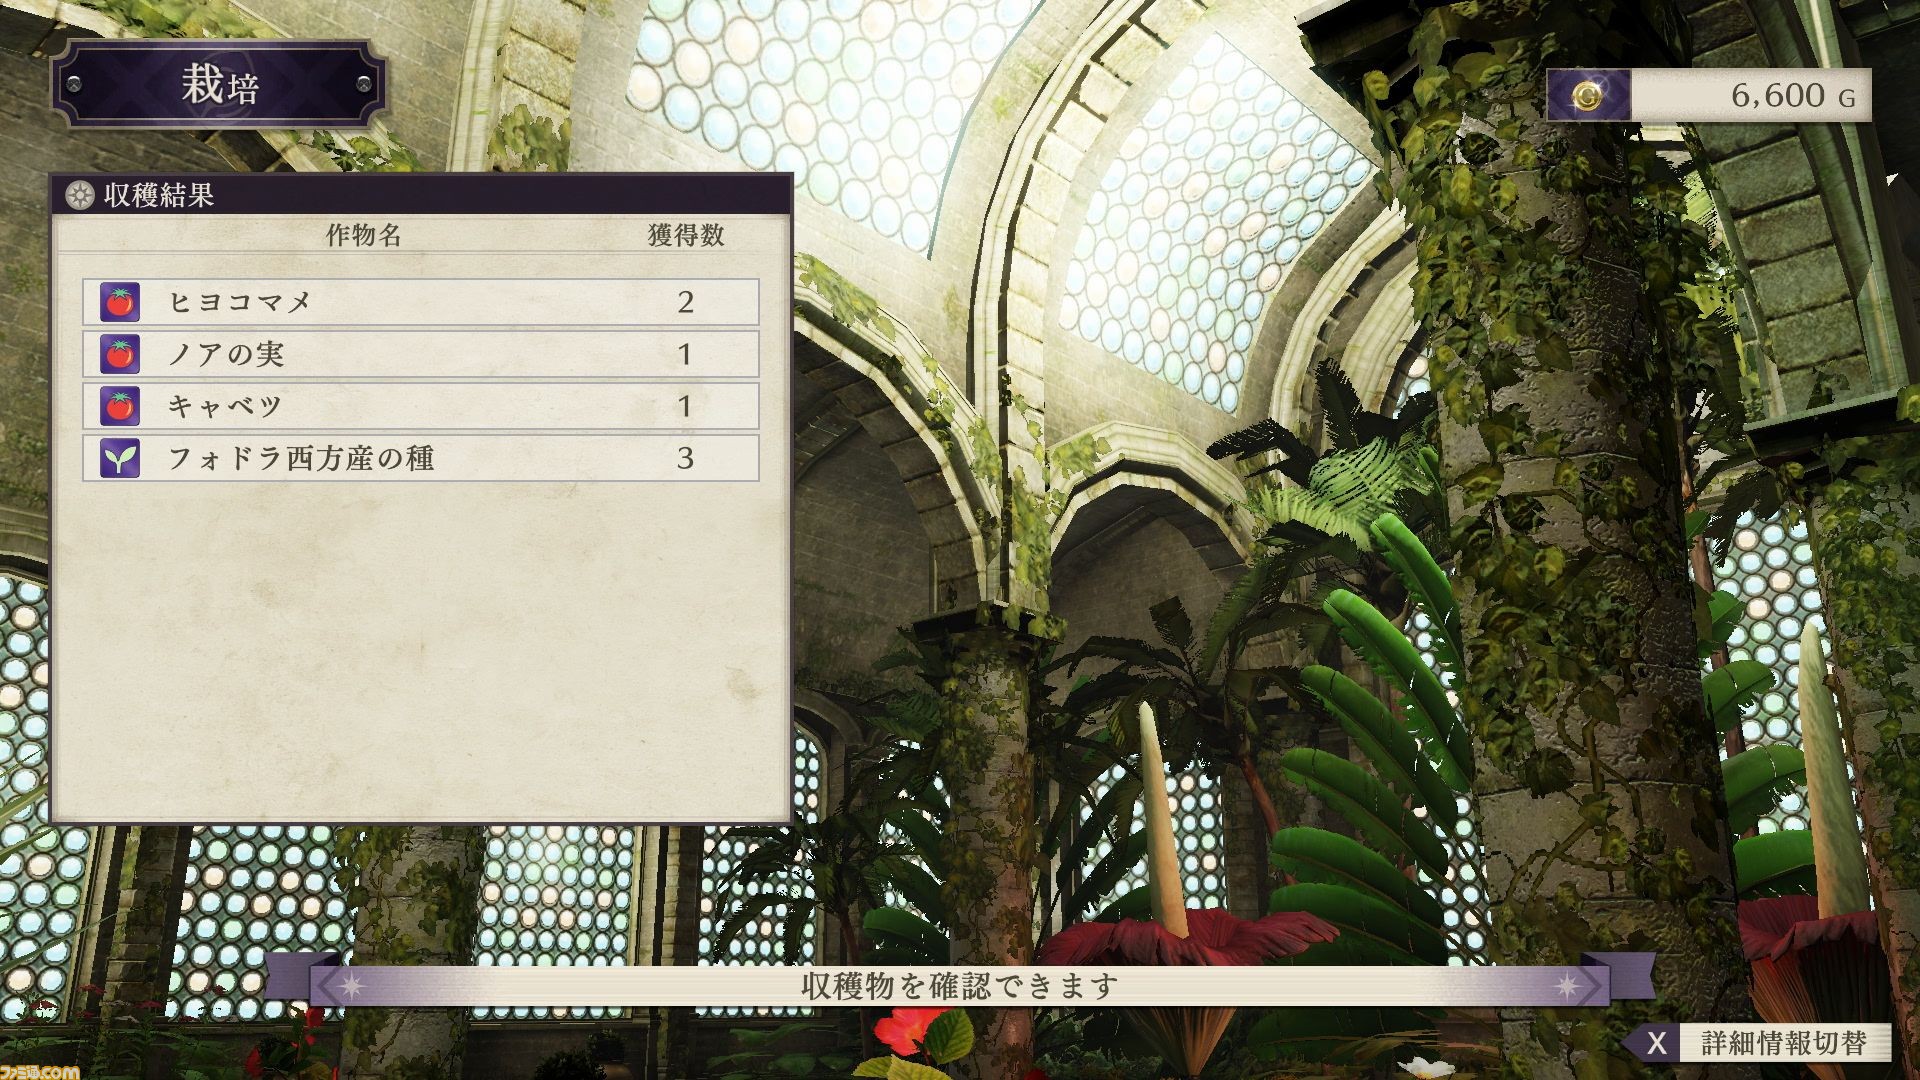
The player wisely goes with the Airmid Water. Oh, Airmid is a place on the world map, but you could probably guess that. The menu items are Place Seeds, Nurture and Harvest. Later on, harvesting yields Chickpeas, Noah’s Fruit, Cabbage and more Fódlan West Flower Seeds.
According to Famitsu, you can combine multiple seeds to get different crops and flowers. Crops can be used as cooking ingredients, naturally. Meanwhile, flowers can be given as gifts. Hmmmm.
Map

Ah, the trusty map. When strolling, there’s a mini-map displayed in the top-right corner, so you can see where you are, as well as the locations or directions of quest-givers and whatnot. Right now, it’s the 11th day of the Harp Season and you’re somewhere in the academy courtyard.
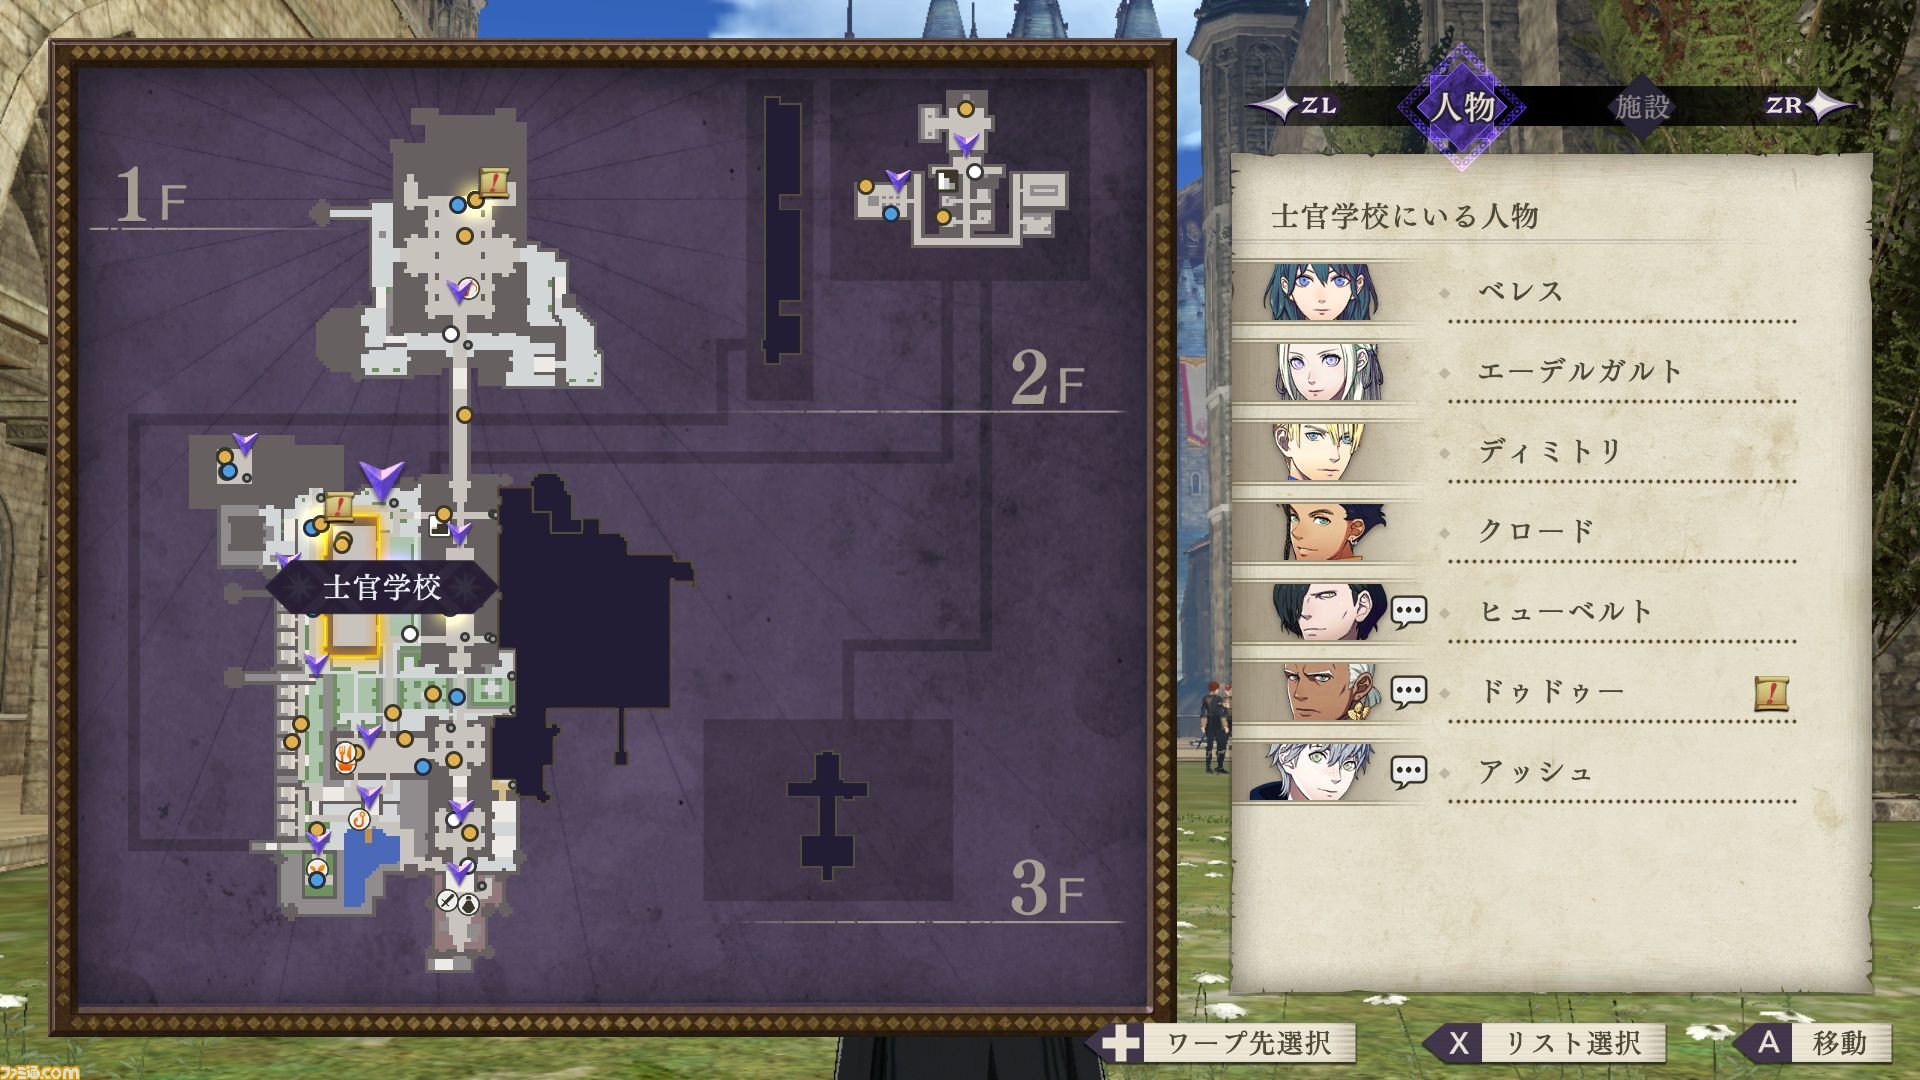
Pressing the R button opens the detailed map screen so you check out where exactly everything and everyone is. In addition, it has a handy feature that lets you fast-travel to places you’ve been before. Looking at the map, it seems you’re next to the Officer’s Academy, which is the yellow box underneath the text label (so it’s on your left).
Right now, it seems the player is hovering their cursor over the Officer’s Academy. This is one possible fast-travel landmark, as indicated by the bigger down-facing arrow. I also counted 12 smaller down-facing arrows that are probably other fast-travel landmarks. Meanwhile, the darkened rooms are obviously places you haven’t been.
On the right hand side is a list of characters within the highlighted area. This appears to include all students, not just your own. It also indicates who’s got something to say and/or a quest to give. In this case, Dedue has a task for you. Pressing ZL/ZR will toggle the facility display instead. Pressing X will bring up a list.
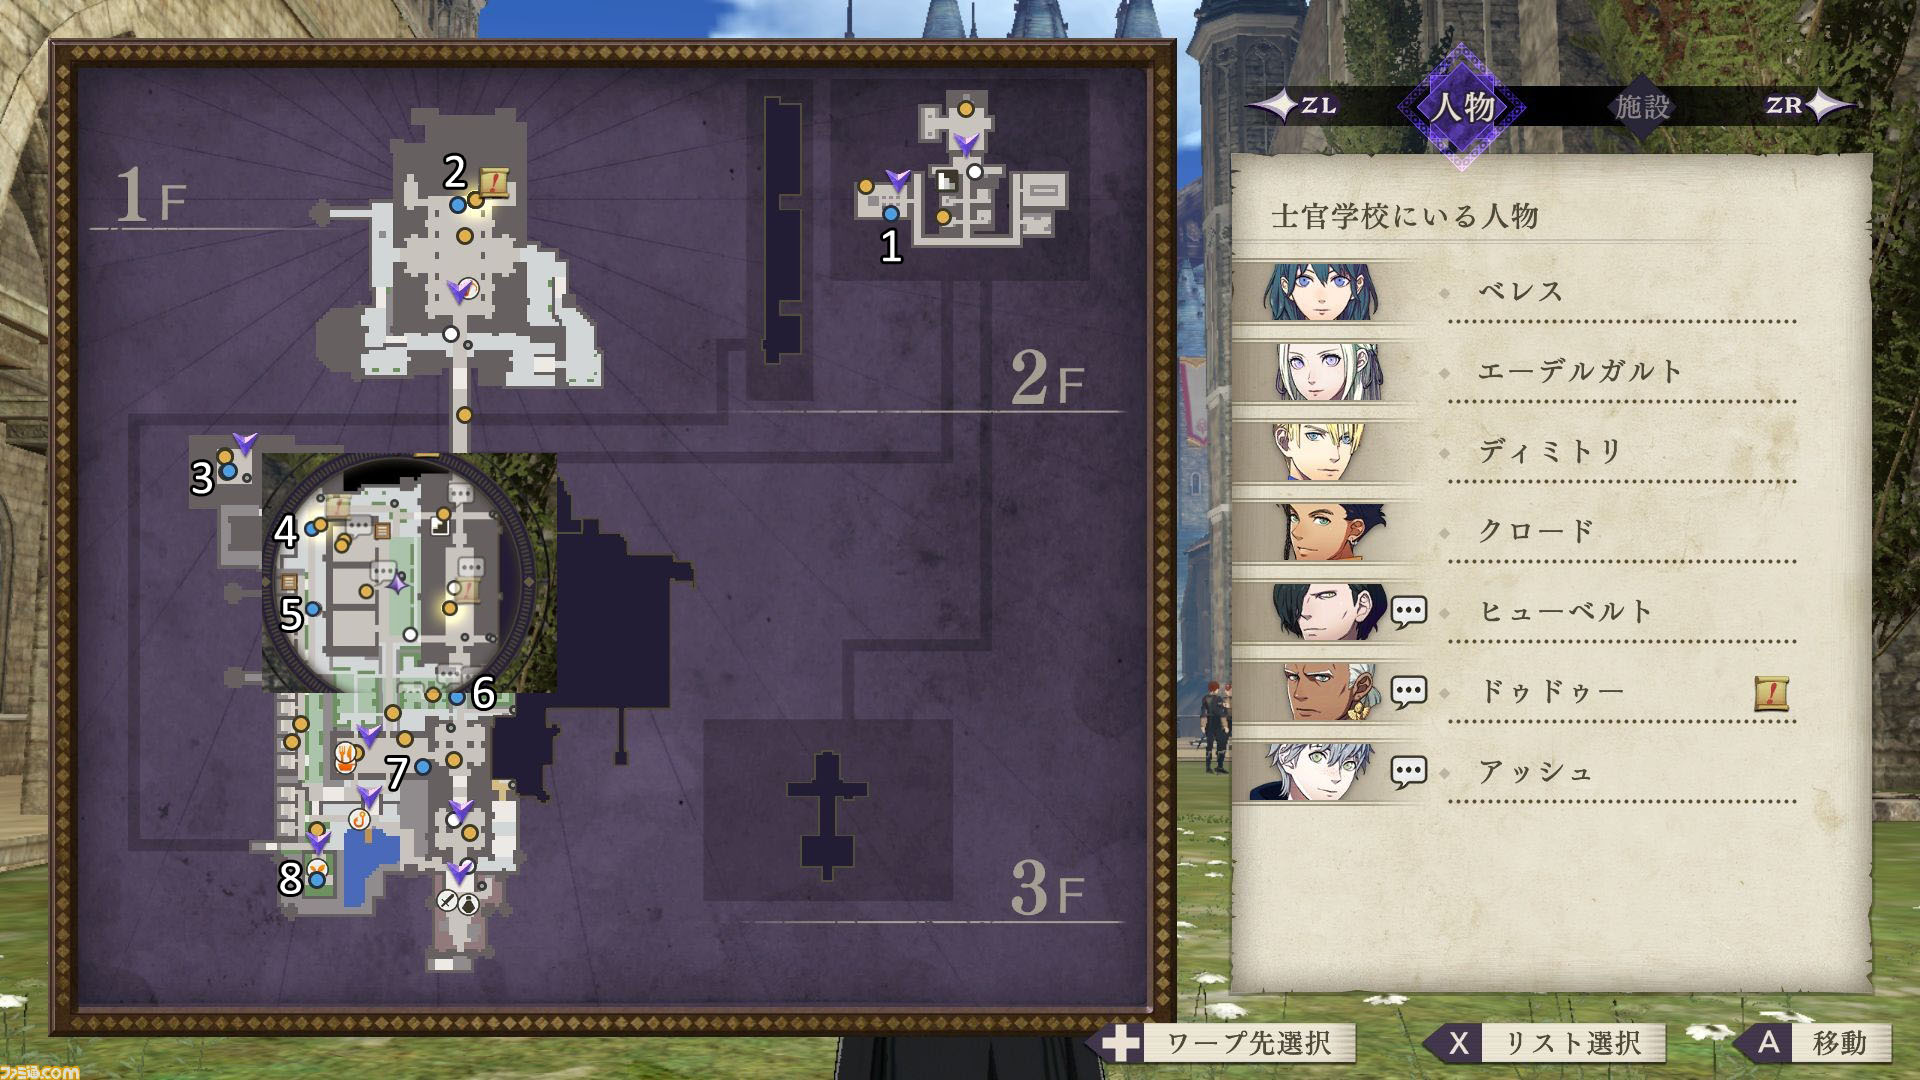
Back to the map itself, there’s a mixture of yellow, blue and white dots and also some really small grey dots, indicating various people. I think the blue dots are your students. I count exactly eight including one obscured by the “Officer’s Academy” label (but visible in the mini-map), which matches the initial number of students per house.
The yellow dots are probably students from other two houses and NPCs. I hastily counted around 20. 16 of those are probably from the other houses. Then there are people like the chefs etc. Some of the yellow dots have a quest-giver (scroll) icon next to them, so it makes sense if a couple of them are quest NPCs.
Meanwhile, the white dots are likely teachers or church folk. There are 4 of those, which seems reasonable. We know of Manuela, Hanneman and the mustached knight–and we’ll soon learn of at least two other teachers. If the numbers don’t add up perfectly, don’t forget there are locations on the map yet to be visited, where more people could be hiding.
Furthermore, there are icons for all the sub-events (like fishing, dining, etc.). These can be found where you’d expect them–fishing near a pond, for example. There are also icons for the armoury and vendor found towards the far south. Finally, there are stairs to other floors. So far, 3 floors are visible although I wouldn’t be surprised if there’s a basement.
Class
Okay, there are two more sub-activities to cover. Students can enhance their professor levels by taking classes from other teachers and knights. The maximum number of class-takers is six. The protagonist can also take classes, similar to the Teacher Training. Huh, it feels a bit awkward taking lessons at the same time as your students.
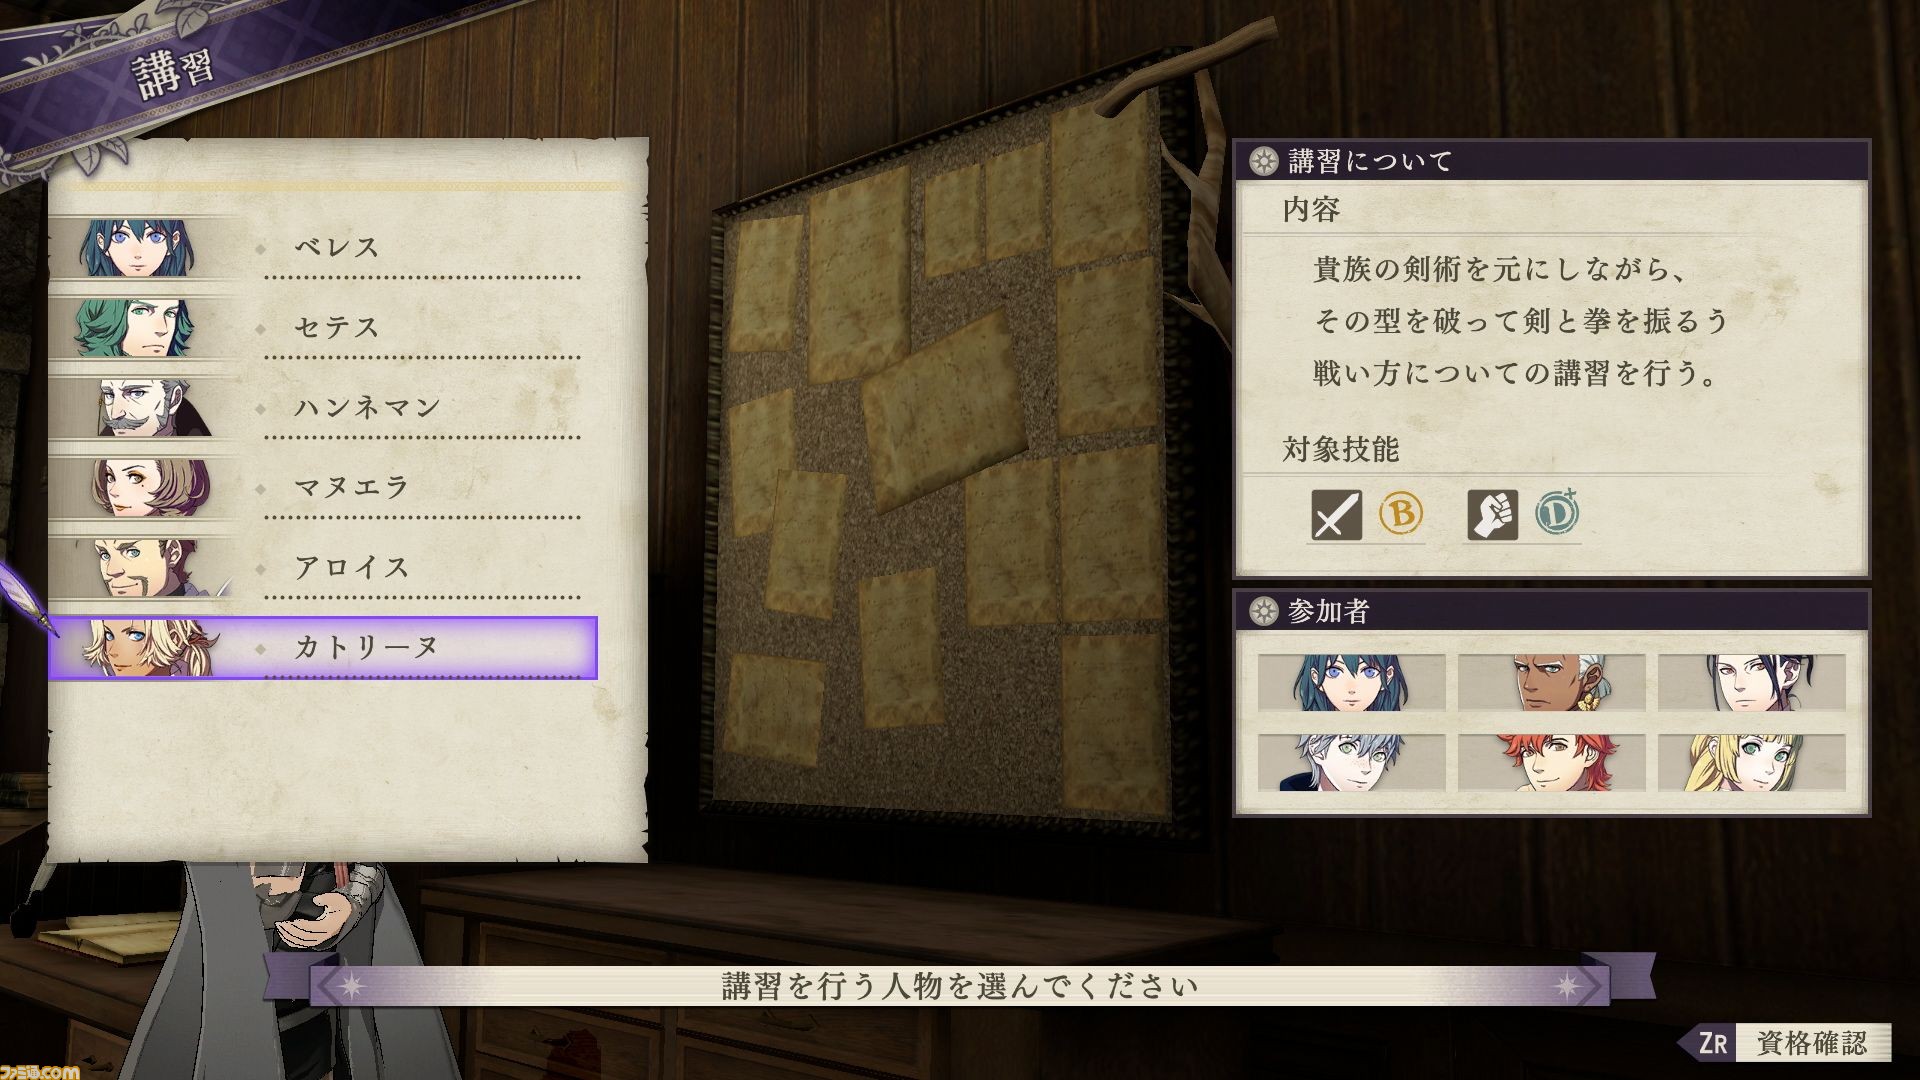
Potential teachers include yourself, followed by Ceteth, the man standing next to Rhea in various scenes. You may also know him as “Setes”. Then we have Hanneman and Manuela. After that is Alois, the mustached knight. Finally there’s Catherine, who’s this classy lady from the February trailer.
The player selects Catherine who’s holding a class focused on Sword and Fighting. The window has a B rank for Sword and D+ rank for Fighting, which I’m guessing is the maximum rank attainable via this class. If your rank is equal in a category, maybe you won’t gain experience towards that category. It’s just a wild guess.
Famitsu says the students taking the class are automatically chosen from those who wish to improve the aforementioned professor levels. If the protagonist isn’t chosen as a teacher, he/she will be forced to take the class. Well, these activities are all about you, so you need to take part in one way or another!
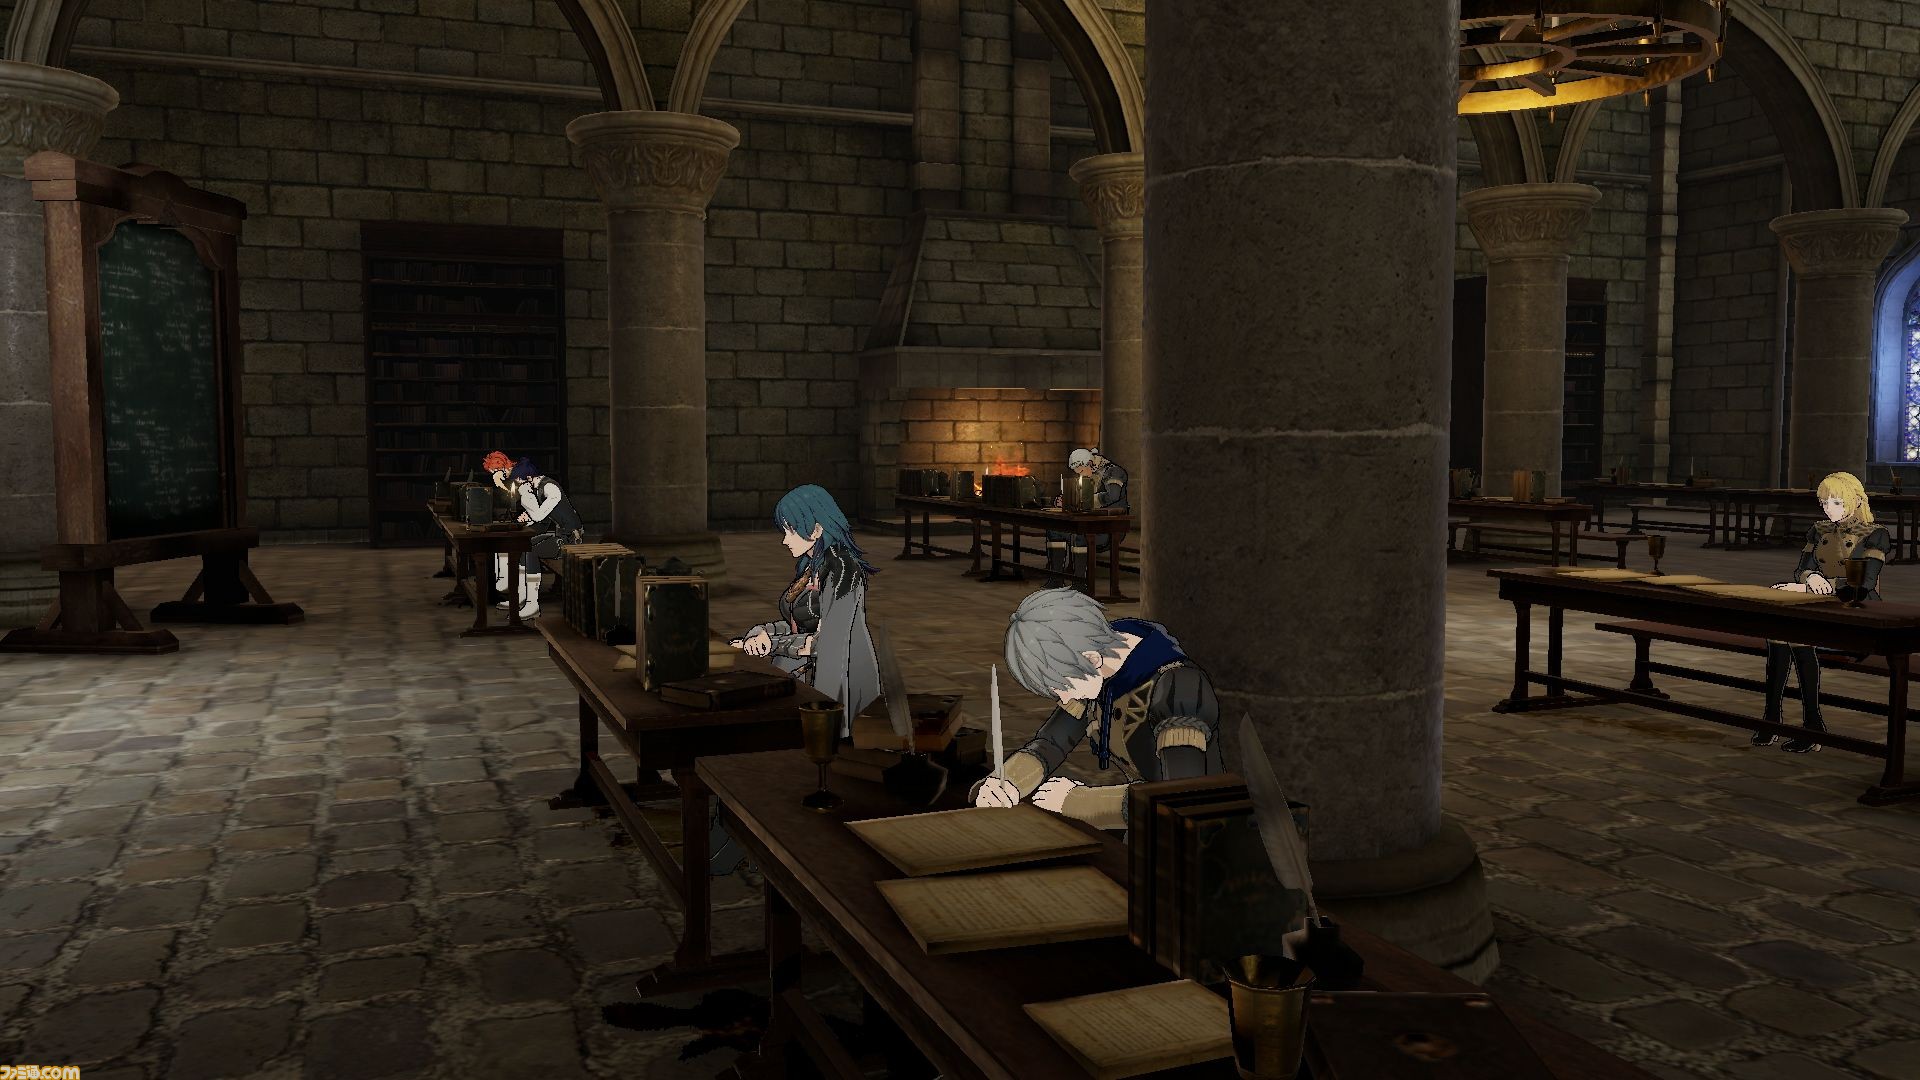

When the class is over, you’re shown a results sheet. Everyone who took the class (Byleth, Dedue, Felix, Ashe, Sylvain and Ingrid) all gain experience in Sword and Fighting as advertised. This seems to be a great way to build professor levels, but don’t forget you’ll need to consume your Stroll Gauge–and that thing drains pretty fast.
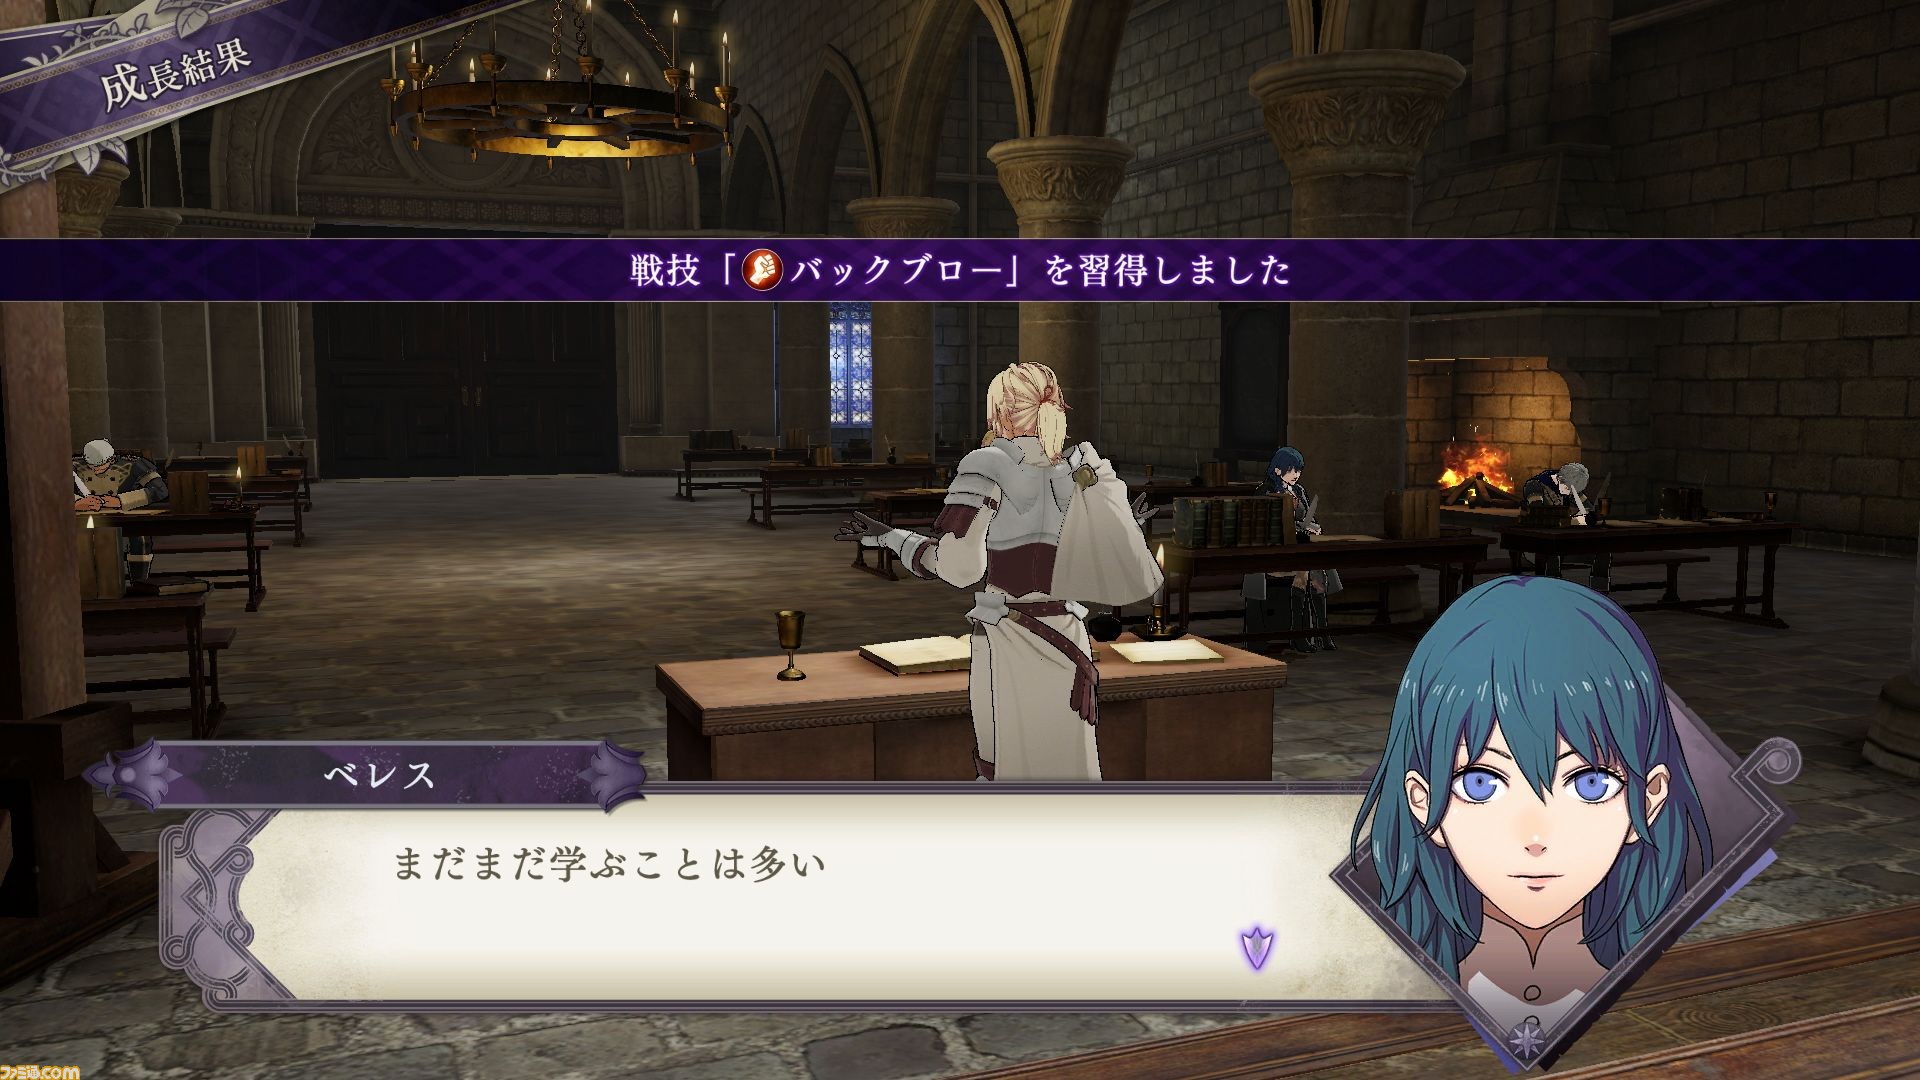

After reaching D rank in Fighting, Byleth gains the Back Blow Combat Art. HOLD ON A SECOND. This is the first time Byleth says anything in a text box that isn’t “….”. For your information, she says there are still many things to learn. I’m guessing he/she will have dialogue during Level Ups as well, because saying “…” for everything would be dull.
The last message says that everyone who took the class gains 50 Motivation. Evidently, the class was extremely enlightening and the students are all eager to learn more. Since this is a separate activity, it uses a different gauge, which seems to be the same Instructor Gauge used for weekday lessons.
Venture
This is the final activity you can choose during weekends. You can go out and battle in optional skirmishes. Each skirmish has a suggested level, so it’s a good idea to carefully raise your characters so they can handle the skirmishes–and, more importantly, the mandatory battle at the end of each season.
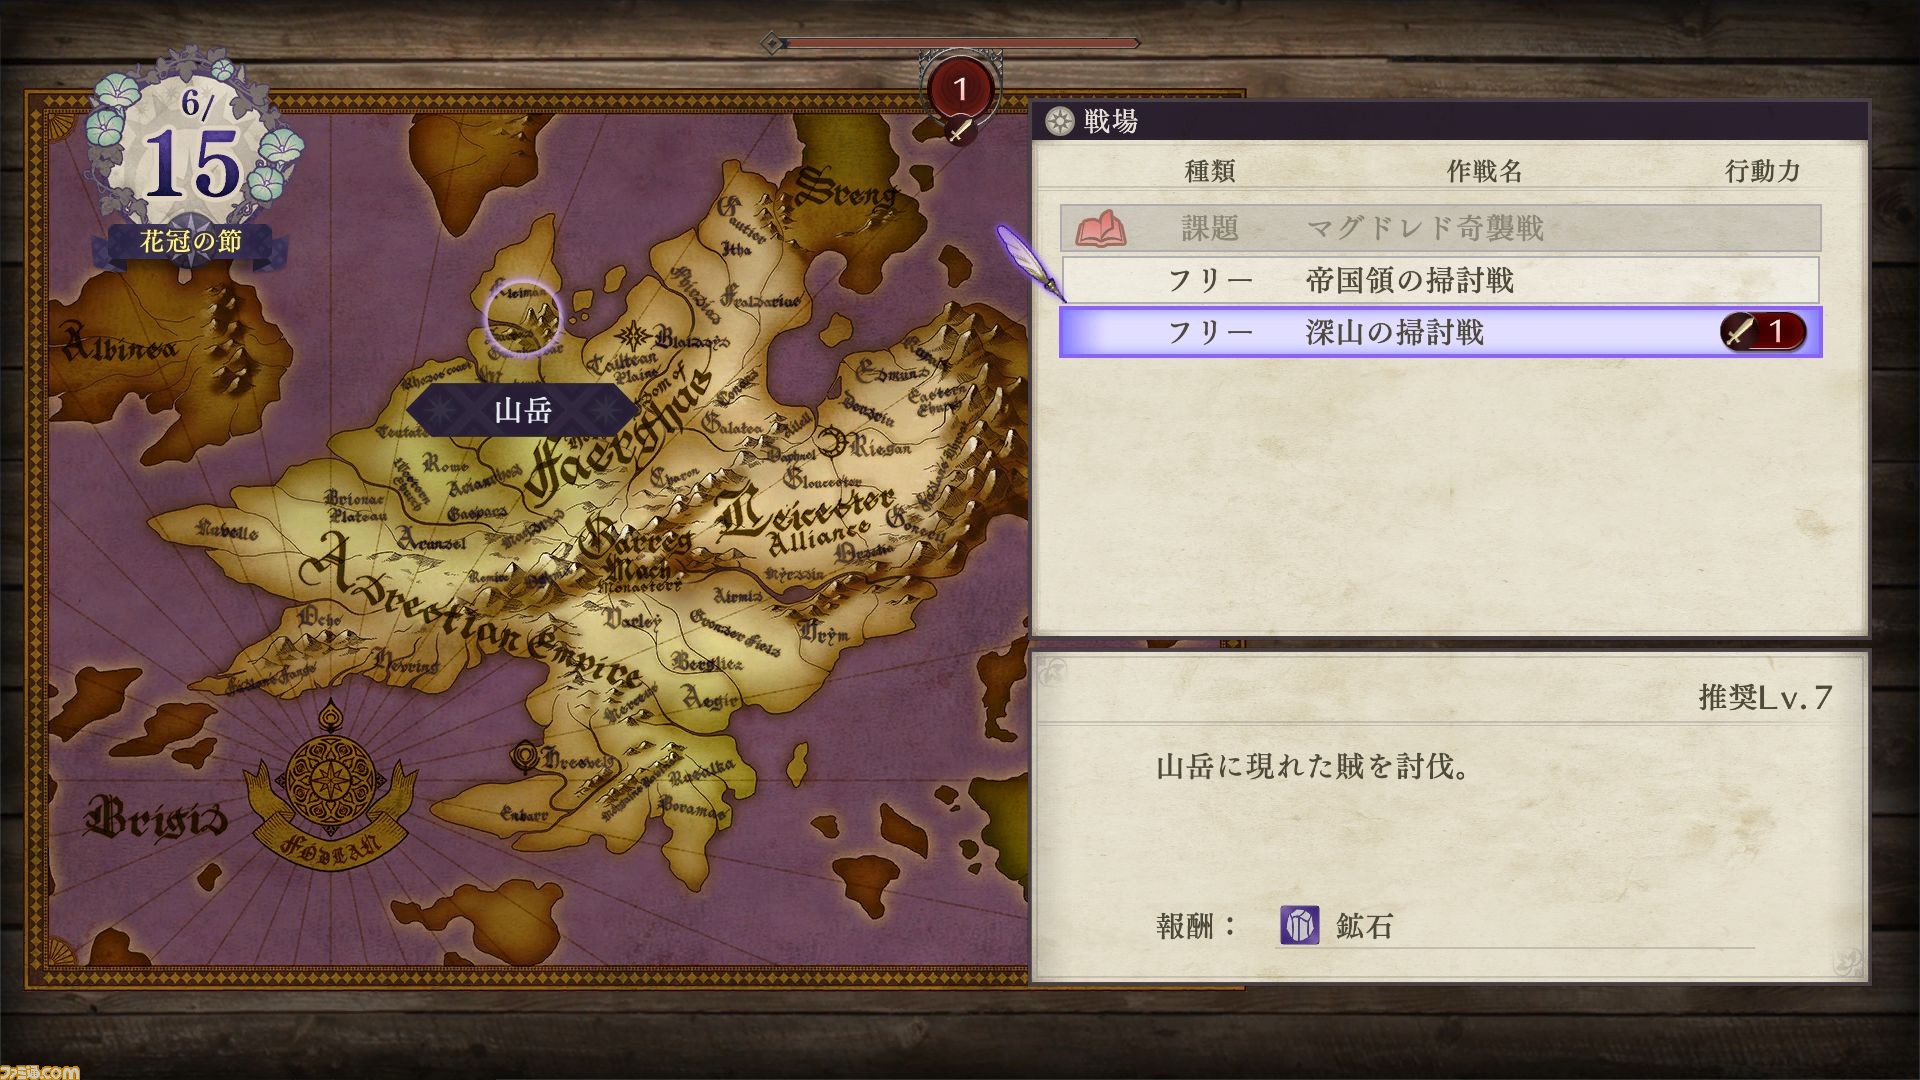
We’re back in the Flower Crown season, during the 6th month. Available skirmishes include: Magdred Surprise Attack (field study; currently unavailable as it’s not the end of the month), Imperial Clean-up and Remote Mountain Clean-up. The last one is selected. It costs 1 use of the Venture Gauge and has a suggested level of 7. The reward is Ore.
According to Famitsu, if playing on Normal difficulty, there’s always an optional skirmish that doesn’t consume the Venture Gauge. But it won’t be available on Hard, so no grinding forever for ya!
By the way, Magdred is a location near the Adrestian-Faerghus border, in-between Gaspard and Garreg-Mach. Hmm, I’m sensing a pattern here. The border is clearly a bad place to be.
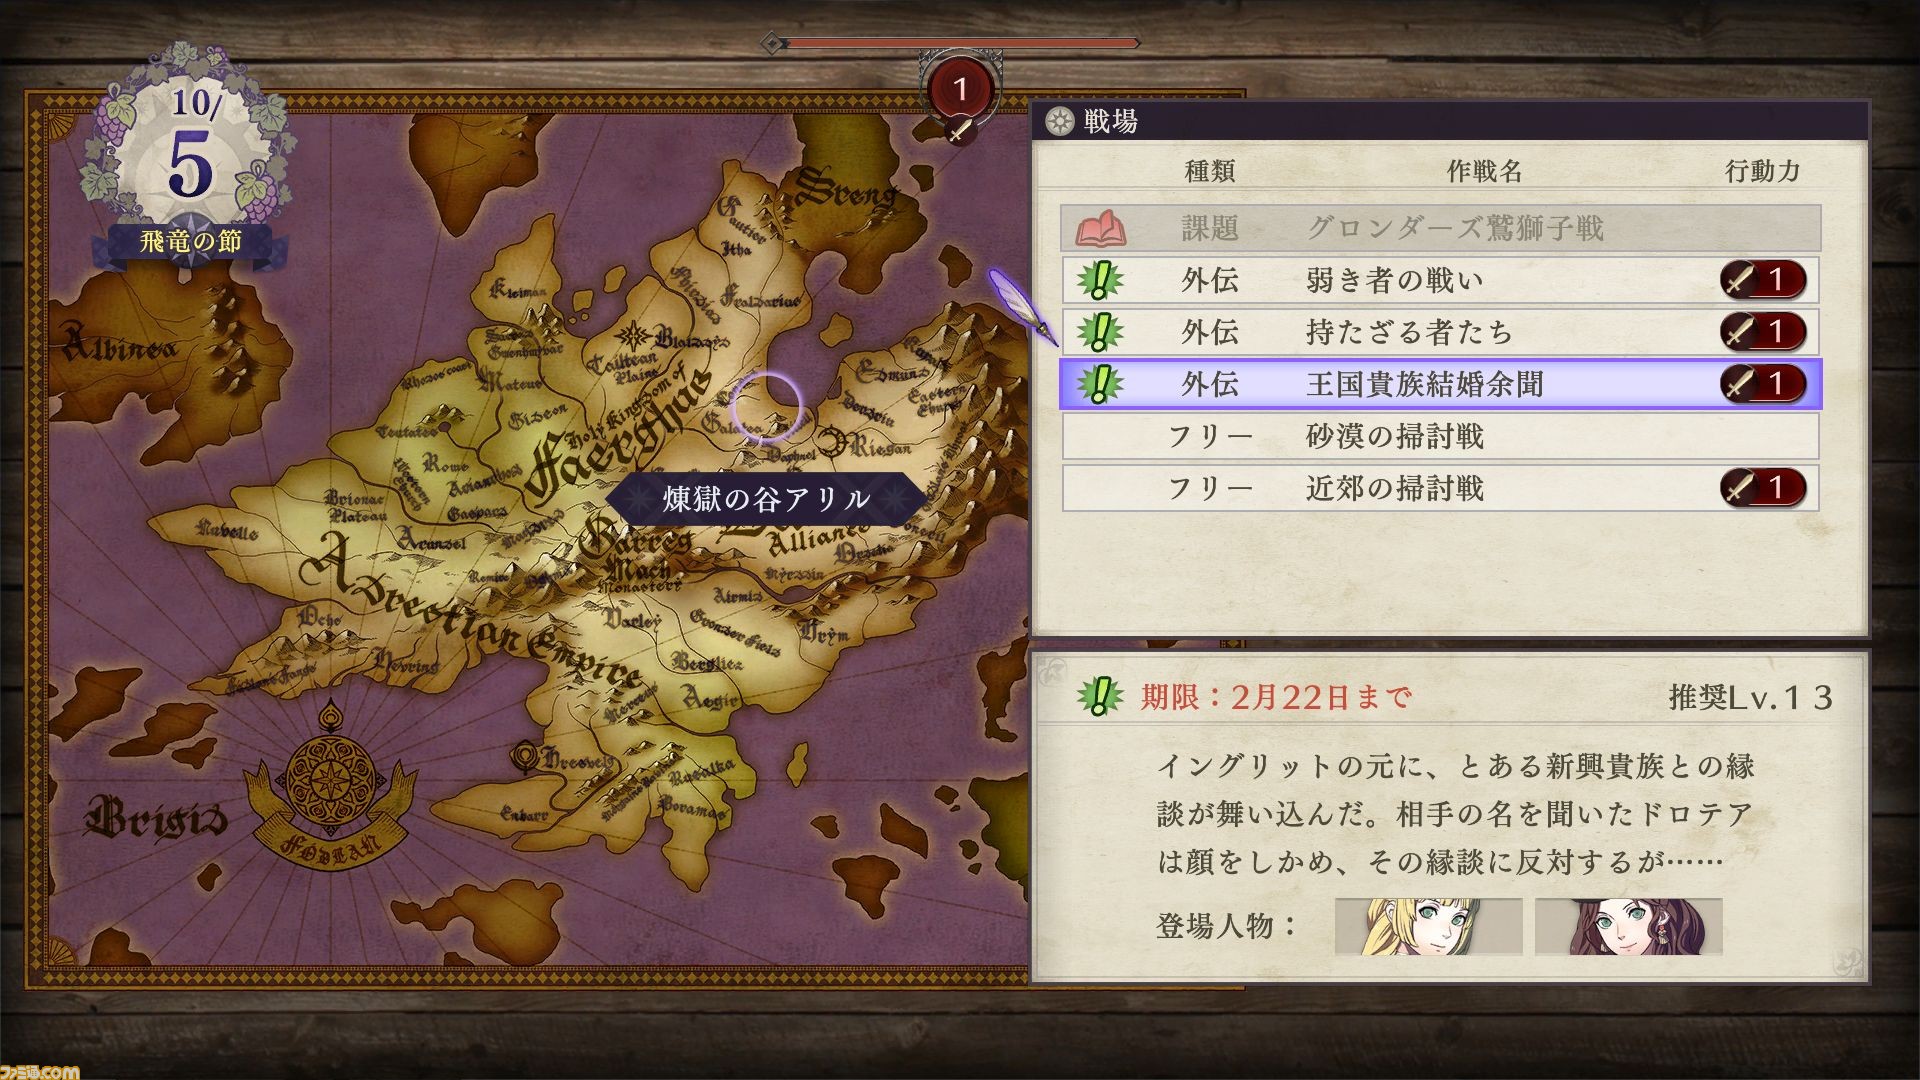
Exhibit number 2 is the Venture menu from the Wyvern Season, during the 10th month. Hmm, there’s a lot more going on. Skirmishes include: Gronder Griffon Battle (field study), Battle of the Weak, Have-Nots, Kingdom Nobles’ Marriage (the three sidequests/paralogues mentioned earlier), Desert Clean-up and Suburban Clean-up.
Likewise, Gronder is a place on the world map, specifically Gronder Field located somewhat near the Adrestian-Faerghus border. I’m intrigued by the mention of a “Griffon” as well. Is this the name of an army/squadron or a beast/monster? We’ll probably have to wait a fair while to find out.
Except for Desert Clean-up (which is the freebie skirmish for Normal players) and the field study task, all the skirmishes cost 1 use of the gauge–and its maximum value is still 1 despite 6 whole months passing after you started teaching. Of note, sidequests appear to have a deadline. Kingdom Nobles’ Marriage expires on 22nd of the 2nd month.
Also, that particular sidequest occurs in the Purgatory Valley of Ailell. This time, it’s located near the border of Faerghus and Leicester. Although I think it’s a coincidence that it’s near a border. Sidequests have featured characters–Ingrid and Dorothea are the stars of this show. Which is cool because they’re from different houses.
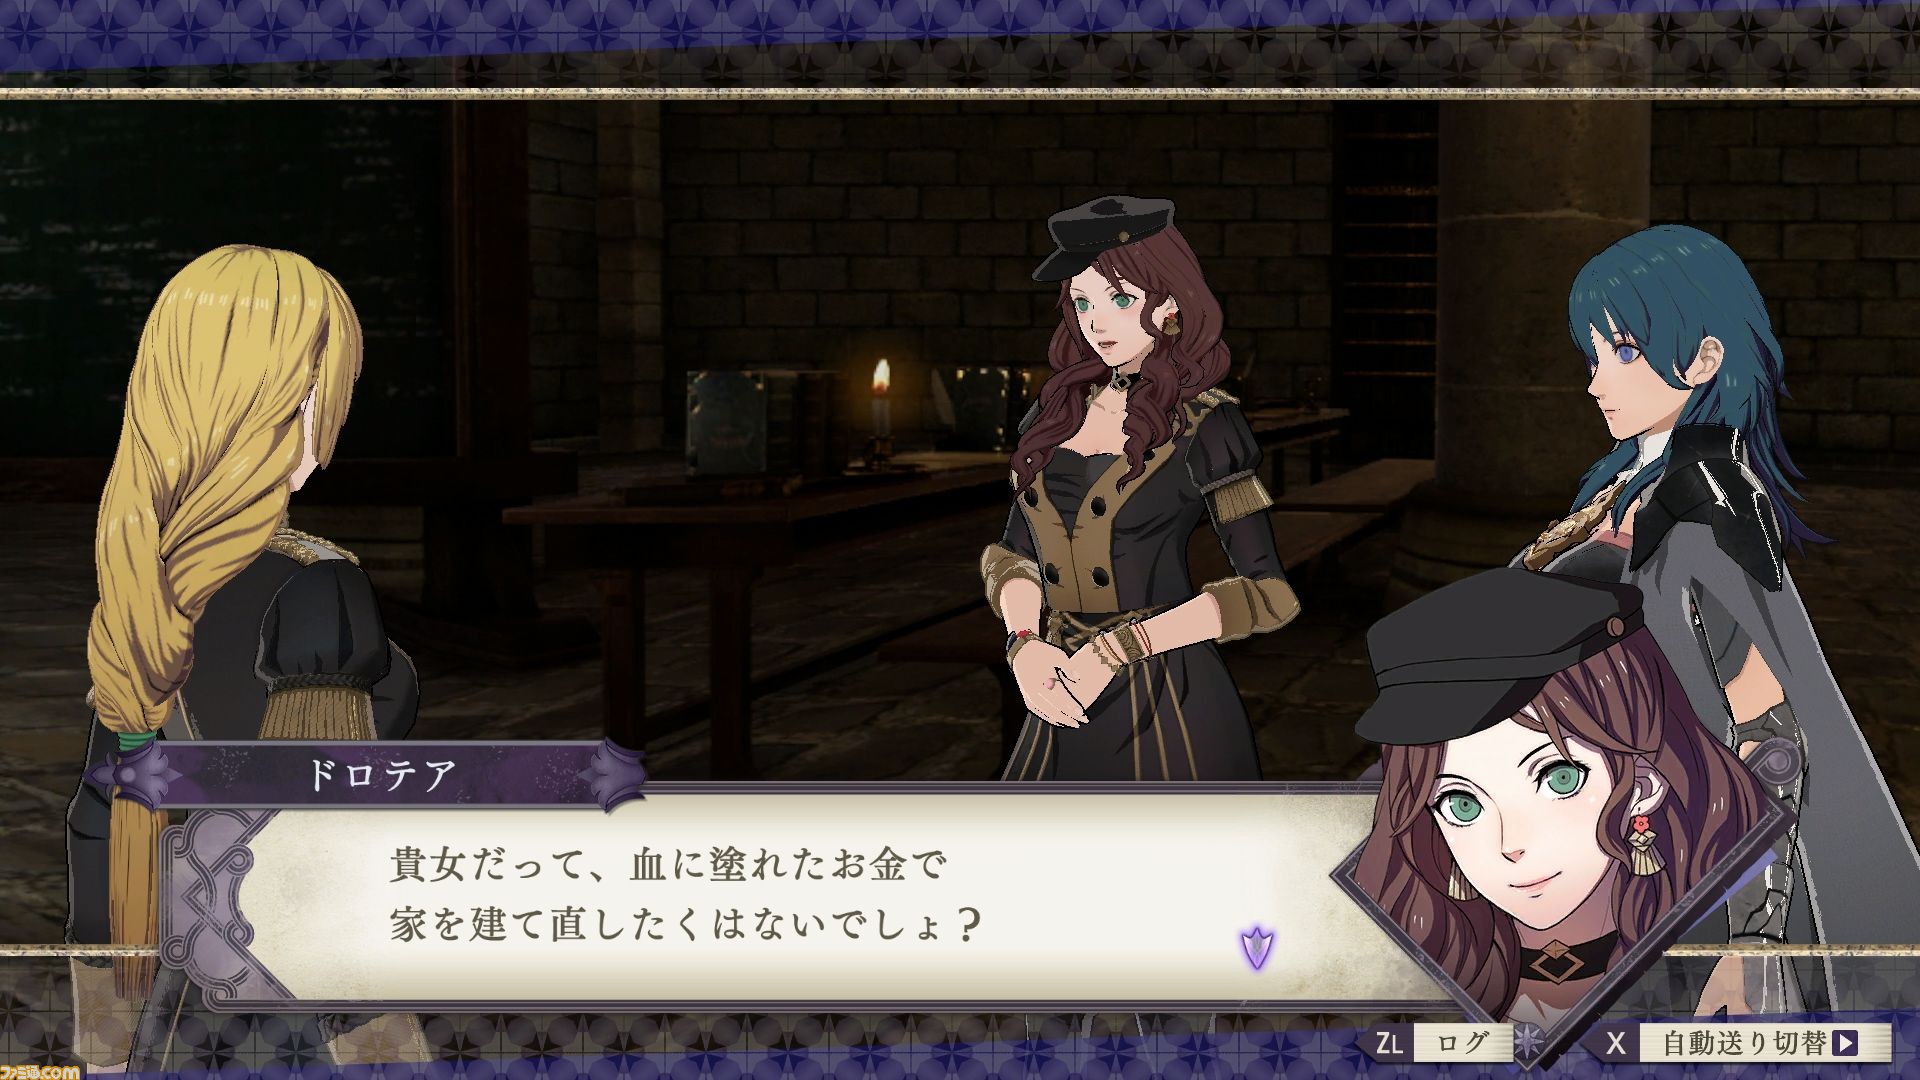
Apparently an emergent nobleman has offered a marriage proposal to Ingrid, but once Dorothea discovers his name, she openly opposes the proposal. Dorothea asks Ingrid if she wants to rebuild her family using bloodstained money. Oof, this songstress knows some secrets alright. It also sounds like Ingrid’s family is in dire straights.
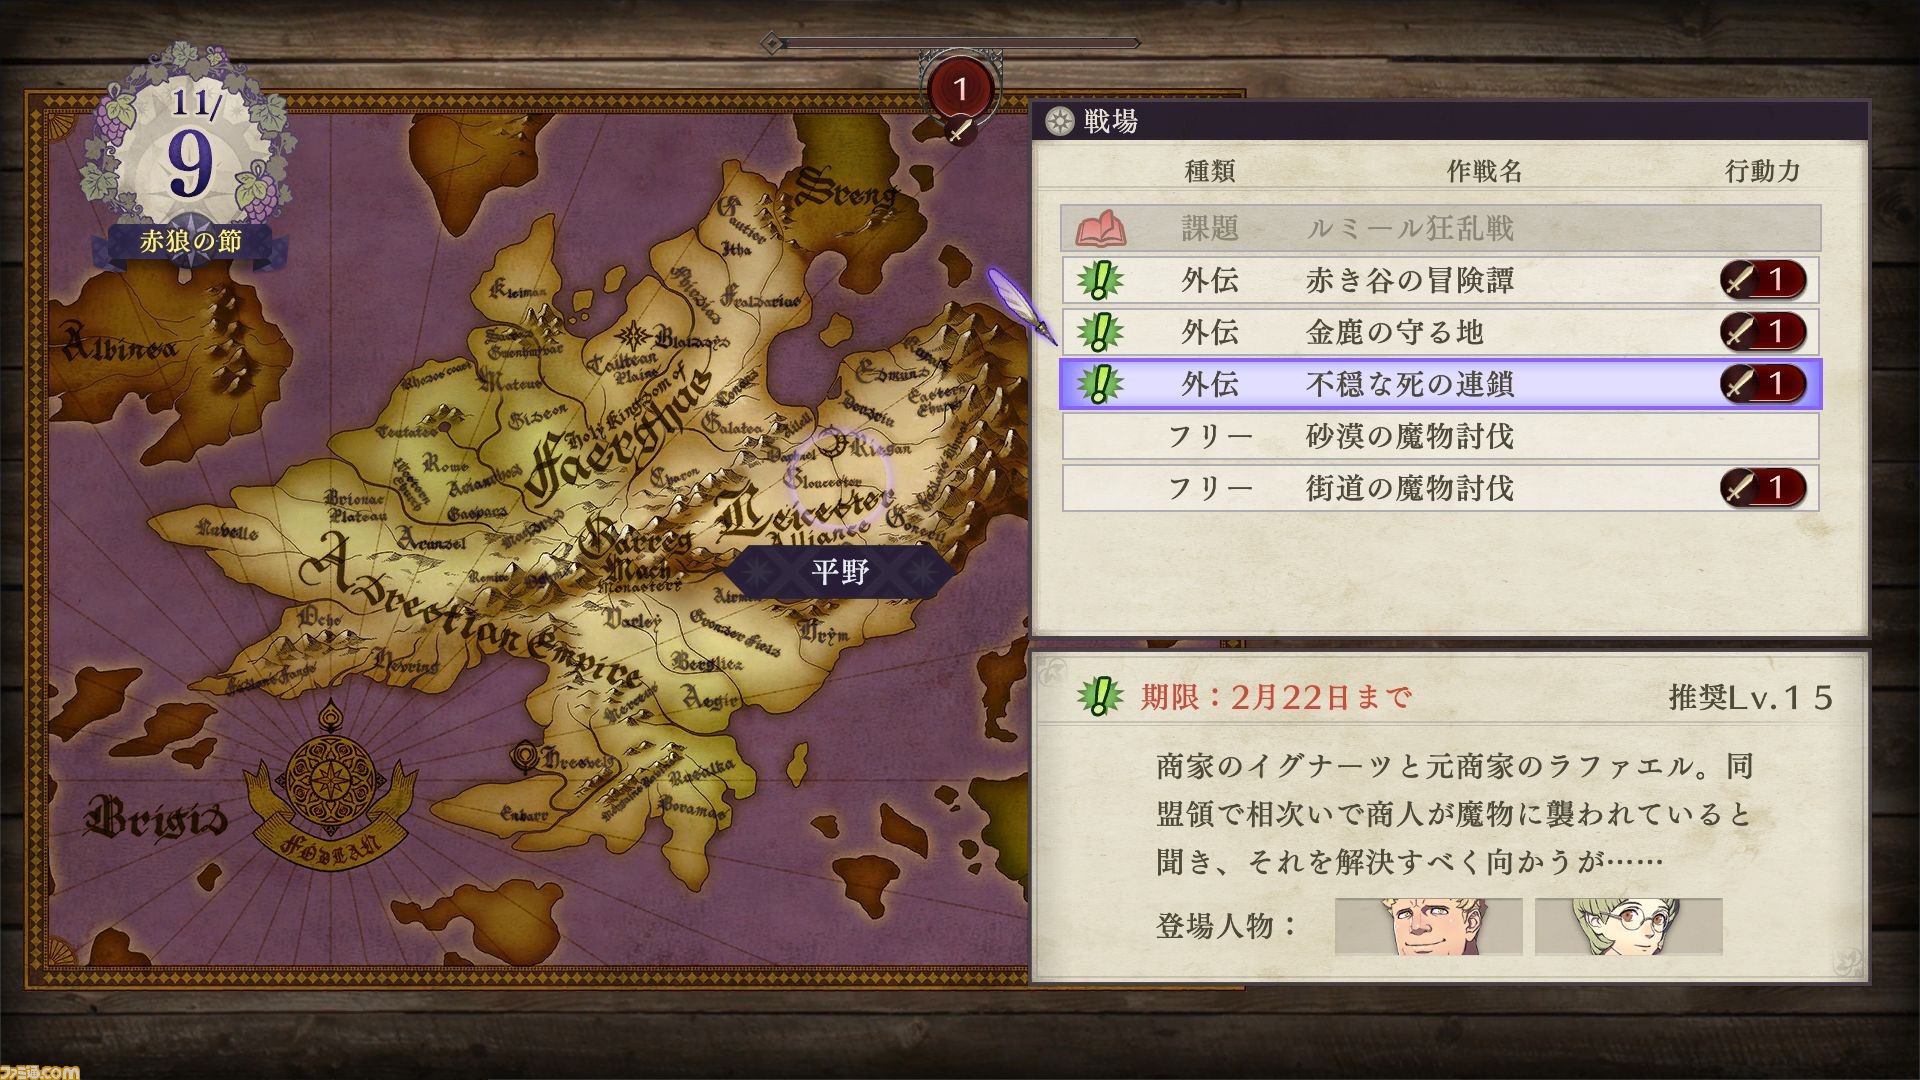
We advance to the Crimson Wolf season, in the 11th month. Oh, that’s my month. Available skirmishes are: Remire Frenzy Battle (field study), Crimson Valley Adventure, Golden Deer’s Sanctuary, Disquieting Death Co-ordination, Desert Terror Extermination and Street Terror Extermination.
Once again, everything costs 1 use of the Venture Gauge outside of the field study and the Normal difficulty 0-cost skirmish. Another month has passed, but the gauge’s maximum value hasn’t budged. Also, the selected sidequest is set to expire on 22nd of the 2nd month again. Hmm, will something major happen during that time?
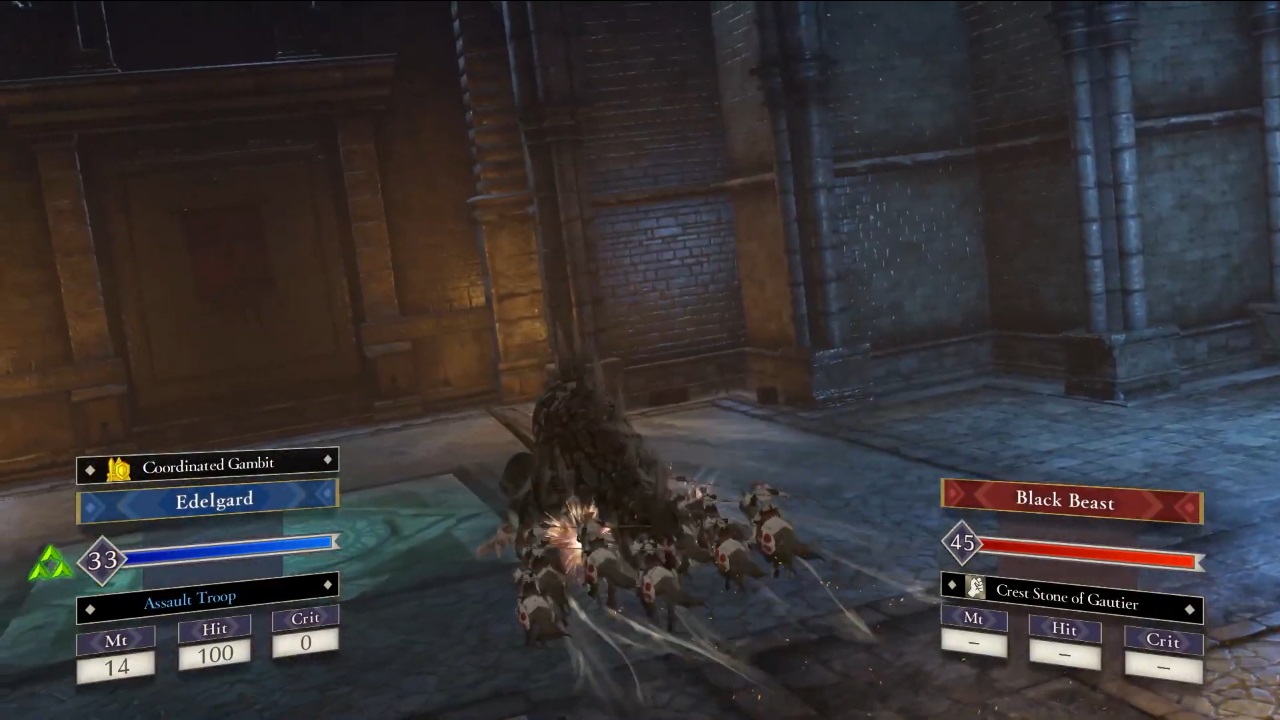
Never mind that, the clean-up skirmishes have now been replaced with Terror exterminations. Have Terrors (aka monsters) just appeared in the story? Or were they always there, but you didn’t have the qualifications to handle them? The “frenzy battle” may also be related to Terrors–and maybe even the Black Beast from the February trailer.

Back to the selected sidequest, it’s Disquieting Death Co-ordination (sorry for the Engrishy name; I’m lazy to think of something better), which involves Raphael and Ignace, both from the Golden Deer. From the sidequest’s name, it seems to be related to co-ordinated attacks. Maybe a forbidden one…
The story goes that Ignace is from a merchant family, while Raphael used to be from one, before his parents both died. Within the alliance’s territory, merchants keep getting attacked by Terrors, so the pair head over to fix the situation… We learn that Raphael’s parents were slaughtered by Terrors during a business trip.
On a final note, Famitsu says that completing sidequests may reward you with items and/or battalions closely related to your companions.
Rest


I’m not gonna lie, I’ll need some rest after this long write up! Rest is important for your daily training. If you choose to rest, you’ll spend your whole weekend in your room, cultivating your energy. Your students will take a vacation and come back with improved Motivation too. Hmm, being lazy has its perks.
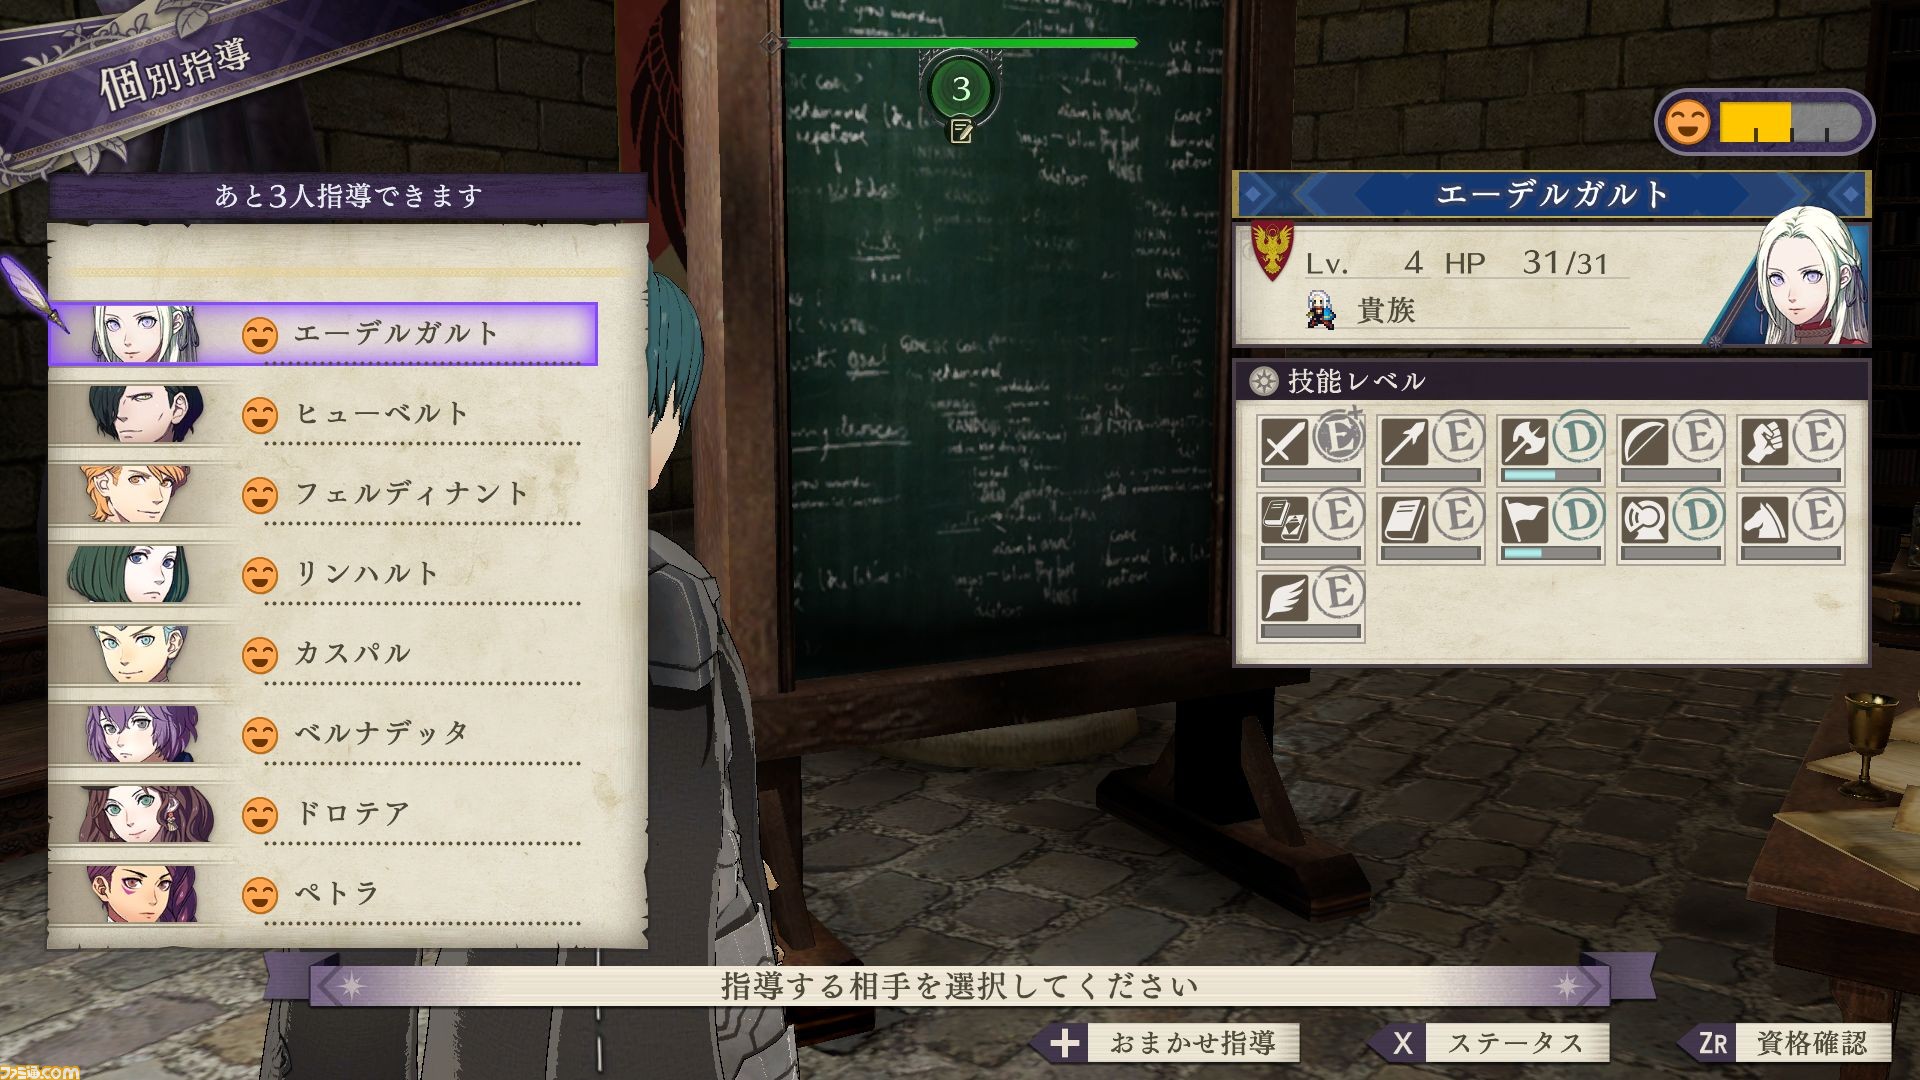
As you can see, the Black Eagles’ Motivation has been restored. Although looking at Edelgard, it only appears to be halfway-filled. Ah well, that’s enough for a couple of study sessions at least.
Character Profiles
From here, we have profiles for 6 students, 2 from each house. 4 of them have already been profiled by the official site. Please check our frequently-updated Characters page to have a gander. However, Famitsu also includes details about each characters’ skills and, if available, crests.
Ferdinand
![]()
- Personal skill: Confidence – Hit rate and Avoid +15 when user’s HP is full.
- Crest: Minor crest of Cichol – A minor crest said to have belonged to the divine Cichol.
Bernadetta
![]()
- Personal skill: Paranoia – If HP isn’t full, Attack +5.
- Crest: Minor crest of Indech – A minor crest said to have belonged to the divine Indech.
Mercedes
![]()
- Personal skill: Live to Serve – When healing with White Magic, user restores the same amount of HP.
- Crest: Minor crest of Lamine – A minor crest said to have belonged to Lamine of the Ten Greats.
Ashe

Sir Lonato’s adopted son. He studies diligently every day with the goal of reaching his adoptive father.
- Personal skill: Wisdom to Live – User can open doors and chests without keys.
Raphael
- Personal skill: Scavenger – User has a Luck% chance to restore 10% HP at the start of each turn.
Lysithea

The eldest daughter of Duke Cordelia’s family. She’s the academy’s youngest student and something of a magical prodigy.
![]()
- Personal skill: Prodigy – Experience points towards professor levels earned during battles is doubled.
- Crest: Minor crest of Charon – A minor crest said to have belonged to Charon of the Ten Greats.
Correction: Prodigy doesn’t double experience points towards Level Ups. I was reading too fast, haha.
OK, I wasn’t too far off the mark with my analysis of the blurry crests from the Famitsu preview. As I suspected, Ferdinand and Bernadetta–both from Adrestia–have crests belonging to saints, like Seiros. Since Seiros helped to establish Adrestia, that’s not a big surprise.
But Mercedes, a former Adrestian, does have a crest from one of the Ten Greats, rather than a saint. Which kind of throws that pattern out. But perhaps that’s one of the reasons she left the empire to go to Faerghus? Another thing, all of the known Ten Greats have locations named after them on the map, except for Lamine. Unless I missed it.
Even Lysithea fits the pattern. Her ancestor, Charon’s namesake is situated just north of Garreg-Mach. However, Lysithea is from Leicester and Charon is in Faerghus. That said, it’s just across the border, so maybe it originally belonged to Leicester and was taken by Faerghus? Alternatively, Lysithea may be from Faerghus and jumped ship like Mercedes.
–And that’s everything! If I missed anything obvious or wrote something stupid, please let me know! There’s actually a bit more I wanted to analyse, but I’m already over-running by a couple of hours. Maybe next time…