This multiple-floor dungeon can be accessed after completing the main story and loading your clear save data. To open the way, you need to accept the “Faraway Frontiers” sub-quest in Zofia Harbor.
Note: You cannot save while inside the dungeon, so make sure to set aside some spare time. Of course, you can still create a Bookmark if you need to take a break or Evacuate to leave the dungeon early.
Floor B1
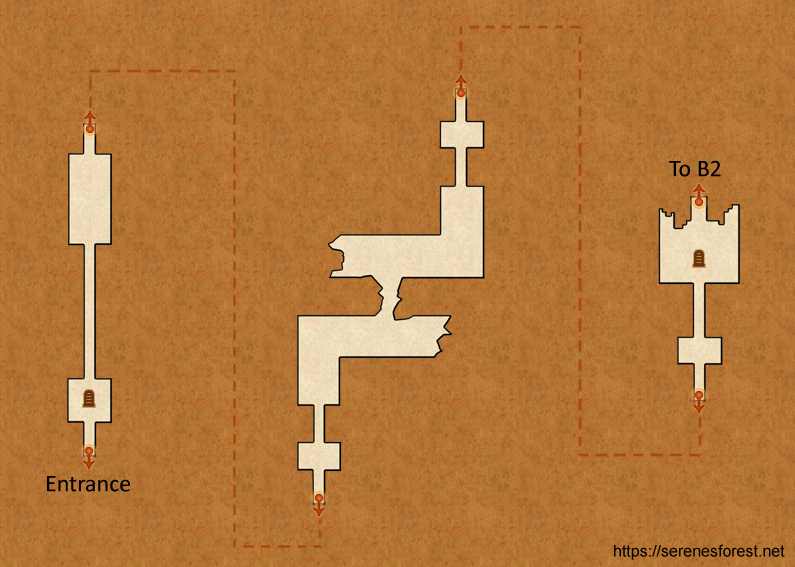
Floor B2
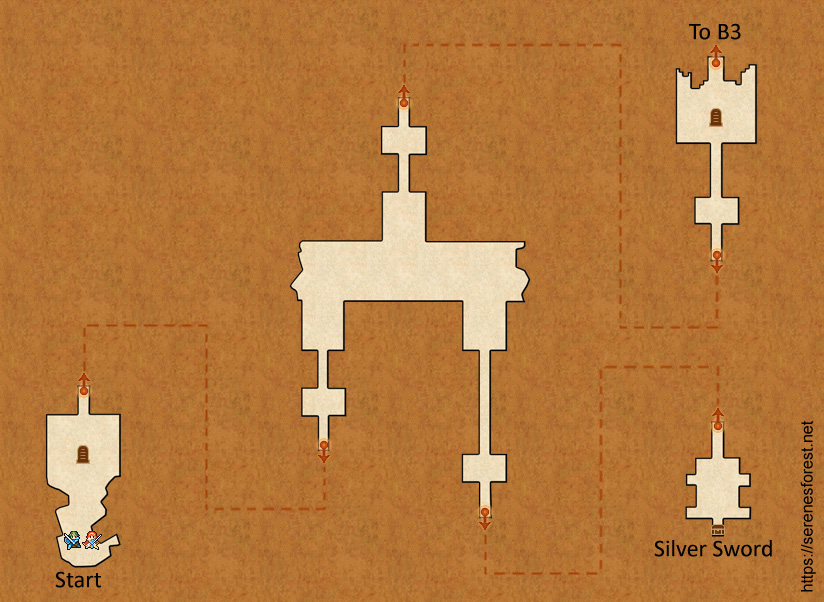
Floor B3
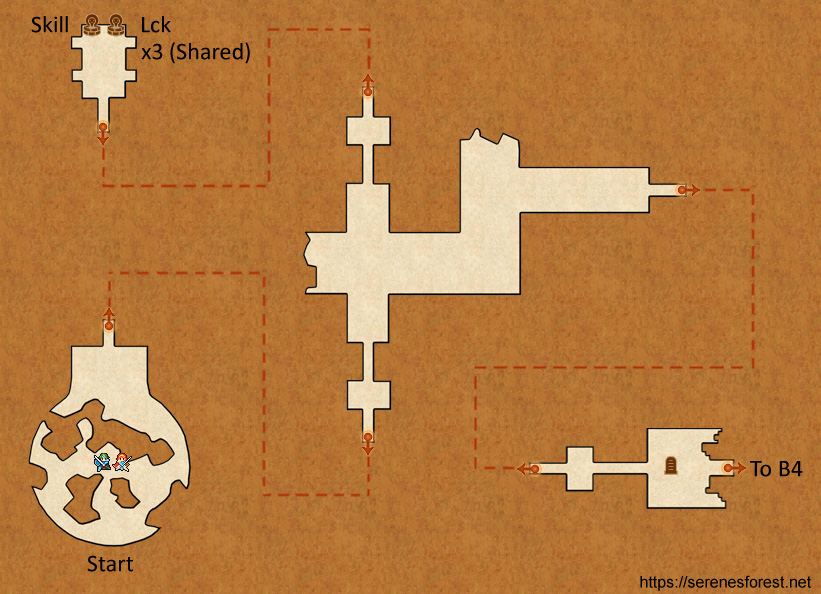
The grass in the Sacred Springs is known to yield a lot of Silver Marks. After cutting down the grass the first time, you can return a second to get more. On subsequent visits, the number will drop greatly, so best you move on.
Floor B4
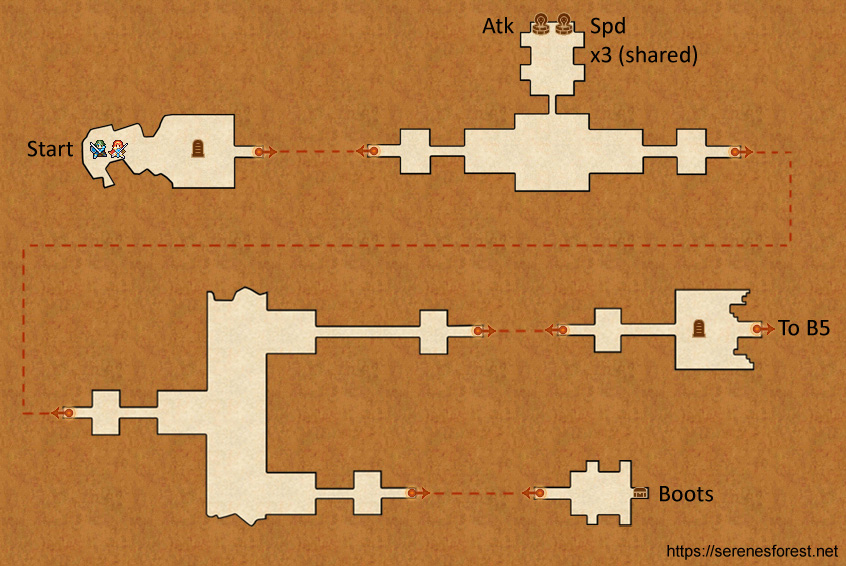
Silver Marks are also plentiful in the Sacred Springs on this floor.
Floor B5
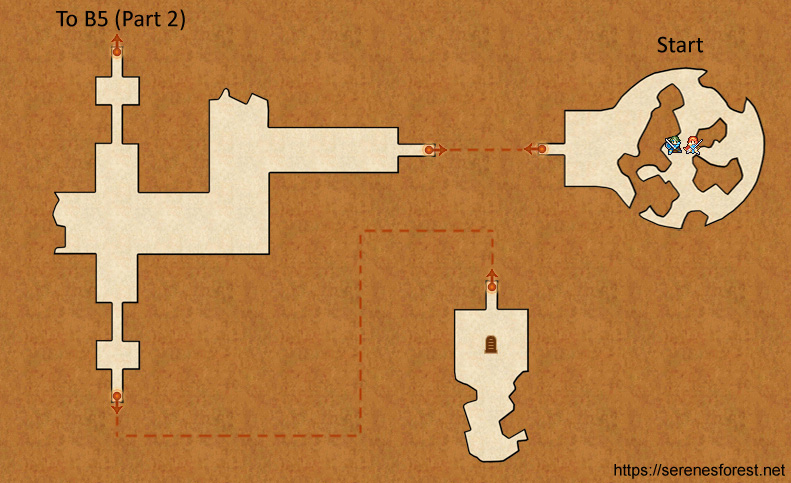
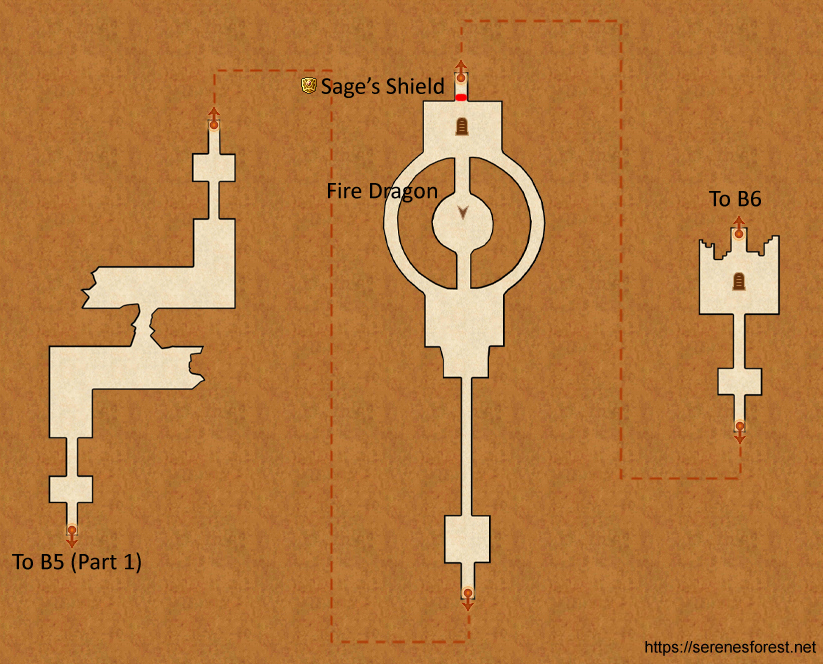
This floor marks the halfway point of the dungeon; waiting at the end is a test to see if you’re strong enough to progress further in. If you’re struggling, we urge you to leave and return with stronger units.
Otherwise, feel free to remove the Sage’s Shield and press on. It’s definitely not been put there a special reason.
Floor B6
The enemies from here are far stronger than any you’ll have faced. Where you first land, you can find a decent amount of Silver Marks from cutting the grass, but not as many as before.
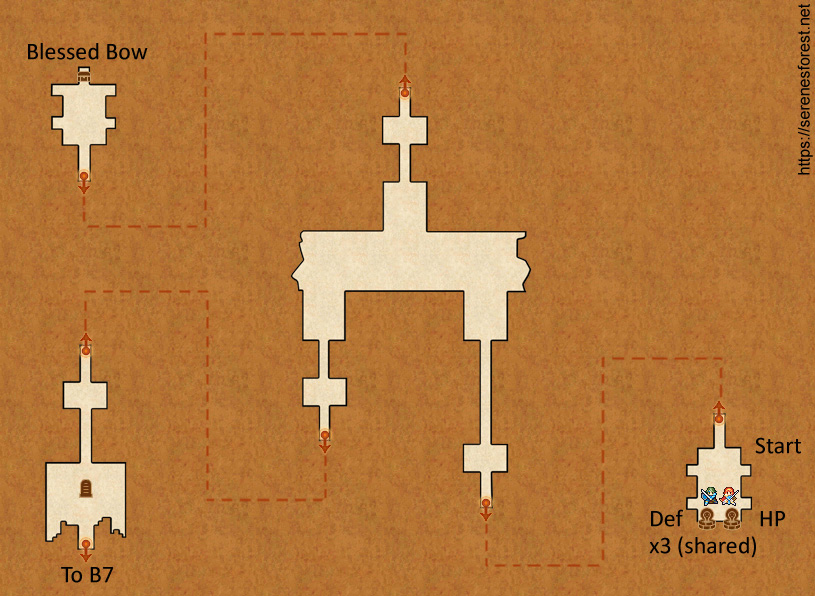
Floor B7
Floor B8
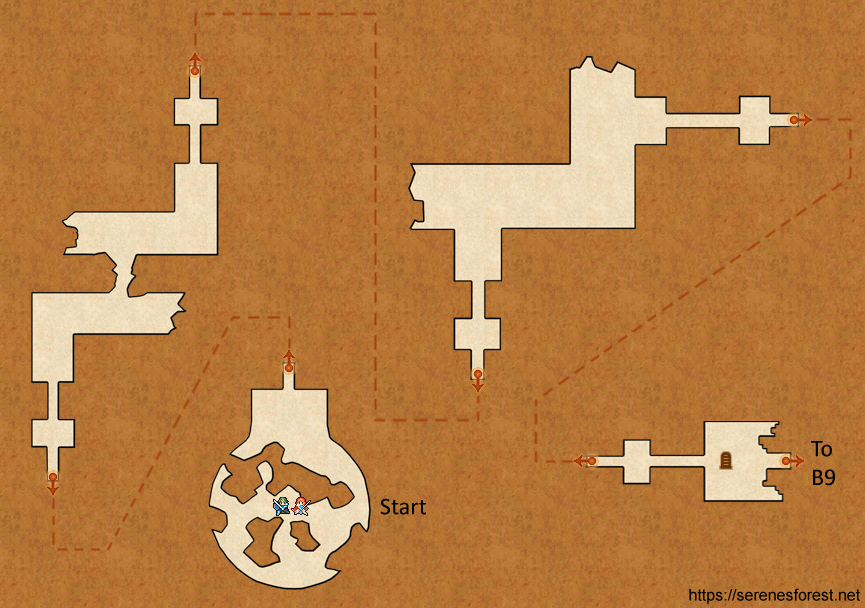
Floor B9
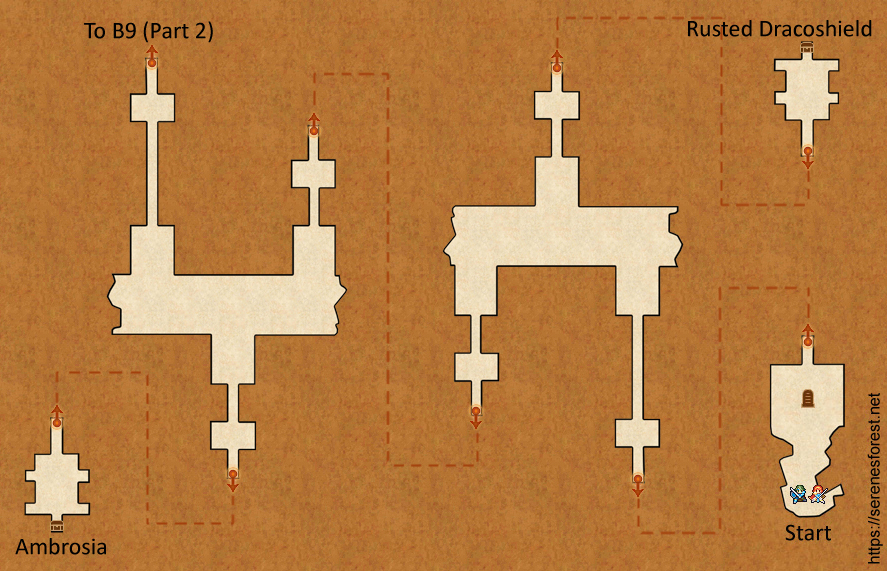
As you make your way through this penultimate floor, aim to smash all of the pots you see. In each room, you can find up to 3 random items ranging from common provisions to the super rare Astra, Sol and Luna weapons (0.26% chance of each).
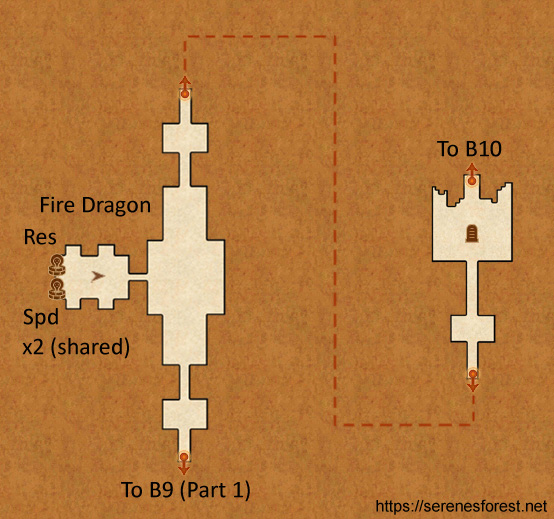
Meanwhile, after slaying the Fire Dragon guarding the Sacred Springs, you can try your luck for a Gold Mark in the grass. During your first visit to the room, you can find up to 3 coins, with a 1/6 chance of one being a Gold Mark.
(If you leave and re-enter the room, you can find 2 coins the 2nd time and 1 coin the 3rd time. So if you’re persistent, you can find up to 6 coins per trip.)
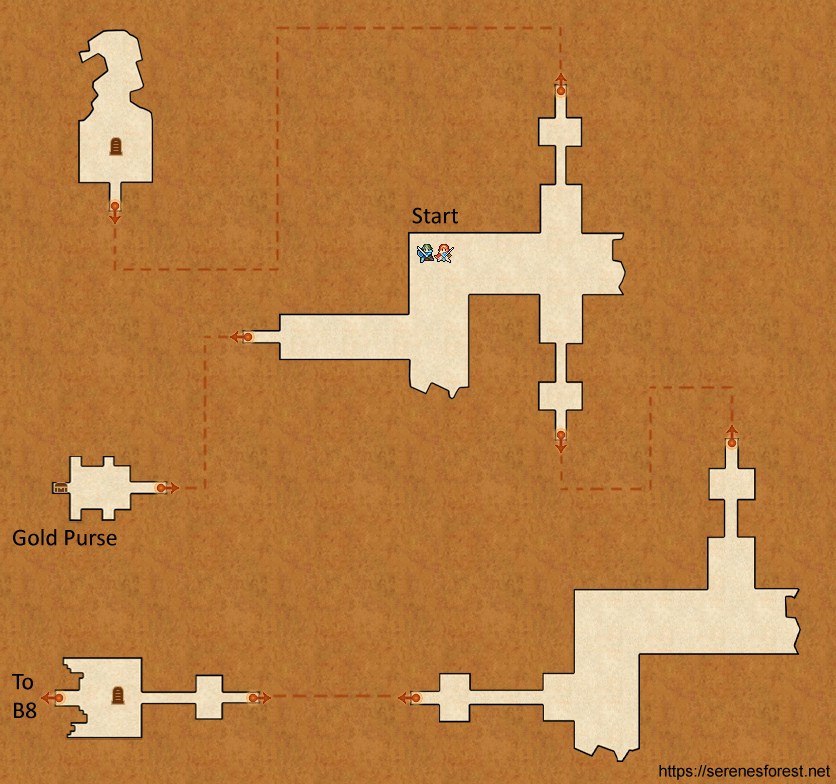
Floor B10
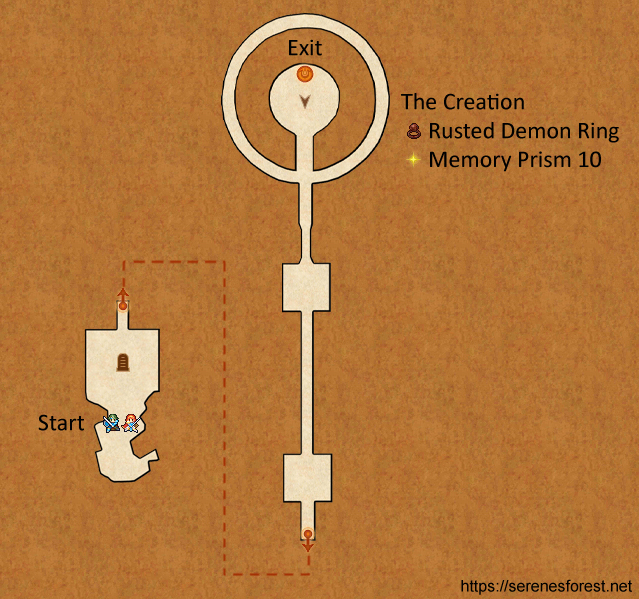
The final floor in all its glory. Although you must be excited, don’t overlook the boxes in the first room where you land. Like the pots in B9, the boxes can drop Astra, Sol and Luna if you’re lucky (0.06% chance).
(Likewise, you can find up to 3 random items the first time, then 2 and 1 if you leave and re-enter twice. For a total of 6 items per trip.)
Last but not least, when you reach the endpoint, you can choose to battle the Creation, an abomination created via ancient alchemy. It looks rather familiar, no? Prevail and you can earn a Demon Ring and the final Memory Prism.
Should you return to the dungeon, you can fight the Creation again if you want. This is one of the easiest ways to earn Renown since the Creation gives a whopping 1000 and the rare monsters that spawn such as Fafnir and Vestal grant 200 to 400 each.