On the world map, you can travel to various locations connected by dotted lines; these can include battlefields, towns and dungeons. More locations will be available the further you progress into the game.
At the beginning, only Alm or Celica’s party can be controlled on the map. Once Act 3 begins, both parties will be on the world map at the same time–and you can free alternate between them.
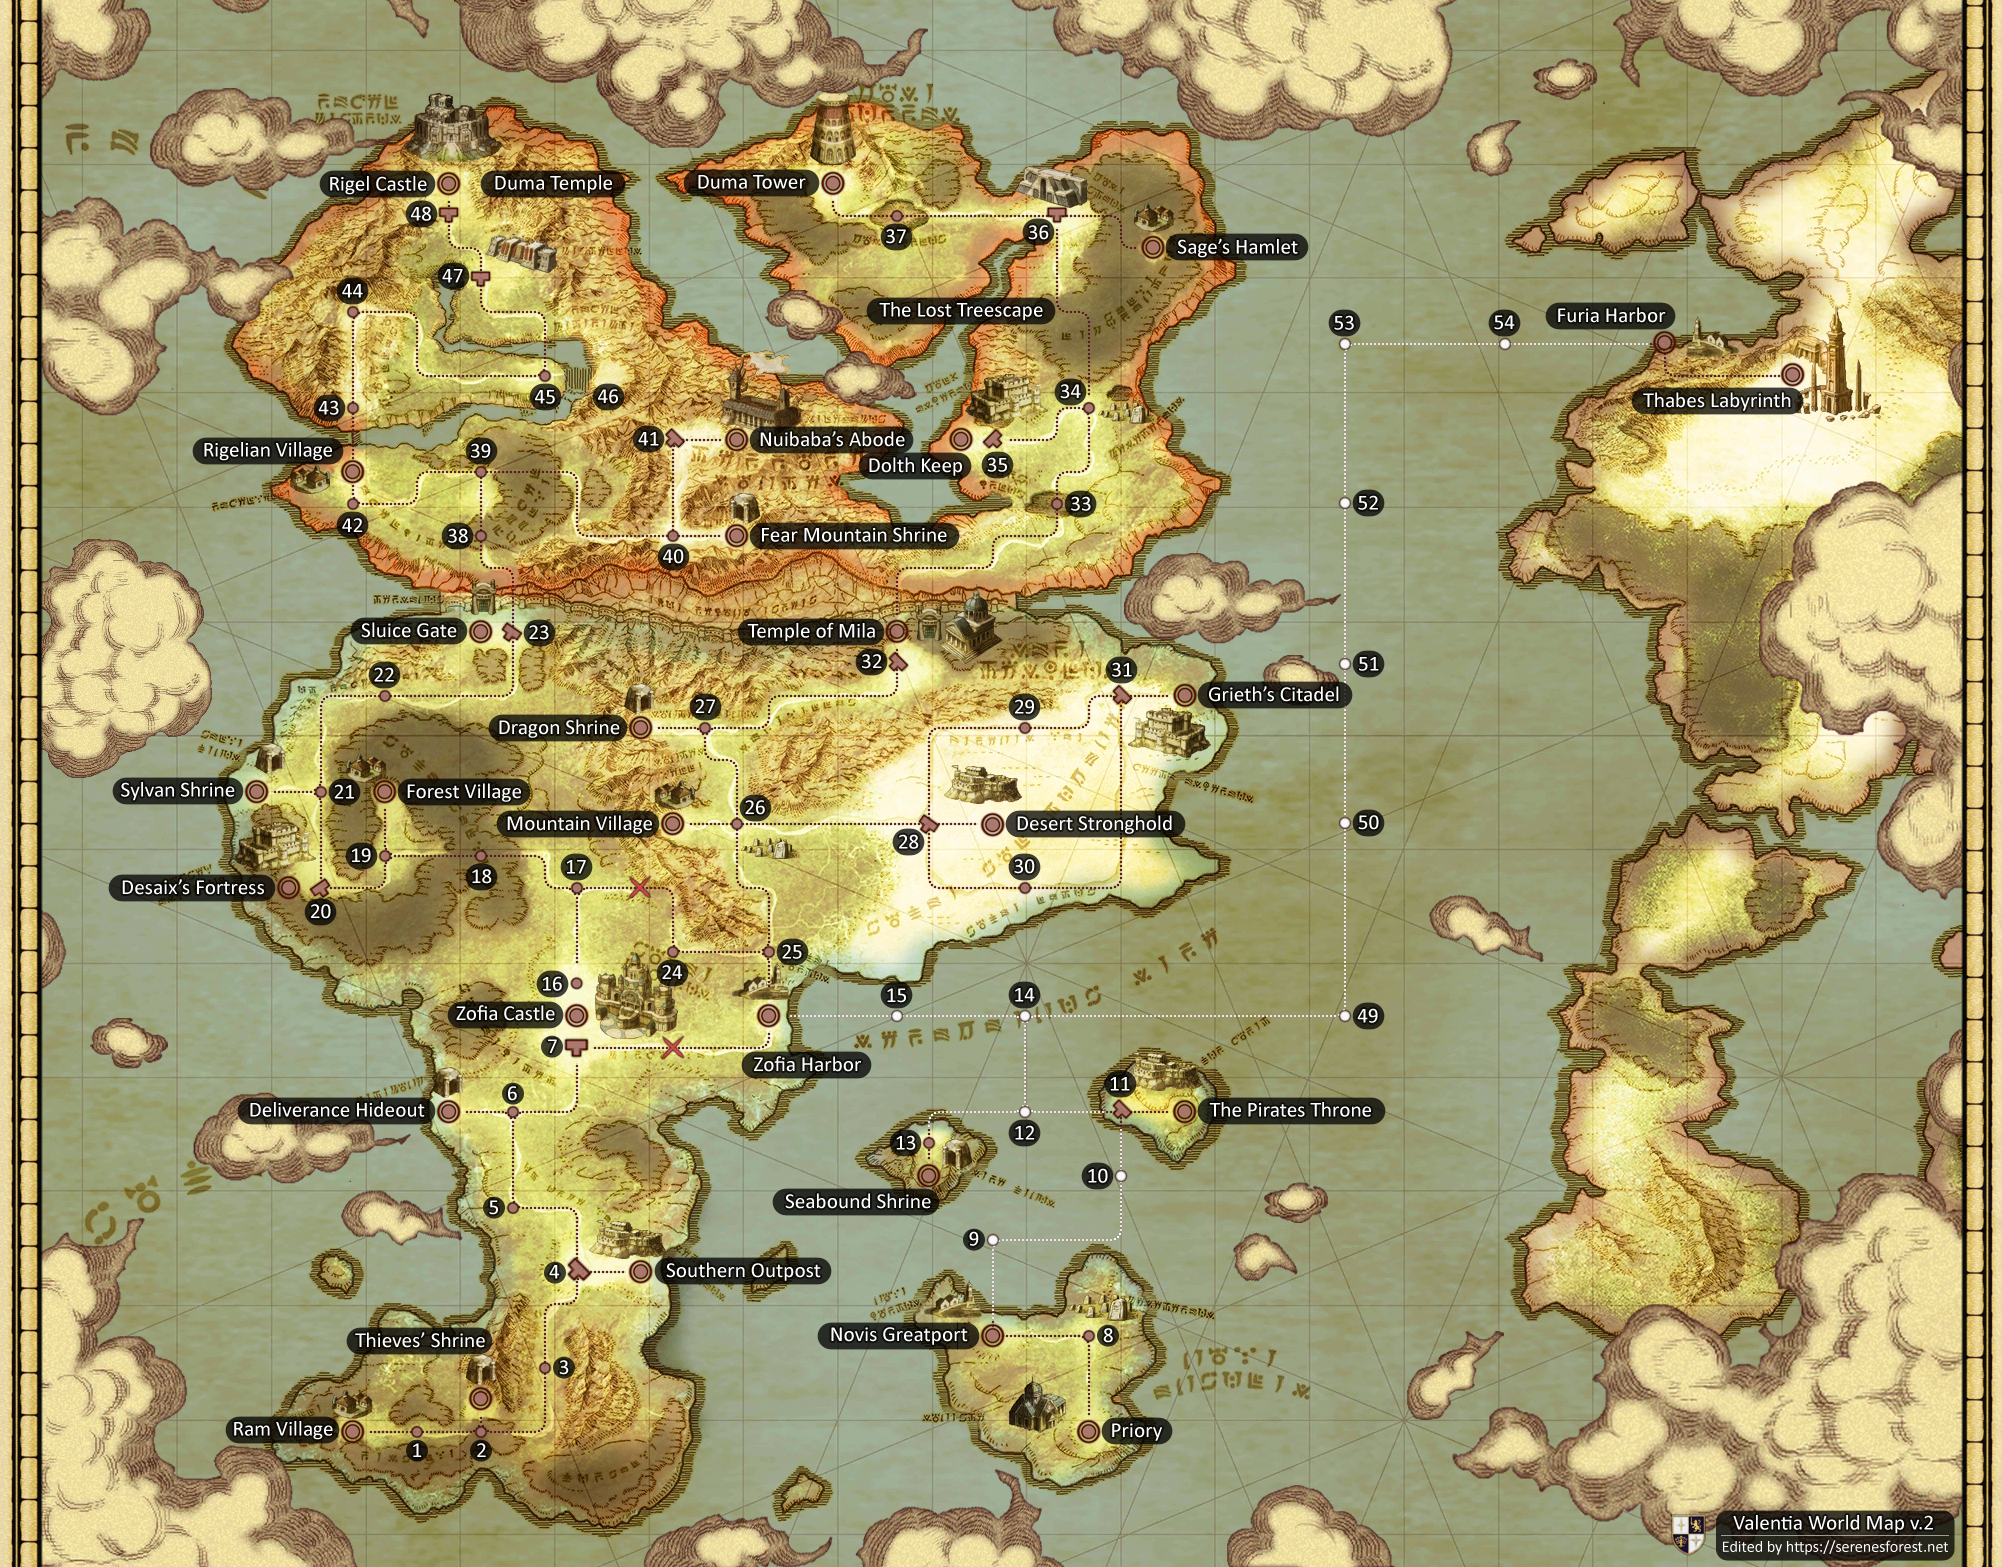
Click to enlarge!
| No. | Location | No. | Location |
|---|---|---|---|
| 1 | Ram Woods | 28 | Desert Stronghold |
| 2 | Fleecer’s Forest | 29 | Northern Desert |
| 3 | Ram Valley | 30 | Southern Desert |
| 4 | Southern Outpost | 31 | Grieth’s Citadel |
| 5 | Southern Zofia 1 | 32 | Temple of Mila |
| 6 | Southern Zofia 2 | 33 | Dead Man’s Mire |
| 7 | Zofia Gate | 34 | Mire Boneyard |
| 8 | Novis Cemetery | 35 | Dolth Keep |
| 9 | Zofia Seaway 1 | 36 | Duma Gate |
| 10 | Zofia Seaway 2 | 37 | The Swamps of Duma |
| 11 | The Pirate Throne | 38 | Border |
| 12 | Zofia Seaway 3 | 39 | Rigel Forest |
| 13 | Seabound Shrine | 40 | Fear Mountain |
| 14 | Zofia Seaway 4 | 41 | Nuibaba’s Abode |
| 15 | Zofia Seaway 5 | 42 | Rigel Plains |
| 16 | North Gate | 43 | Rigel Valley |
| 17 | Northern Zofia | 44 | The Dragon’s Maw |
| 18 | Zofia Forest 1 | 45 | Rigel Falls |
| 19 | Forest Crossroads | 46 | Secret Shrine |
| 20 | Desaix’s Fortress | 47 | The Last Bastion |
| 21 | Zofia Forest 2 | 48 | Rigel Castle |
| 22 | Forest Northside | 49 | Archanea Seaway 1 |
| 23 | Sluice Gate | 50 | Archanea Seaway 2 |
| 24 | Mountain Highway | 51 | Archanea Seaway 3 |
| 25 | Zofian Coast | 52 | Archanea Seaway 4 |
| 26 | Mountain Graveyard | 53 | Archanea Seaway 5 |
| 27 | Valley Approach | 54 | Archanea Seaway 6 |